Tag: #levelupgaming #gameplaytips #gamingskills

  • The Complete Elvenar Army Guide: Mastering Military Might and Combat Strategy

    The Complete Elvenar Army Guide: Mastering Military Might and Combat Strategy

    Introduction: Building Your Military Foundation

    In Elvenar, military strength is essential for world map expansion, tournament participation, and Spire of Eternity challenges. Whether you prefer peaceful negotiation or aggressive conquest, understanding your army’s capabilities, training systems, and tactical deployment is crucial for success. This comprehensive guide covers every aspect of Elvenar’s military system—from basic unit types to advanced tournament strategies—helping you build a formidable force capable of dominating any battlefield

    .


    Understanding Your Military Buildings

    The Barracks: Race-Specific Foundation

    Your Barracks is the cornerstone of military production, unlocked early in Chapter 1. This building trains five unique units for each race: Elves receive Sword Dancers, Archers, Sorceresses, Treants, and Golems; Humans train Axe Barbarians, Crossbowmen, Priests, Paladins, and Mortars

    . While both races have equal unit strength, their tactical styles differ—Human units typically hit harder but defend weaker, while Elven units are more balanced

    .

    Barracks Upgrades reduce training time and increase available slots. Every size increase adds another training slot, allowing parallel unit production. From Chapter XXI onward, Barracks also provide Prosperity, a special requirement for certain chapter buildings

    . Prioritize Barracks upgrades early; faster training means faster army replenishment and more battles per day.

    Training Grounds: Shared Elite Units

    Available from Chapter 2, the Training Grounds trains five shared units for both races: Cerberus, Dryad, Banshee, Orc Warrior, and Orc Strategist

    . These units fill tactical gaps not covered by race-specific troops. Cerberus excel at killing enemy Mages quickly; Banshees specialize as Heavy Range killers; Orc Warriors and Orc Strategists provide powerful mid-to-late game options

    .

    Upgrade your Training Grounds significantly—each upgrade dramatically increases training speed, making these elite units available faster for critical battles

    .

    Mercenary Camp: Specialized Reinforcements

    The Mercenary Camp (unlocked later) provides additional specialized units including Blossom Mages, Rangers, Drone Riders, and Vallorian Veterans. These units often have unique abilities that excel in specific situations, such as Rangers’ mage-killing capabilities or Drone Riders’ exceptional speed for reconnaissance

    .


    Unit Classes and the Combat Pentagon

    Elvenar features five unit classes arranged in a combat advantage system:

    Light Melee (LM)

    Fast, balanced frontline fighters with high initiative. Includes Sword Dancers (Elves), Axe Barbarians (Humans), Cerberus, and Drone Riders. Strong against Light Range, weak against Heavy Melee

    .

    Heavy Melee (HM)

    Slow, tanky units with massive health but limited movement. Includes Treants (Elves), Paladins (Humans), and Orc Warriors. Strong against Light Melee, weak against Light Range and Mages

    .

    Light Range (LR)

    High-damage, fragile shooters. Includes Archers (Elves), Crossbowmen (Humans), Rangers, and Dryads. Strong against Heavy Melee and Mages, weak against Light Melee and Heavy Range

    .

    Heavy Range (HR)

    Armored ranged units with special protections. Includes Golems (Elves), Mortars (Humans), Banshees, and Orc Strategists. Strong against Light Range, weak against Heavy Melee

    .

    Mages

    Support units with powerful special abilities. Includes Sorceresses (Elves), Priests (Humans), and Blossom Mages. Strong against Heavy Melee, weak against Light Melee

    .

    The Combat Pentagon: Light Melee → Light Range → Heavy Melee → Mages → Heavy Range → Light Melee (with variations). Understanding these relationships is fundamental to tactical deployment

    .


    Training and Army Management

    Training Size vs. Speed

    Two factors determine army production: Training Size (how many units per slot) and Training Speed (how fast slots complete). Training size increases with Armories, Shrines of Shrooms, and Dwarven Bulwarks—but larger stacks take longer to train. Training speed increases with building upgrades and wonders like Needles of the Tempest, Victory Springs, and Flying Academy

    .

    The Balance: If you check the game twice daily, aim for training queues lasting 12+ hours. If training completes in 2 hours but you sleep for 8, you lose 6 hours of potential production. Adjust your training size and speed so queues finish shortly after you typically log in

    .

    Armory Strategy

    Armories increase training queue size but consume significant population and space. For active players checking twice daily, 2 Armories suffice; for less frequent players, 4 Armories prevent queue overflow

    . Balance based on your schedule, not maximum theoretical capacity—excess armories waste resources better spent on production buildings.

    Troop Production Rotation

    Don’t train all unit types equally. Focus on your most-used troops based on current tournament types and world map enemies. For example, during Steel Tournaments, prioritize Archers and Rangers; during Marble Tournaments, emphasize Sorceresses and Blossom Mages

    . Mercenary Camp units often provide the best value for specific encounters.


    Tactical Deployment and Battle Strategies

    The Default Deployment Strategy

    When selecting troops, the order you place them matches the opposing lineup order

    . As a default strategy:

    • Place Archers/Rangers opposite Mages and Heavy Melee
    • Place Banshees opposite Heavy Range
    • Place Orc Strategists opposite Light Range
    • Place Golems opposite Light Melee

    This creates favorable matchups across the front line, but adapt based on battlefield terrain and enemy composition.

    Terrain and Positioning

    Before deploying, scout the battlefield with a single fast unit (like a Drone Rider or Cerberus) to view terrain obstacles

    . Retreat without penalty to adjust your strategy. Use obstacles to create bottlenecks, protecting fragile ranged units while melee forces engage. Position Heavy Melee to block enemy advancement while your ranged units deal damage from safety

    .

    Manual vs. Auto-Fighting

    Auto-fighting is convenient but often results in higher losses—AI doesn’t optimize positioning or target priority. Manual fighting allows strategic retreats, focus fire, and terrain exploitation. Even occasional manual fighting improves your understanding of unit behaviors, helping you select better troops for auto-fights

    .

    When to Manual Fight:

    • Difficult tournament provinces (4+ stars)
    • Spire of Eternity boss battles
    • Encounters where auto-fight consistently fails
    • When preserving specific troops matters

    The “Niche Unit” Strategy

    When standard lineups fail, deploy “ignored” units with highest stats: Drone Riders, Sinister Cerberus, Vallorian Veterans, and Gruff Orcs. These units excel in specific matchups where conventional strategies fail

    :

    • Drone Riders opposite Light Range (speed kills)
    • Vallorian Veterans opposite Heavy Range (tank and spank)
    • Gruff Orcs opposite Light Melee (overwhelming force)

    You’ll lose troops securing victory, but sometimes a win with losses beats consistent defeat.


    Tournament and Spire Strategies

    Tournament Preparation

    Before tournaments, craft every combat building available in the Magic Academy: Enlightened Light Range (ELR), Magnificent Mage Multiplier (MMM), and Unleashed Unit Upgrade (UUU). Even if not immediately used, stockpile these—there’s no storage limit, and they’re crucial for high-score attempts

    .

    Tournament-Specific Tactics

    Each tournament type features specific enemy compositions requiring tailored strategies

    :

    Marble Tournament: Dominated by Heavy Melee, Heavy Range, and Light Range. Key units: Sorceresses, Priests, Blossom Mages. Use Light Range support but protect them from Mist Walkers.

    Steel Tournament: Mage-heavy with Steinling and Thief support. Key units: Archers, Rangers. Use Light Melee to protect Archers from War Dogs. Prioritize killing enemy Mages early.

    Planks Tournament: Mixed Heavy Melee, Light Melee, and Light Range. Key units: Golems, Mortars, Orc Strategists. Focus on eliminating Ancient Orcs first.

    Crystal Tournament: Heavy Range, Light Melee, and Mage mix. Key units: Treants, Paladins, Orc Warriors. Eliminate Enchantresses and Hellhounds early.

    The Timewarp Advantage

    The Timewarp Ancient Wonder (or fed Polar Bear) reduces tournament cooldown between rounds. At maximum level, this allows completing 6 tournament rounds or even 2 full tournaments within 5-day booster durations, effectively doubling your score potential

    . This is arguably the most powerful military investment for serious tournament players.


    Ancient Wonders for Military Might

    Essential Combat Wonders

    1. Simia Sapiens: The best military wonder in the game—provides free troops and training bonuses
    2. Needles of the Tempest: Speeds Barracks training and boosts Light Range damage
    3. Flying Academy: Speeds Mercenary Camp training and boosts Heavy Range
    4. Victory Springs: Speeds Training Grounds training and boosts Light Melee
    5. Timewarp: Reduces tournament cooldowns—game-changing for active players

    Wonder Investment Strategy

    Focus on maximizing 1-2 wonders before adding new ones. Random low-level wonders provide minimal benefit; concentrated investment creates powerful assets. For pure fighters, prioritize Simia Sapiens and Timewarp. For balanced play, add Needles and Flying Academy

    .


    Advanced Combat Techniques

    Initiative and Turn Order

    Units act based on initiative (displayed in unit stats) and placement. Light units generally act before heavy units. Understanding turn order lets you plan kill sequences—eliminating enemies before they act saves your troops from return fire

    .

    Targeting Priority

    Target enemies based on who can strike you first, not just damage advantages. An enemy that moves before your key unit and can reach it should die first, even if another enemy has worse matchup against you .

    Retreat and Reroll

    Don’t hesitate to retreat from unwinnable battles. Troops return unharmed, allowing you to adjust strategy or wait for better conditions. Similarly, if world map enemies are unfavorable, scout different provinces rather than fighting disadvantageous matchups.

  • The Complete Elvenar Resources Guide: Mastering Economy and Production

    The Complete Elvenar Resources Guide: Mastering Economy and Production

    Introduction: The Foundation of Your Empire

    In Elvenar, resources are the lifeblood of your civilization. Every building constructed, every technology researched, and every army trained depends on your ability to generate and manage resources efficiently. Whether you’re a new player establishing your first settlement or a veteran optimizing a sprawling metropolis, understanding the intricacies of Elvenar’s economy is essential for success. This comprehensive guide explores every resource type, production strategy, and optimization technique to transform your city into an economic powerhouse

    .


    Core Resources: Coins and Supplies

    Coins: The Primary Currency

    Coins serve as Elvenar’s primary currency, generated primarily through Residences via taxation. These structures provide both housing for your population and steady Coin income. Strategic placement near Cultural Buildings boosts their productivity significantly, creating synergy between city aesthetics and economic output

    .

    Advanced Coin Generation Strategies:

    Beyond basic taxation, multiple avenues exist for Coin acquisition. Visiting other players’ cities and offering “neighborly help” generates bonus Coins without resource expenditure—simply click their buildings to motivate them

    . Completing encounter negotiations on the world map provides substantial Coin rewards, while storyline quests offer generous payouts that accelerate early-game progression

    .

    The Main Hall determines your maximum Coin storage capacity. Regular upgrades prevent hitting caps that halt production, ensuring continuous economic growth. Experienced players recommend maintaining Coin reserves above 50% capacity to handle sudden expenses like technology research or building upgrades

    .

    Supplies: The Production Engine

    Supplies represent your secondary critical resource, produced in Workshops and consumed for virtually every city action—building upgrades, troop training, and goods manufacturing. Unlike Coins, Supplies require active production management rather than passive generation

    .

    Production Cycle Optimization:

    Workshops offer multiple production cycles: 5 minutes, 15 minutes, 1 hour, 3 hours, 9 hours, and 1 day. Shorter cycles always yield better efficiency than longer ones; two 3-hour orders outproduce one 9-hour order in the same timeframe

    . Match your selection to your play schedule:

    • Active players: 5-15 minute cycles for maximum yield
    • Regular check-ins: 1-hour cycles balanced with life schedules
    • Overnight/extended absence: 9-hour or 1-day cycles

    For endgame efficiency, maintain minimum 8 Workshops set to 1-hour cycles. This configuration optimally completes recurring quests while maintaining steady Supply flow

    . With a maxed Prosperity Towers Ancient Wonder and Power of Provision spells, 2 Magical Workshops can replace 9 normal ones, saving enormous space while maintaining production

    .


    Manufactured Goods: Tiered Production System

    Tier 1: Basic Goods (Marble, Steel, Planks)

    Your economic foundation rests on three Standard Goods: Marble, Steel, and Planks. Check your Main Hall to identify your production-boosted good—one of these three receives significant bonuses from collected relics

    . This boost percentage, visible in your Main Hall, determines your specialization strategy.

    The Boosted Goods Strategy:

    Focus manufacturing exclusively on your boosted good and trade for others rather than building diverse factories. One boosted manufactory often outproduces three unboosted alternatives

    . This specialization creates massive efficiency advantages, particularly when supported by an active Fellowship for trading.

    Collect Relics by exploring provinces on the world map—each set of 6 matching relics increases your boost percentage for that good type

    . Prioritize provinces containing relics matching your boosted good to maximize production efficiency.

    Tier 2: Crafted Goods (Scrolls, Crystal, Silk)

    As you advance to Chapter 2, you unlock Crafted Goods: Scrolls, Crystal, and Silk. These require upgraded manufactories and increased population but provide essential resources for mid-game progression. The same boosted goods principle applies—identify your boosted Crafted Good and specialize accordingly

    .

    Tier 3: Magical Goods (Elixir, Magic Dust, Gems)

    Late-game chapters introduce Magical Goods: Elixir, Magic Dust, and Gems. These represent the pinnacle of manufacturing complexity, requiring significant space and population investment. Due to increasing production costs between tiers, building non-boosted Magical manufactories is far more inefficient than non-boosted Basic factories—making specialization absolutely critical

    .


    Knowledge Points: The Progression Currency

    Knowledge Points (KP) fuel your research through the technology tree, regenerating at one per hour (maximum 10 stored). Never let your KP bar fill completely—wasted regeneration stalls advancement

    .

    Instant KP Generation:

    The ultimate solution for rapid progression: scout nearby provinces and solve encounters. Each completed encounter awards 1 KP instantly plus valuable relics, bypassing the hourly limit entirely

    . This technique transforms the world map from passive scenery into an active KP farm. Scout continuously as long as you have sufficient Coins and Supplies, turning exploration into accelerated research.

    Balance your KP spending between short-term technologies (rapid chapter progression) and long-term Ancient Wonders (permanent city bonuses). Most successful players allocate daily KP between both priorities, adjusting based on current needs

    .


    Advanced Resources and Special Currencies

    Relics: The Multiplier Resource

    Relics enhance workshop efficiency significantly, providing production bonuses that accelerate your entire economy. Each set of 6 matching relics increases boost percentages for corresponding goods

    . Beyond production benefits, relics are required for certain constructions and Ancient Wonders, making province exploration doubly valuable.

    Ancient Wonder Knowledge Points

    Dedicated KP for Ancient Wonders comes from Runes—special items obtained through various activities. These function separately from technology research KP, allowing parallel progression. Prioritize wonders that match your playstyle: Golden Abyss and Mountain Halls for general efficiency, Timewarp for tournament-focused players

    .

    Event Currency and Special Resources

    Seasonal events introduce temporary currencies like Sky Essence or Stars used for event-specific progression and rewards. These resources expire when events conclude, so spend them completely before deadlines. Focus on acquiring daily reward buildings and evolving buildings that provide permanent benefits long after events end

    .


    Population and Culture: The Hidden Resources

    Population Management

    Population determines how many buildings you can construct and upgrade. Residences provide this critical resource, but efficient players maximize population density through upgrades rather than quantity. Upgraded residences house more citizens in the same footprint, freeing space for production buildings

    .

    Ancient Wonders like Golden Abyss and Mountain Halls provide massive population bonuses at high levels—combined they save over 700,000 population in late-game, equivalent to dozens of residence spaces

    .

    Culture Points

    Culture affects your city’s happiness and productivity. Unlike other resources, culture buildings don’t require road access, allowing flexible placement. Position them centrally to maximize road efficiency at your city’s perimeter

    . Maintain 140-170% happiness for optimal productivity—reaching 200% through neighborly help rather than excessive self-investment

    .


    Trading and Resource Acquisition

    The 3-Star Trading Advantage

    Make trades irresistible by offering 2 units less than the default amount. This creates a “3-star offer” appearing at the top of trade lists, accepted within minutes even in saturated markets

    . The rapid turnover means faster resource acquisition than full-price trades sitting for days.

    Since InnoGames changed cross-tier balance ratios from 1:4 to 1:1.5, cross-tier trading has become more viable

    . However, ensure your Fellowship maintains diverse boosted goods producers—if everyone trades down, nobody supplies lower tiers.

    The Wholesaler

    Use the Wholesaler to convert surplus Coins or Supplies into needed goods, preventing resource waste from hitting storage caps

    . While rates aren’t favorable for regular trading, this emergency option prevents production stoppages during critical moments.


    Resource Optimization Strategies

    Space Efficiency Mathematics

    Every grid square in Elvenar is precious. Calculate production per square when comparing buildings:

    • A 3×3 manufactory (9 squares) roughly equals two 2×2 manufactories (8 squares) in efficiency
    • Culture buildings providing both population and culture often outperform separate residences and culture buildings
    • Magical Workshops from the Spire of Eternity provide superior production per square than standard workshops

    The “Just-in-Time” Production

    Avoid overproduction that hits storage caps. Time your manufacturing to complete when you can immediately use resources for upgrades, research, or training. This “just-in-time” approach maximizes active production time and minimizes waste

    .

    Batch Production Efficiency

    Click the circle icon when selecting production to apply the same item to all identical buildings simultaneously

    . For Workshops, this works across all buildings. For Manufactories, batch identical types at the same upgrade level—upgrade in pairs for maximum efficiency.


    Long-Term Resource Planning

    Guest Race Preparation

    Guest Races (Dwarves, Fairies, Orcs, etc.) require dedicated settlement space and unique resources. Plan spare expansions for these settlements—they grow substantially and can overwhelm unprepared cities

    . Use Teleport Spells from the Spire to temporarily store buildings, freeing space for guest race structures.

    Endgame Resource Transition

    As you approach “endgame” (highest chapters), shift from rapid chapter progression to wonder maximization. Ancient Wonders provide permanent benefits that compound over time—investing heavily in Chapter 15+ yields greater long-term returns than rushing to Chapter 20 with minimal wonders

    .


    Common Resource Mistakes to Avoid

    1. Building non-boosted manufactories—always specialize in your boosted goods
    2. Letting KP cap at 10—scout provinces for instant generation instead
    3. Ignoring neighborly help—free Coins and culture bonuses from Fellowship interaction
    4. Overproducing supplies—they cap easily; spend before hitting limits
    5. Neglecting relic collection—boost percentages dramatically affect long-term production

  • Mastering Elvenar: Essential Strategy Tips for Building Your Fantasy Empire

    Mastering Elvenar: Essential Strategy Tips for Building Your Fantasy Empire

    Introduction: Laying the Foundation for Success

    Elvenar is a game of patience, strategic planning, and efficient resource management. Whether you’ve just begun your journey as an Elf or Human ruler, or you’re looking to optimize an established city, understanding core strategic principles will transform your gameplay experience. This comprehensive guide covers essential tips from early-game fundamentals to advanced optimization techniques, helping you build a thriving metropolis that stands the test of time

    .

    Early Game Strategy: Your First Steps

    Choose Your Race Wisely

    Your journey begins with a crucial decision: Elves or Humans. While both races share identical core mechanics ensuring balanced gameplay, their distinct aesthetics and unit compositions create different experiences. Elves embody magical sophistication with nature-connected architecture, while Humans represent industrial medieval determination with sturdy, practical designs

    . If you’re uncertain, consider creating accounts on different servers to experience both races—there’s no penalty for exploring both options

    .

    Follow the Storyline Quests

    New players often overlook the importance of storyline quests, but these serve as your tutorial and early-game accelerator. These guided missions introduce core mechanics gradually while providing valuable rewards including Coins, Supplies, and even premium Diamonds. Beyond resources, quests unlock new buildings, technologies, and game features that expand your capabilities. Never ignore these narrative-driven objectives—they’re designed to prevent overwhelming new players while ensuring steady progression

    .

    The Eight Residence Rule

    Establish your population foundation early by building at least eight residences. These structures provide both housing and Coin income through taxation. Position them strategically near cultural buildings to maximize productivity bonuses. Simultaneously, construct workshops to begin Supply production—essential for construction, upgrades, and military training

    . This dual-focus on population and production creates the economic engine that powers all future expansion.

    Resource Management Mastery

    The Knowledge Point Strategy

    Knowledge Points (KP) are your progression currency, regenerating at one per hour (maximum 10 stored). Never let your KP bar fill completely—wasted regeneration stalls your advancement. However, there’s a powerful trick: scout nearby provinces on the world map and solve encounters. Each completed encounter awards 1 KP instantly plus valuable relics, bypassing the hourly limit entirely when you’re eager to progress

    . This technique transforms the world map from passive scenery into an active KP farm.

    Production Optimization

    Workshops offer multiple production cycles—from 5 minutes to 1 day. Match your selection to your play schedule: 5-15 minute cycles for active play sessions, 1-hour cycles for regular check-ins, and 9-hour cycles for overnight

    . Shorter orders always yield better efficiency than longer ones; two 3-hour orders outproduce one 9-hour order in the same timeframe. For endgame efficiency, maintain minimum 8 workshops set to 1-hour cycles for quest completion

    .

    The Boosted Goods Focus

    Check your Main Hall to identify your production-boosted goods—these receive significant bonuses from collected relics. Focus your manufacturing on these boosted types and trade for others rather than building diverse factories. This specialization creates massive efficiency advantages, particularly as you advance to Crafted Goods (Scrolls, Crystal, Silk) and Magical Goods (Elixir, Magic Dust, Gems)

    . One boosted manufactory often outproduces three unboosted alternatives.

    City Layout and Space Optimization

    The Road Efficiency Principle

    Roads are necessary evils—they consume space while providing only culture bonuses. Minimize them ruthlessly by following golden rules: never place roads at city edges (they only serve one building), position narrow building edges toward roads (a 3×2 building should show its 2-square side to the road, saving 20+ road blocks), and ensure roads serve at least two buildings

    . The difference between efficient and inefficient road networks can free space for an entire additional building.

    The Corner Main Hall Strategy

    Place your Main Hall in a corner with no more than 2 roads leading from it. This bulky, awkwardly-sized structure dictates your entire layout if centered—corners minimize road waste and free prime space for productive buildings. Veteran players recommend the top corner, building streets downward and sideways. There will come a day when you desperately need to move it; establish this efficient foundation early when fewer buildings require relocation

    .

    Culture Building Placement

    Counter-intuitively, place culture buildings in the CENTER of your city, not the edges. This allows maximum-length straight roads at the perimeter where they’re most efficient. Since culture buildings don’t need road access, central placement optimizes space usage perfectly while freeing edge space for road-dependent structures

    . Group all culture buildings together in rows, with your Builder’s Hut alongside them—neither requires roads, so keep paths far away

    .

    The Double Spiral Design

    For maximum efficiency, implement advanced layout principles: zero crossroads (keep roads straight until hitting corners), place biggest buildings at road ends (only need 1 road square), group same-sized buildings together for easy reorganization, and expand in perfect squares (5×5, 6×6, 7×7) to maintain optimal ratios

    . When restructuring, use spare expansions as staging areas—move buildings to temporary spaces while reorganizing, then return them to optimized positions

    .

    Military and Combat Strategy

    Understanding Unit Classes

    Elvenar features five unit classes with distinct roles: Light Melee (balanced frontline), Heavy Melee (tank units), Light Ranged (high-damage shooters), Heavy Ranged (armored shooters), and Mages (support units)

    . Each race trains five unique units in their Barracks, plus ten shared units in the Training Grounds and Mercenary Camp. While stats are balanced between races, tactical styles differ—Human Light Melee hits harder but defends weaker, while Elven versions are more balanced

    .

    Combat Formation Tactics

    The order you place troops matches the opposing lineup order. Default strategy: place Archers/Rangers opposite Mages and Heavy Melee, Banshees opposite Heavy Ranged, Orc Strategists opposite Light Ranged, and Golems opposite Light Melee

    . However, adapt based on battlefield terrain—use obstacles to create bottlenecks protecting fragile ranged units while melee forces engage.

    For manual fighting, deploy fast Light Melee first to scout terrain, then position your army based on enemy formation. Retreat Light Ranged into back corners when facing Mages to avoid first-round shredding, bringing them out after melee troops have engaged

    . This “snatch victory from defeat” technique often turns losing auto-fights into wins through strategic positioning.

    The Niche Unit Advantage

    When standard lineups fail, deploy “ignored” units with highest stats: Drone Riders, Sinister Cerberus, Vallorian Veterans, and Gruff Orcs. Substitute Dogs opposite Mages, Drones opposite Light Ranged, Veterans opposite Heavy Ranged, and Gruff Orcs opposite Light Melee. You’ll lose troops but secure victory against seemingly impossible encounters

    . These units require manual control but excel in specific matchups where conventional strategies fail.

    Advanced Progression Strategies

    Ancient Wonder Prioritization

    Ancient Wonders provide powerful passive bonuses but require significant investment. Priority for new players: Golden Abyss (population boost) and Mountain Halls (population concentration). At maximum level, each provides 18% population discount—combined they save over 700,000 population in late-game, freeing massive space for other buildings

    . These general-use wonders benefit any playstyle, whether fighting or catering-focused.

    Timewarp becomes essential for active players, reducing tournament cooldowns from 16 hours to near-instant with high levels and fed Polar Bear—transforming tournament participation from spread-out obligation to single-session completion

    .

    The “Max Before Adding” Rule

    Focus on maximizing 1-2 Ancient Wonders before adding new ones. This creates hugely beneficial buildings with highly efficient benefits per square. Wonder costs increased significantly in recent updates, making concentrated investment more important than scattered low-level wonders

    . A level 30 wonder provides exponentially better returns than ten level 3 wonders occupying the same space.

    Short-Term vs. Long-Term Balance

    Decide your progression philosophy early. Short-term strategy prioritizes rapid technology advancement through the research tree—fast progress but minimal wonders until “end-game.” Long-term strategy invests heavily in wonders early, accepting slower chapter progression for powerful permanent benefits

    . Most successful players find balance: allocate daily KP between technologies and wonders, adjusting based on current needs. Approaching guest races or competitive tournaments may demand temporary focus shifts.

    Community and Trading Optimization

    The 3-Star Trading Trick

    Make trades irresistible by offering 2 units less than the default amount. This creates a “3-star offer” appearing at the top of other players’ trade lists, accepted within minutes even in saturated markets

    . The rapid turnover means faster resource acquisition than full-price trades sitting for days. Since InnoGames changed cross-tier balance ratios from 1:4 to 1:1.5, cross-tier trading stigma has reduced significantly

    .

    Fellowship Selection and Participation

    Join an active Fellowship early. These 25-player groups enable resource trading, mutual aid, and coordinated chat. Helping Fellowship members generates bonus rewards when they return the favor. Check city names when visiting—many players indicate preferences like “Culture please!” or specific building help requests

    . Motivate their strongest culture buildings for maximum mutual benefit.

    Quality of Life Enhancements

    Swipe-to-Collect Efficiency

    Click and hold on one ready building, then swipe across all other ready buildings to collect resources instantly. This cuts collection time by 90% compared to individual tapping

    . Combine with fully zoomed-out view to spot all harvestable buildings across your expanding kingdom.

    Batch Production Setup

    Click the circle icon when selecting production to apply the same item to all identical buildings simultaneously. For Workshops, this works across all buildings. For Manufactories, it batches identical types at the same upgrade level—upgrade in pairs for maximum efficiency

    .

    Keyboard Shortcuts

    When resetting production, press number keys 1-6 to select options quickly: 1=5min, 2=15min, 3=1hr, 4=3hr, 5=9hr, 6=1 day for Workshops; 1=3hr, 2=9hr, 3=1 day, 4=2 days for Manufactories . Use arrow keys to navigate the world map without mouse clicking.

    Conclusion: Patience and Persistence

    Elvenar rewards strategic thinking over rushed expansion. The most successful cities result from patient optimization—efficient road networks, focused production, balanced wonder investment, and active community participation. Whether you prefer peaceful trading or military conquest, these strategies provide the foundation for building not just a city, but a lasting legacy in the magical realm of Elvenar.

  • Magic Dust in Elvenar: The Complete Guide to Mastering Tier 3 Magical Goods

    Magic Dust in Elvenar: The Complete Guide to Mastering Tier 3 Magical Goods

    Introduction: The Sparkle of High-Tier Production

    In the intricate economic ecosystem of Elvenar, few resources carry the prestige and production challenges of Magic Dust. As a Tier 3 (T3) Magical Good, Magic Dust represents the pinnacle of standard resource production alongside Elixir and Gems . These magical goods are the most resource-intensive to manufacture, requiring substantial investments in population, culture, and coin/supply infrastructure. Yet for players blessed with Magic Dust as a boosted good, mastering its production unlocks tremendous trading power and accelerates progression through even the most demanding chapters.

    This comprehensive guide will walk you through everything you need to know about Magic Dust production: from determining if Magic Dust is your boosted good, to optimizing manufactory levels, managing production costs, understanding the Sentient Goods connection, and leveraging Magic Dust in the trading economy. Whether you are a new player deciphering the game’s resource systems or a veteran caterer looking to maximize efficiency, this guide will ensure your Magic Dust production truly sparkles.


    What Are Magic Dust in Elvenar?

    Magic Dust belongs to the Magical Goods category, which is the third tier of Standard Goods in Elvenar’s economic hierarchy. The three tiers are structured as follows:

    TierCategoryGoods
    Tier 1 (T1)Basic GoodsMarble, Steel, Planks
    Tier 2 (T2)Crafted GoodsCrystal, Scrolls, Silk
    Tier 3 (T3)Magical GoodsElixir, Magic Dust, Gems

    Magic Dust is unlocked through research in Chapter 3 of the Research Tree . Once the technology is researched, you can build the Magic Dust Manufactory, which requires a street connection to your Main Hall .

    Magic Dust is the most expensive of the Standard Goods to produce, requiring significant population and culture support. However, this high cost comes with a correspondingly high value in the trading system, making Magic Dust a powerful tool for acquiring the lower-tier goods you need.


    Boosted Goods: The Foundation of Efficient Production

    Understanding the Boost System

    Every player in Elvenar receives three boosted goods—one from each tier—randomly assigned based on your city’s location on the world map when your account is created . These boosted goods receive a production multiplier based on the number of relics you have collected for that specific good type.

    To determine whether Magic Dust is one of your boosted goods:

    1. Open your Main Hall
    2. Navigate to the Relics tab
    3. Look for the three goods displayed at the top—these are your boosted goods 

    If Magic Dust appears in this list, congratulations! You are “Magic Dust-boosted” and should prioritize Magic Dust manufactories as your primary Tier 3 production.

    The Importance of Focusing on Boosted Goods

    Concentrating production on your boosted goods is one of the most fundamental efficiency principles in Elvenar. As experienced players explain, “There is no wrong way to play Elvenar but you will save a lot of precious city space if you concentrate on boosted goods. In the beginning, this difference may be minimal but the longer you play and the higher you increase your % boost, the bigger the difference will get” .

    The relic boost system allows you to increase your boosted good production up to 700% , and this can be further enhanced by Ancient Wonders like the Mountain Halls . A player with a high relic count and appropriate Wonders can produce dramatically more Magic Dust from a single manufactory than an unboosted player could from multiple buildings.

    If Magic Dust Is Not Your Boosted Good

    If Magic Dust does not appear among your three boosted goods, the recommended strategy is straightforward: do not build Magic Dust manufactories at all. Instead, produce your boosted Tier 3 good (Elixir or Gems) and trade with neighbors or fellowship members for the Magic Dust you need .

    As one forum user succinctly advises: “Build more of your boosted and none of your non-boosted (only exception is level 1 buildings for use in events of course) and trade” . This approach saves valuable city space and resources while still giving you access to all goods through the Trader.


    Magic Dust Manufactory: Production Basics

    Building and Placement

    The Magic Dust Manufactory is a production building that, like all manufactories, must be connected to your Main Hall via streets. Its footprint and upgrade requirements change as you progress through chapters. For both Elves and Humans, the Magic Dust Manufactory starts at 4×3 and can expand to 5×4 at higher levels .

    Production Options

    Like all manufactories, the Magic Dust Manufactory offers multiple production durations:

    • 3-hour production: Best for active players who can collect frequently; offers the best goods-per-hour ratio
    • 9-hour production: Good for players who check in a few times daily
    • 1-day and 2-day productions: These remain available until your manufactory reaches level 24, at which point they are replaced by Sentient Goods production options 

    Production Costs

    Magic Dust production is notably expensive compared to lower tiers. For example, a level 8 Elixir manufactory producing 400 units in a 3-hour cycle requires significant supply and population support. When factoring in the supporting residences, workshops, and culture buildings needed, T3 production requires roughly half the space of T2 production but still represents a substantial investment .

    The exact costs for each manufactory level are displayed in the build menu. For Elven players, a level 1 Magic Dust Manufactory requires 4,800 coins and produces 56 units, while higher levels dramatically increase output at proportionally higher costs .

    Using Enchantments

    Magical Manufacturing spells can significantly boost your Magic Dust production. For maximum efficiency, cast the spell right before collecting a production run to make the most of its duration. This is particularly valuable when you need large quantities of Magic Dust for research or upgrades.


    The Relic Boost System for Magic Dust

    How Relics Increase Production

    Your Magic Dust production boost percentage is determined by the number of Magic Dust Relics you have collected. Relics are obtained by:

    • Completing encounters in Magic Dust provinces on the world map
    • Opening chests when giving neighborly help (random chance)
    • Participating in tournaments when Magic Dust is the featured good
    • Completing certain event quests

    Maximum Boost Potential

    The maximum relic boost for Standard Goods is 700% . Achieving this requires collecting a significant number of Magic Dust relics. The exact thresholds are displayed in your Main Hall’s Relics tab.

    Ancient Wonder Enhancements

    The Mountain Halls Ancient Wonder further increases your boosted goods production beyond the relic cap. For dedicated Magic Dust producers, this Wonder is an invaluable investment.


    Efficiency Considerations: Leveling Your Magic Dust Manufactory

    The Diminishing Returns Challenge

    One of the most counterintuitive findings in Elvenar is that higher-level manufactories are not always more space-efficient than multiple lower-level ones. Detailed spreadsheets analyzing manufactory efficiency across all chapters reveal that as you upgrade manufactories, the population and culture requirements increase faster than production output .

    This is because “as the manufactories are upgraded, they require more people to operate them but the amount of goods produced does not increase proportionally to the population required” . For example, with a Steel manufactory (the same principle applies to Magic Dust), a level 20 requires 2,160 people and makes 231 goods, meaning it takes 9.4 people to make 1 good, while a level 23 requires 4,252 people and makes 290 goods, meaning it takes 14.7 people to make 1 good .

    Therefore, from a pure space-efficiency perspective, having several moderately-leveled Magic Dust manufactories may actually produce more goods per total square (including support buildings) than a single maximally-upgraded manufactory.

    When to Upgrade

    The optimal upgrade strategy depends on your chapter and available space. General guidelines include:

    • Upgrade to the first available level in each new chapter to unlock new production options
    • Consider parking at certain levels where efficiency peaks before diminishing returns become severe
    • Use community spreadsheets to check efficiency ratios for your specific chapter

    Population and Culture Requirements

    Since you cannot build or upgrade a manufactory without population and culture, the space those take up must necessarily be factored into the production capabilities of the manufactory . This is why a lower-level manufactory with lower population demands can sometimes be more efficient overall than a higher-level one that requires significantly more support buildings.


    Magic Dust and Sentient Goods: The Advanced Connection

    Unlocking Sentient Production

    When you reach Chapter XII – The Elementals and upgrade your Magic Dust manufactory to level 24 or higher, you unlock the ability to produce Sentient Goods . At this point, the 1-day and 2-day production options on your Magic Dust manufactory are replaced with Sentient Goods options, while the 3-hour and 9-hour options for regular Magic Dust remain unchanged .

    Your Boosted Sentient Good

    The formula for determining your boosted Sentient Good follows a +1 cycling pattern from your Standard Goods boost. For Magic Dust, which is a Tier 3 good, your boosted Sentient Good is Alloy Shrooms .

    The full mapping for Magic Dust producers is:

    Your Boosted Standard GoodYour Boosted Sentient Good
    Magic DustAlloy Shrooms

    This mapping applies to both Elven and Human manufactories .

    Sentient Production Requirements

    Producing Sentient Goods (including Alloy Shrooms) requires :

    • Divine Seeds (introduced in Chapter XI – Halflings)
    • The corresponding Standard Good (Magic Dust, in this case)

    Later Chapters: Ascended Goods

    In Chapter XVIII – Team Spirit, manufactories at level 32 and higher unlock Ascended Goods production. For Magic Dust-boosted players, this progression continues with boosted Ascended Goods following a +2 mapping rather than +1.


    Trading Magic Dust: Maximizing Value

    The Trader and Cross-Tier Trading

    The Elvenar Trader uses value ratios for goods, but many players argue these ratios do not fully account for the higher production costs of Tier 3 goods. A detailed analysis concluded that “the game is set so that options and advantages are really limited” when it comes to cross-tier trading .

    Fellowship Trading Strategy

    The most effective approach to trading Magic Dust is to be part of an active, balanced fellowship. As one player notes: “I produce my boosts knowing my fellowship mates have my weakside and produce their boosts—then we all come out ahead” .

    If you are producing Magic Dust as your boosted good, you should:

    1. Produce only your boosted Magic Dust in quantity
    2. Trade down for the Tier 2 and Tier 1 goods you need
    3. Join an active fellowship where members understand the value of Magic Dust and will accept fair trades
    4. Use the Wholesaler as a last resort—it offers worse rates but provides guaranteed access to non-boosted goods

    The Blooming Trader’s Guild Option

    For players struggling to acquire non-boosted goods, the Blooming Trader’s Guild Ancient Wonder increases wholesaler returns, making it viable to make trades for non-boosted goods using coins, supplies, or boosted goods . This wonder also provides settlement bonus increases, making it excellent for future chapters as well.


    Alternative Sources of Magic Dust

    The Traveling Merchant

    The Traveling Merchant is a craftable building that can produce non-boosted goods more efficiently than building non-boosted manufactories. As one player explains, “It isn’t as efficient as event buildings, but if the event buildings you are getting no longer produce the goods you are looking for, then the Traveling Merchant can be a good option” .

    Do not confuse the Traveling Merchant with the Festival Merchant—they are both craftable but serve different purposes.

    Event Buildings

    Many event buildings produce Magic Dust or other Tier 3 goods. When evaluating these buildings, consider:

    • Production per square compared to your manufactories
    • Population and culture implications (many event buildings provide these rather than consuming them)
    • Upgrade requirements using Royal Restorations

    Common Mistakes to Avoid

    Building Non-Boosted Magic Dust Manufactories

    The most common and costly mistake is building Magic Dust manufactories when Magic Dust is not one of your three boosted goods. As one player noted, “You should notice that you will produce more for your boosted good than the other two… It is far efficient if you concentrate on producing only your boosted goods” .

    Over-Upgrading Without Checking Efficiency

    Blindly upgrading your Magic Dust manufactory to the maximum available level in each chapter can actually reduce your space efficiency. Always check the population and culture requirements against the production gains before upgrading.

    Ignoring the Relic Boost

    Failing to collect Magic Dust relics leaves significant production potential untapped. Prioritize clearing Magic Dust provinces on the world map and participating in tournaments when Magic Dust is featured.

    Neglecting Support Infrastructure

    Magic Dust production requires substantial coins, supplies, population, and culture. Ensure your Workshops, Residences, and Culture buildings are adequate to support your manufactories. A Magic Dust manufactory without sufficient support is like a car without fuel.


    Conclusion: Mastering Your Magic Dust Production

    Magic Dust production in Elvenar is a rewarding but demanding endeavor. Whether Magic Dust is your blessed boosted good or a resource you acquire through trade, understanding its production mechanics, cost structures, and efficiency considerations will make you a more effective city manager.

    If Magic Dust is your boosted good, embrace it. Build your manufactories, collect your relics, and leverage your efficient production to become a trading powerhouse in your fellowship. If Magic Dust is not your boosted good, respect its value but do not waste space producing it inefficiently—trade for it instead.

    The key principles to remember are simple: focus on your boosted goods, pay attention to efficiency at each chapter, use enchantments strategically, and never underestimate the importance of population and culture in your production calculations.

  • Ascended Goods in Elvenar: The Complete Guide to Chapter 18 and Beyond

    Ascended Goods in Elvenar: The Complete Guide to Chapter 18 and Beyond

    Introduction: The Next Tier of Resources

    In the ever-expanding world of Elvenar, resource management is the cornerstone of successful city-building. Just when you think you have mastered the basics of Standard Goods and adapted to the complexities of Sentient Goods, the game introduces yet another layer: Ascended Goods . Introduced with Chapter 18, “Team Spirit,” these resources represent the third major tier of manufactory-produced goods and open up entirely new gameplay mechanics . This comprehensive guide will explain everything you need to know about Ascended Goods, from unlocking them to mastering the unique trading system they bring with them.

    What Are Ascended Goods?

    Ascended Goods are a new category of resources that become available when you reach Chapter 18. Like Sentient Goods before them, Ascended Goods represent a higher tier of production that builds upon your existing manufactory infrastructure. However, they come with their own unique characteristics, requirements, and trading mechanics that set them apart from anything that came before .

    These goods are essential for progressing through Chapter 18 and remain relevant in subsequent chapters, including Chapters 19 and 20 . While you might question their purpose initially—as some players have discovered they are not strictly required for every technology in Chapter 18—they become increasingly important as you advance further .

    How to Unlock Ascended Goods

    Manufactory Level Requirement

    To begin producing Ascended Goods, you must upgrade your Basic Manufactories (Marble, Steel, or Planks) to at least level 32 . This significant investment ensures that only established cities with developed production infrastructure can access this new tier.

    Once your manufactories reach this threshold, two new production options become available: 3-hour and 9-hour productions specifically for Ascended Goods . Your existing production options for Standard and Sentient Goods remain unchanged, meaning your level 32+ manufactories can produce all three tiers of goods depending on your needs.

    Research Requirements

    Before you can do anything with Ascended Goods, you must research the appropriate technologies in Chapter 18’s Research Tree. The first Ascended Good you can research is the Basic Ascended Goods technology early in the chapter . Additionally, to trade Ascended Goods with other players, you must research the Superior Trader in Chapter 18 .

    Determining Your Boosted Ascended Good

    One of the most important concepts to understand is how your boosted Ascended Good is determined. The game uses a simple but crucial formula: Your boosted Ascended Good will be your current boosted Regular Good +2 .

    Here is how this works in practice:

    • If your boosted Basic Good is Marble, your boosted Ascended Good will be Scholarly Sprouts (which corresponds to Planks)
    • If your boosted Basic Good is Steel, your boosted Ascended Good will be Primordial Minerals (which corresponds to Marble)
    • If your boosted Basic Good is Planks, your boosted Ascended Good will be Ignited Ingots (which corresponds to Steel)

    This cycling system ensures that every player has a boosted Ascended Good that complements rather than duplicates their existing boosted goods. Just like with Standard Goods, your production boost for Ascended Goods depends on the number of relics you have stored for the respective good type .

    The Three Categories of Ascended Goods

    Following the pattern established by Standard and Sentient Goods, Ascended Goods are divided into three categories :

    • Basic Ascended Goods: The first tier, introduced in Chapter 18
    • Refined Ascended Goods: Become available in later chapters
    • Precious Ascended Goods: The highest tier, required for advanced progression

    Each category builds upon the previous one, creating a layered production chain that rewards strategic planning and efficient resource management.

    Production Requirements: Unurium and Standard Goods

    Producing Ascended Goods is not simply a matter of clicking a button. Each production requires two key inputs :

    1. Unurium: A resource introduced in Chapter 17 that continues to be essential. Unurium decays like Mana and Divine Seeds but has far fewer sources of production, making it a limiting factor 
    2. Corresponding Standard Goods: You need Standard Goods from the same manufactory to produce Ascended Goods

    This dual requirement means you cannot simply convert all your production to Ascended Goods. You must balance your Standard Goods production for other needs while allocating enough to fuel your Ascended Goods creation.

    The Merchant System: Trading Ascended Goods

    A New Way to Trade

    Ascended Goods cannot be traded through the standard Trader interface like other resources. Instead, they require a completely new mechanic: the Merchant . This system becomes available after you research the Superior Trader and upgrade your Trader to level 7 .

    How Merchants Work

    When you trade with a Merchant, you receive your requested goods immediately . This instant gratification comes with a catch: while the Merchant is traveling to fulfill your order, your goods are offered to other players through the regular trading system .

    Key features of the Merchant system include:

    • Fair offers only: Merchants will only accept balanced, two-star trades 
    • Fixed amounts: Each Merchant deal involves specific quantities based on your Main Hall level 
    • Limited slots: You can hire up to five Merchants simultaneously 
    • Temporary availability: Merchants are only available for a limited time once hired 

    Strategic Merchant Use

    Experienced players recommend always keeping your Merchants active. As one forum user noted, “Always be trading for goods. Anytime you’re in the game, check for offers and place some if a slot is available” . This constant trading helps maintain balanced stocks of all three Ascended Good types, which is essential because settlement productions frequently require different combinations.

    The cost to hire Merchants increases with each additional slot, requiring significant coins. Some players have reported needing to use Coin Rains and even bring residences out of storage to meet the coin demands .

    How Many Manufactories Do You Need?

    A common question among players entering Chapter 18 is how many manufactories to dedicate to Ascended Goods production. The answer depends on several factors.

    Some players successfully complete Chapter 18 with just one level 32+ manufactory producing their boosted Ascended Good . However, others argue that two manufactories provide a much better experience, allowing you to produce enough boosted goods to trade for the non-boosted varieties you need .

    The limiting factor is Unurium. With limited Unurium production capabilities, you may not be able to keep multiple manufactories running at full capacity. Players with access to Magical Manufacturing spells and Ancient Wonders that boost Unurium production have more flexibility .

    The Settlement Connection: Chapter 18’s Elemental Hubs

    Ascended Goods are not just another resource to stockpile—they are intimately connected to Chapter 18’s settlement mechanics. The Elemental Hubs, which are the core production buildings of this chapter, require Ascended Goods for their construction and operation .

    The settlement introduces four Element Hub variants (Earth, Wind, Fire, and Water), though experienced players have discovered that you can complete the chapter using only three of them (Earth, Wind, and Fire) . The Water Hub is only required for specific quests and can be built temporarily then teleported away .

    Within this system, you produce Elementals in the Hubs, combine them with volunteers (Humans, Elves, or Elvenar) to earn Medals, and use those Medals to qualify for Trials that reward Team Work badges—the key to unlocking technologies .

    Ascended Goods in Later Chapters

    While some players initially questioned whether Ascended Goods were truly necessary, they become increasingly important as you progress beyond Chapter 18 .

    • Chapter 18: Basic Ascended Goods are required to construct Hubs, upgrade the Gate of Dimensions, and produce Elements 
    • Chapter 19: Both Basic and Refined Ascended Goods are needed to construct Breeding Facilities, upgrade the Fortress of Revenge, and produce Black and White Magic and Matter 
    • Chapter 20: All three Ascended Good types (Basic, Refined, and Precious) are required 

    This progression confirms that investing in Ascended Goods production infrastructure is worthwhile for long-term players.

    Comparison with Sentient Goods

    Ascended Goods share many characteristics with Sentient Goods, but there are important differences. Like Sentient Goods, Ascended Goods are subject to decay—they transform back into lower-tier resources over time . However, the specific mechanics and the resources required for production differ.

    The most significant difference is the trading system. While Sentient Goods can be traded through the standard Trader interface, Ascended Goods require the Merchant system, which introduces new strategic considerations .

    Additionally, Sentient Goods require Divine Seeds for production, while Ascended Goods require Unurium . This shift reflects your city’s evolving resource priorities as you advance through the chapters.

    Strategic Tips for Ascended Goods Management

    Prepare Before Entering Chapter 18

    Before you reach Chapter 18, stockpile Unurium and ensure you have enough space for additional manufactories if needed. Level up your Main Hall to increase the quantity of goods you can trade through Merchants .

    Start with One Manufactory

    Begin Chapter 18 with a single level 32+ manufactory producing your boosted Ascended Good. Assess your Unurium income and production needs before committing to a second manufactory .

    Keep Merchants Active

    Always have your Merchant slots filled with active trades. The instant nature of Merchant trades means you never have to wait for someone to accept your offer—you get goods immediately, and other players can choose to help fulfill your order in the background .

    Maintain Balanced Stocks

    Use your Merchants to trade for non-boosted Ascended Goods regularly. Keeping roughly equal amounts of all three types ensures you can always accept whatever Merchant offers become available .

    Save Magical Manufacturing Spells

    If you have Magical Manufacturing spells stockpiled, Chapter 18 is an excellent time to use them. Boosting your Ascended Goods production can dramatically accelerate your progress through the chapter .

    Conclusion

    Ascended Goods represent the next evolution in Elvenar’s resource management systems. While they may seem complex at first, understanding their production requirements, boosted good determination, and unique Merchant trading system is essential for progressing through Chapter 18 and beyond.

    The key takeaways are simple: upgrade your manufactories to level 32, research the Superior Trader, keep your Merchants active, and maintain balanced stocks of all three Ascended Good types. With these strategies in place, you will be well-prepared to master the Team Spirit chapter and continue your city’s ascent through the ranks.

  • Neighborly Help in Elvenar: The Social Foundation of Success

    Neighborly Help in Elvenar: The Social Foundation of Success

    In the enchanting world of Elvenar, where magical kingdoms rise from pristine wilderness and industrial cities expand across fantastical landscapes, success depends not merely on individual skill but on the strength of community bonds. At the heart of this cooperative philosophy lies Neighborly Help—a sophisticated social mechanic that transforms isolated settlements into interconnected networks of mutual prosperity. This feature represents one of Elvenar’s most distinctive elements, distinguishing it from competitive strategy games and creating an ecosystem where collaboration yields greater rewards than solitary achievement

    .

    Understanding the Mechanics of Neighborly Help

    Neighborly Help operates through a deceptively simple interface that masks considerable strategic depth. When visiting another player’s city—whether they are World Map neighbors discovered through exploration or Fellowship members regardless of location—players encounter three distinct help options represented by a “shaking hands” icon at the bottom of the screen

    .

    The first and most universally available option involves clicking the Main Hall, which provides the visited player with free Coins upon their next login. This help option remains available unless the Main Hall is currently undergoing upgrade construction. The second option targets the Builder’s Hut, providing acceleration bonuses that reduce construction time for the owner’s next building project by 10%. The Builder’s Hut can accumulate up to five such boosts from different visitors, though the maximum number of stored boosts corresponds to the number of builders the player possesses—meaning early-game players with fewer builders have limited boost capacity

    .

    The third and most strategically significant option involves Culture Buildings. When a player clicks on an eligible culture building, that structure’s culture output doubles for eight hours. This temporary boost can be extended through specific Ancient Wonders, creating cascading benefits throughout the visited player’s entire economy. Only one neighbor can help each culture building at any given time, creating natural competition for the most valuable structures

    .

    The Culture Bonus: Economic Multiplier

    The true power of Neighborly Help reveals itself through the Culture Bonus system—arguably the most impactful economic mechanic in Elvenar. This system operates across five distinct levels, each providing substantial production increases for Coins and Supplies generated by Residential buildings and Workshops

    .

    The progression works as follows: Level 1 increases production from the base 100% to 125%, requiring available culture equal to 20% of (required culture + working population). Level 2 boosts production to 150%, requiring 40% available culture. Level 3 reaches 160% with 60% available culture—specifically designed to be achievable through Neighborly Help. Level 4 attains 170% production with 80% available culture, requiring consistent neighbor assistance to maintain without excessive space dedicated to culture buildings

    .

    These percentages represent multiplicative increases to base production. For example, a workshop producing 100 supplies at base level generates 170 supplies at Culture Bonus Level 4—a 70% increase that compounds across all production buildings simultaneously. Advanced players regularly achieve 300% or higher Culture Bonuses through strategic building placement, Ancient Wonder investments, and consistent Neighborly Help, with record achievements reaching 474% or beyond

    .

    The mathematical impact proves staggering. A player maintaining 300% Culture Bonus effectively triples their Coin and Supply production compared to someone operating at base level. Over months of gameplay, this differential translates into millions of additional resources, accelerated construction, faster research progression, and superior tournament performance. The Culture Bonus thus represents not merely a convenience but a fundamental determinant of competitive advancement

    .

    The Fellowship Advantage

    While World Map neighbors provide essential assistance, Fellowships (Elvenar’s guild system) elevate Neighborly Help to extraordinary levels of effectiveness. Fellowship members can exchange help regardless of geographic separation on the world map, effectively expanding a player’s “neighbor” pool from approximately 20 discovered neighbors to potentially 24 additional Fellowship members

    .

    This expansion proves particularly crucial because Neighborly Help generates Experience Points for Fellowship Progression—a system unlocking powerful Perks including Knowledge Point sharing, Tournament Archives, Spire Archives, and Advanced Help duration extensions. Each help exchange between Fellows yields 10 Experience Points, or 20 points when performed as a reciprocal “help-back” gesture. These points accumulate rapidly, enabling Fellowship-wide bonuses that accelerate Ancient Wonder development and improve competitive event performance

    .

    The Advanced Help Perk deserves special attention, as it extends the duration of received help, providing players more time to reciprocate assistance while collecting Coins and Supplies. At maximum level, this Perk transforms the economics of Neighborly Help, allowing less frequent visits while maintaining equivalent benefits—particularly valuable for players with limited daily playtime

    .

    Strategic Communication: City Naming Conventions

    Sophisticated players have developed city naming conventions to optimize Neighborly Help efficiency. These three-letter codes communicate preferred help priorities to visitors, ensuring assistance aligns with the city’s current needs

    .

    The most common convention uses C for Culture, B (or BH) for Builder’s Hut, and M (or MH) for Main Hall. The order indicates priority: “CBM” means Culture first, then Builder’s Hut, then Main Hall. “BCM” prioritizes Builder’s Hut assistance, while “MCB” emphasizes Coins through Main Hall clicks. These codes appear before or after the city name, enabling visitors to provide maximum value with minimal communication

    .

    This convention system demonstrates Elvenar’s mature social ecosystem, where players have independently developed protocols to overcome the game’s limited direct communication tools. It reflects a community that values mutual benefit and recognizes that optimized help benefits both giver and receiver—visitors receive Coins and Supplies for each help action performed, creating positive-sum interactions

    .

    Ancient Wonders and Help Optimization

    Advanced players leverage specific Ancient Wonders to maximize Neighborly Help effectiveness. Three structures form the core of help-optimized cities: the Lighthouse of Good Neighbourhood, Crystal Lighthouse, and Watchtower Ruins

    .

    The Lighthouse of Good Neighbourhood provides the Ensorcelled Endowment Bonus—additional production increases for culture buildings that have been both polished (helped) by neighbors and enchanted with Ensorcelled Endowment spells. This bonus applies to specialized buildings like Mana Sawmills and Orc Nests, which don’t benefit from standard Culture Bonuses. At high levels, this Wonder can provide 94% or greater production increases to enchanted, polished buildings

    .

    The Crystal Lighthouse extends the duration of Neighborly Help bonuses, reducing the frequency of visits required to maintain maximum Culture Bonus. The Watchtower Ruins increase the numerical value of Neighborly Help bonuses themselves. Together, these three Wonders create synergistic effects where properly maintained cities achieve extraordinary production levels with manageable maintenance requirements

    .

    The Economics of Visitation

    Neighborly Help creates a reciprocal economic ecosystem that rewards active participation. Each help action provides immediate benefits to the giver: Coins and Supplies that scale with the giver’s own production levels. This means advanced players receive substantially greater rewards from helping others than beginners, creating natural incentive for high-level players to maintain active help routines

    .

    The help-back system amplifies these benefits. When Player A helps Player B, and Player B subsequently helps Player A, both players receive standard rewards plus Fellowship Experience Point bonuses. This reciprocity transforms Neighborly Help from altruistic gesture into strategic optimization, where maintaining reciprocal relationships with active players yields superior returns than helping inactive neighbors who never return visits

    .

    Challenges and Community Solutions

    Despite its benefits, the Neighborly Help system faces challenges, particularly regarding inactive neighbors and “Gold Mines”—abandoned cities that occupy valuable neighbor slots without providing reciprocal assistance. Players report investing substantial resources (troops, scouting time, and effort) to discover neighbors, only to find their neighborhoods populated by inactive accounts or Gold Mines that generate no help benefits

    .

    The community has developed adaptive strategies: aggressive Fellowship recruitment to replace unreliable map neighbors, city naming conventions that attract active visitors, and regular pruning of inactive contacts. Some players maintain “Fellowships of one”—solo guilds that enable tournament and Spire participation without social obligations—though this approach sacrifices the substantial benefits of active Fellowship collaboration

    .

    Mobile and Desktop Implementation

    The Neighborly Help interface differs slightly between platforms. On desktop, players access help options through the bottom control bar, with visual indicators (bouncing hands icons) highlighting eligible buildings. Mobile implementations streamline this process, automatically identifying helpable structures when visiting cities

    .

    The mobile version presents all possible help recipients in a scrollable list, while desktop requires manual building selection. Both versions gray out unavailable options—either because help was recently provided (24-hour cooldown) or because no eligible structures exist. The “Done” button allows exit from cities where no help can be provided, preventing interface lockups when visiting inactive or poorly developed settlements

    .

    Conclusion: The Cooperative Advantage

    Neighborly Help embodies Elvenar’s core design philosophy: that strategic games need not be zero-sum competitions, that collaboration can coexist with individual achievement, and that community building represents a valid—and often superior—path to success. The mechanic transforms routine social interaction into substantial economic advantage, where daily visits generate compound returns through Culture Bonuses, Fellowship Perks, and reciprocal relationships.

    For new players, understanding Neighborly Help proves essential for efficient progression. For veterans, optimizing help networks—through Fellowship selection, Ancient Wonder investment, and active community participation—separates adequate performance from exceptional achievement. In a game where individual city-building provides the foundation, Neighborly Help supplies the framework upon which truly magnificent kingdoms are constructed .

  • Rock-Paper-Scissors Combat System in Elvenar: Mastering Tactical Warfare

    Rock-Paper-Scissors Combat System in Elvenar: Mastering Tactical Warfare

    Introduction to Elvenar’s Combat Mechanics

    Elvenar distinguishes itself in the city-building MMO genre through its sophisticated turn-based tactical combat system that employs a rock-paper-scissors mechanic to create deep strategic gameplay

    . Developed by InnoGames and launched in 2015, this browser-based fantasy strategy game gives players direct control over their military forces, requiring them to understand unit matchups, terrain advantages, and formation tactics to achieve victory on the battlefield

    . Unlike many similar games that rely on automated combat resolution, Elvenar demands active participation and tactical thinking, making military conquest one of the most engaging aspects of the experience.

    The combat system is built around a fundamental principle: no single unit type dominates all others. Instead, each unit possesses specific strengths and weaknesses that create a dynamic battlefield environment where army composition, positioning, and understanding of enemy capabilities determine success or failure

    . This design ensures that combat remains challenging and rewarding throughout the entire game progression, from early chapters where players command basic swordsmen and archers to late-game scenarios featuring mystical creatures and advanced military technologies.

    Understanding the rock-paper-scissors relationships between unit types is essential for any player seeking to expand their territory through conquest, participate effectively in tournaments, or complete event quests requiring military victories

    . This comprehensive guide explores the intricacies of Elvenar’s combat system, providing the knowledge necessary to build formidable armies and achieve consistent battlefield success.

    The Foundation of Rock-Paper-Scissors Combat

    Understanding Unit Categories

    Elvenar’s combat system organizes units into five primary categories, each with distinct roles, movement patterns, and strategic functions

    . These categories form the foundation of the rock-paper-scissors relationships that govern battlefield effectiveness.

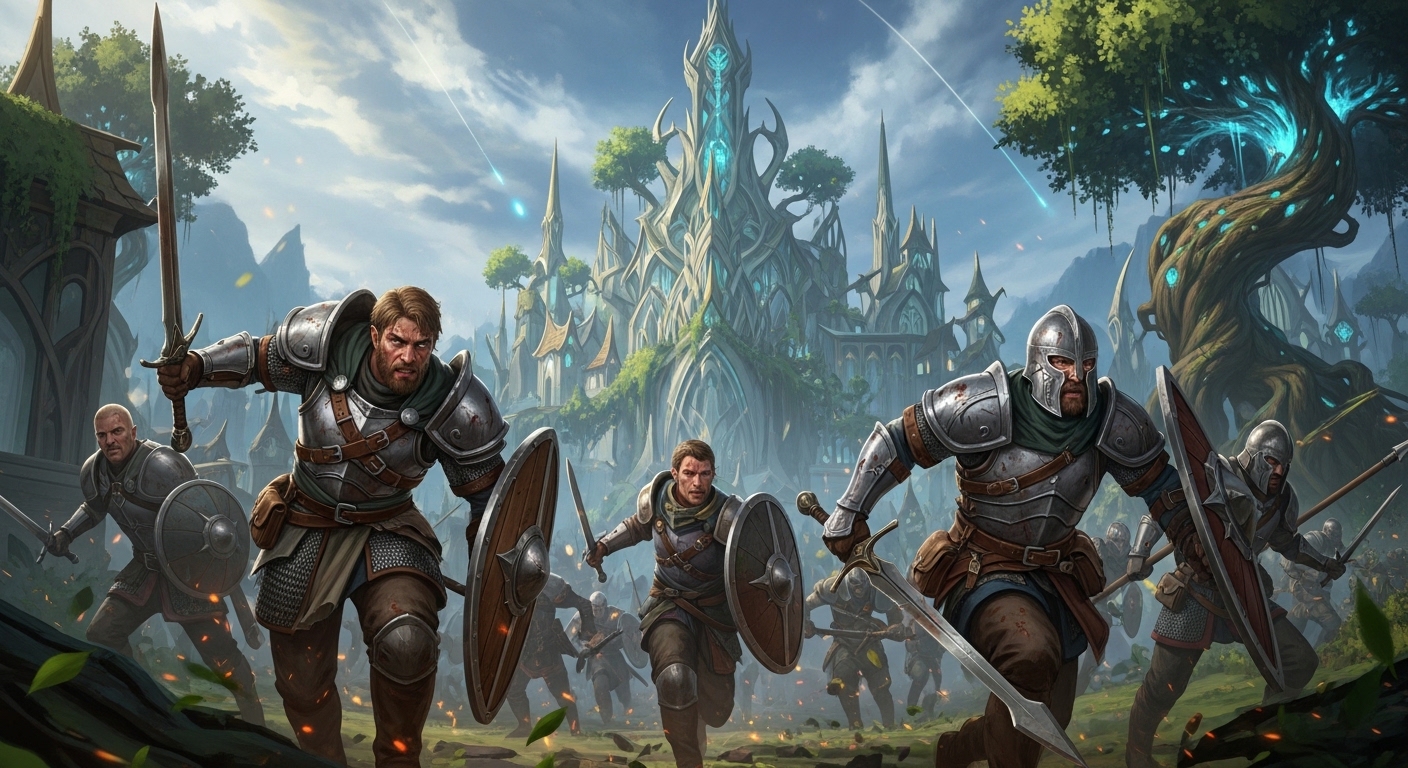
    Light Melee Units represent fast, agile fighters designed for rapid engagement and flanking maneuvers. These units typically feature high initiative, allowing them to act early in combat rounds, and possess strong offensive capabilities against specific target types. However, their lighter armor makes them vulnerable to concentrated attacks, particularly from ranged units that can strike before they close the distance

    .

    Heavy Melee Units serve as the armored backbone of any army, featuring substantial health pools and defensive statistics that allow them to absorb significant punishment. These units excel at holding positions and protecting more vulnerable allies, but their slower movement and lower initiative mean they often act later in combat rounds. Their strength against certain unit types makes them essential for specific tactical situations

    .

    Light Ranged Units provide mobile firepower capable of striking enemies from a distance. These units sacrifice durability for flexibility, often featuring abilities to move and attack in the same turn or to strike multiple targets. Their ranged capability allows them to eliminate threats before receiving retaliation, but their fragility requires careful positioning and protection

    .

    Heavy Ranged Units deliver devastating damage from afar at the cost of mobility and vulnerability. These artillery-style units can turn the tide of battle with concentrated fire but require substantial protection from melee forces. Their high damage output makes them priority targets for enemy forces, necessitating thoughtful army composition and tactical deployment

    .

    Mage Units (also referred to as Special units in some contexts) provide magical support capabilities that can buff allies, debuff enemies, or deliver magical damage that bypasses conventional armor. These units add complexity to the combat system and become increasingly important in advanced chapters where magical warfare dominates

    .

    The Core Rock-Paper-Scissors Relationships

    The essence of Elvenar’s combat balance lies in a sophisticated web of advantages and disadvantages between these unit categories. While the exact relationships evolve slightly as new units are introduced through chapter progression, the fundamental principles remain consistent

    .

    Light Melee typically excels against Heavy Ranged units, using their speed to close distance before artillery can devastate them, then exploiting the heavy ranged units’ poor close-combat capabilities. This relationship ensures that players cannot rely solely on heavy artillery for victory without appropriate escort protection.

    Heavy Melee generally dominates Light Melee encounters, as their superior armor and health allow them to withstand the lighter units’ attacks while delivering crushing retaliatory blows. This creates a natural counter to light melee rushes and establishes heavy melee as essential defensive components.

    Light Ranged units prove devastating against Heavy Melee forces, as they can pepper heavily armored units with projectiles from beyond retaliation range, gradually wearing down opponents who cannot effectively respond. This relationship prevents heavy melee from becoming invincible battlefield dominators.

    Heavy Ranged units often devastate Light Ranged counterparts, as their superior range and damage can eliminate fragile skirmishers before they can contribute meaningfully to the engagement. This creates tension between different ranged approaches and rewards combined-arms tactics.

    Mage units interact dynamically with all categories, often providing bonuses or penalties that shift these fundamental relationships. Their magical capabilities can enhance friendly unit effectiveness or diminish enemy capabilities, adding strategic depth to army composition decisions.

    These relationships create a combat ecosystem where no single unit type can achieve consistent victory. Success requires building balanced armies that can handle diverse threats or specialized forces designed for specific encounter types where enemy compositions are known in advance.

    Tactical Combat Implementation

    Turn-Based Battlefield Dynamics

    Elvenar’s combat unfolds on hexagonal battlefields where positioning, movement, and initiative order create complex tactical puzzles

    . Each battle begins with army deployment, where players arrange their units within designated starting zones. This initial placement significantly influences battle outcomes, as it determines which units can engage first, which can support allies effectively, and which are vulnerable to early enemy pressure.

    The turn-based system operates through initiative phases, where units act in sequence based on their speed statistics. High-initiative units like light melee and light ranged can strike before slower opponents, potentially eliminating threats before they can act or repositioning to advantageous locations

    . Understanding initiative order allows players to plan combination attacks where faster units soften enemies for slower heavy hitters to finish.

    Movement mechanics add spatial complexity to tactical decisions. Each unit possesses specific movement ranges and terrain handling capabilities. Some units move freely across open ground but struggle in forests or hills, while others ignore terrain penalties entirely

    . The battlefield itself features varied terrain types—open plains, defensive forests, elevated positions—that modify unit statistics and create natural chokepoints or defensive positions.

    Combat resolution involves attack rolls modified by unit statistics, terrain bonuses, and special abilities. When a unit attacks, it deals damage based on its offensive power against the target’s defensive statistics, with potential for critical hits or special effects based on unit abilities. Retaliation occurs when melee units are attacked, allowing defenders to strike back immediately, which creates important considerations about when and whom to attack

    .

    Army Composition Strategies

    Effective army composition in Elvenar requires balancing multiple factors: the rock-paper-scissors relationships against expected enemy forces, the initiative curve to ensure productive turn order, terrain considerations for the specific battlefield, and the trade-off between specialization and flexibility

    .

    Balanced Approach: Many players default to balanced armies containing representatives of multiple unit categories. A typical balanced force might include two heavy melee units to anchor the line, two light ranged units for flexible firepower, one heavy ranged unit for concentrated damage, and one light melee or mage unit for special capabilities. This composition handles diverse threats adequately without excelling against specific opponents.

    Specialized Forces: When scouting reveals enemy army compositions in advance, players can build specialized forces designed to exploit specific weaknesses. Against an enemy heavy on heavy melee, a light ranged-heavy army can achieve devastating results. Conversely, facing light ranged superiority might demand fast light melee to close distance quickly. Specialization increases effectiveness against known threats but risks vulnerability if enemy compositions differ from expectations.

    Initiative Stacking: Some strategies prioritize high-initiative units to ensure acting first in combat rounds. Early action allows eliminating enemy threats before they can fire, repositioning to control battlefield geometry, or applying debuffs that shape subsequent turns. However, initiative-focused armies may sacrifice raw power or durability, creating risks if early advantages cannot be converted into decisive victories.

    Turtle Defenses: Heavy melee and heavy ranged combinations can create formidable defensive positions that punish enemy aggression. These forces excel at protecting territory and winning wars of attrition but may struggle to seize initiative or respond to highly mobile opponents who refuse direct engagement.

    Advanced Combat Tactics

    Terrain Mastery

    The hexagonal battlefields of Elvenar feature diverse terrain types that significantly impact combat effectiveness

    . Mastering terrain usage separates competent commanders from tactical masters.

    Defensive Terrain: Forests, hills, and structures provide defensive bonuses that reduce incoming damage and sometimes grant retaliation advantages. Positioning vulnerable ranged units in defensive terrain while using heavy melee to block approaches can create nearly impenetrable positions. Understanding which terrain types benefit which units allows players to maximize their army’s effective durability.

    Chokepoint Control: Many battlefields feature natural chokepoints—narrow passages between obstacles that limit unit movement. Controlling these chokepoints with heavy melee while ranged units fire from safety behind creates devastating kill zones. Conversely, avoiding enemy chokepoint traps by seeking alternative routes or using light melee mobility to bypass blocked positions maintains offensive flexibility.

    Elevation Advantages: Elevated positions often provide range bonuses, damage increases, or improved visibility that enhances ranged unit effectiveness. Securing high ground for heavy ranged units while protecting these positions creates powerful artillery positions that dominate the battlefield.

    Open Field Maneuver: Open terrain favors mobility and allows light melee to leverage their speed for flanking maneuvers, encirclements, and rapid target elimination. In open fields, initiative and movement range become paramount, rewarding armies that can strike first and relocate before enemy retaliation.

    Initiative Manipulation

    Beyond raw statistics, players can manipulate initiative order through tactical decisions that create effective advantages even when unit statistics suggest disadvantage

    .

    Delaying Tactics: Some abilities or positioning choices can effectively delay enemy unit actions or accelerate friendly actions. Understanding how to sequence attacks to eliminate high-initiative enemies before they act, or how to protect friendly high-initiative units to ensure they survive to their turns, shapes combat outcomes significantly.

    Combined Arms Timing: Coordinating attacks between units of different initiative levels creates combination effects that exceed individual unit capabilities. A light ranged unit might soften an enemy for a heavy melee finisher, or heavy ranged bombardment might prepare targets for light melee cleanup. These combinations require understanding initiative sequences and planning multi-turn sequences.

    Retaliation Management: Since melee units retaliate when attacked, the order of attacks against enemy melee forces matters enormously. Using ranged attacks or magic to weaken enemies before committing melee attackers reduces retaliation damage. Conversely, forcing enemies to attack your heavy melee units triggers beneficial retaliations that damage enemies without costing your action economy.

    Enemy-Specific Adaptations

    As players progress through Elvenar’s chapters, they encounter increasingly diverse enemy unit types, including many that are not available to player armies

    . These enemy-exclusive units often possess unique abilities that require specific counter-strategies.

    Monster Types: Various provinces feature monstrous enemies with special capabilities—poison attacks, area damage, healing abilities, or immunity to certain damage types. Scouting reports and combat experience reveal these capabilities, allowing players to adapt their army compositions and tactics accordingly. Some monsters require concentrated fire to eliminate before they can use devastating abilities, while others demand spread formations to minimize area damage.

    Boss Encounters: Certain provinces feature powerful boss units with enhanced statistics and special abilities. These encounters often require specialized tactics—perhaps heavy ranged focus fire, light melee swarming to prevent ability activation, or specific magical counters that neutralize boss advantages.

    Adaptive Learning: Elvenar’s combat system rewards adaptive learning. Failed battles provide information about enemy capabilities and composition, allowing players to adjust their approaches for subsequent attempts. This iterative improvement process means that challenging encounters become manageable through experience and adaptation rather than raw statistical superiority.

    Military Infrastructure and Development

    Building a Combat-Capable City

    Effective combat in Elvenar requires substantial city infrastructure investment that must be balanced against economic and cultural development priorities

    .

    Barracks and Training: The Barracks serves as the foundation of military production, training core units for your army. Upgrading barracks unlocks advanced unit tiers with improved statistics and sometimes new abilities. The Needles of the Tempest Ancient Wonder accelerates barracks training, allowing faster army replacement and expansion

    .

    Mercenary Camps and Special Units: Beyond basic barracks units, Mercenary Camps provide access to specialized forces that complement standard armies. These units often fill gaps in the rock-paper-scissors relationships or provide unique capabilities unavailable through standard training. Investment in these facilities expands tactical options significantly.

    Squad Size Research: Military technology research increases squad size—the number of individual soldiers represented by each unit token on the battlefield. Larger squad sizes dramatically increase army effectiveness, making military research a priority for combat-focused players

    .

    Training Grounds and Doctrines: Advanced military buildings and research unlock doctrines or training enhancements that modify unit capabilities. These investments allow specialization in specific combat approaches—perhaps enhancing light melee speed for rapid assault strategies or improving heavy ranged damage for artillery dominance.

    Ancient Wonders and Military Enhancement

    Elvenar’s Ancient Wonders system includes several structures that significantly enhance military capabilities, representing long-term investments in combat effectiveness

    .

    Martial Monastery: This wonder increases unit health, making armies more durable and reducing losses in combat. For players who engage frequently in warfare, the Martial Monastery provides substantial value through reduced training requirements and improved battle outcomes.

    Needles of the Tempest: Beyond accelerating barracks training, this wonder can indirectly support combat by ensuring that army losses are replaced quickly, maintaining readiness for successive engagements.

    Crystal Lighthouse: While primarily an economic wonder, the Crystal Lighthouse’s trade benefits can support the goods production necessary for military infrastructure and negotiation alternatives to combat.

    Other Military Wonders: Various other wonders provide combat-related bonuses, from increasing specific unit type effectiveness to providing resources that fund military expansion. Wonder selection should align with overall combat strategy and playstyle preferences.

    Combat in Different Game Contexts

    Province Conquest Combat

    The primary context for Elvenar combat is province conquest on the world map

    . Each province contains multiple encounter points that can be resolved through combat, with enemy compositions varying by province type and location.

    Province combat difficulty scales with your squad size and the number of provinces previously conquered, ensuring that encounters remain challenging as you progress

    . This scaling means that early provinces feature small enemy forces with basic unit types, while distant provinces present substantial armies with diverse compositions and advanced units.

    Successful province conquest requires either consistent combat capability or the flexibility to switch between combat and negotiation based on encounter specifics

    . Players who invest heavily in military infrastructure often find province conquest faster and more resource-efficient than negotiation, while those with economic focuses might prefer diplomatic solutions for expensive encounters.

    Tournament Warfare

    Elvenar’s weekly tournament system provides competitive combat challenges that test military capabilities against progressively difficult opposition

    . Tournament provinces feature modified enemy compositions and enhanced rewards for successful completion.

    Tournament combat often requires multiple consecutive victories in similar encounter types, testing army sustainability and player tactical consistency. The scaling difficulty based on total conquered provinces means that tournament participation strategies must consider long-term expansion patterns

    .

    Successful tournament performance yields Knowledge Points, relics, and special resources that accelerate overall progression, making tournament combat capability highly valuable. Players often maintain specific army compositions optimized for tournament encounter types and adjust their weekly participation based on their current military readiness.

    Event and Quest Combat

    Special events and daily quests frequently introduce combat requirements with unique constraints—specific unit type mandates, victory condition modifications, or enhanced enemy capabilities

    . These encounters reward flexible army composition and tactical adaptation.

    Event combat sometimes features special battlefield conditions or enemy types not found in standard province encounters, requiring players to develop new tactics or leverage underutilized unit types. Success in these encounters often provides event currencies or exclusive rewards that justify the tactical investment.

    Common Combat Mistakes and Optimization

    Army Composition Errors

    Novice commanders frequently make army composition mistakes that undermine their combat effectiveness

    .

    Over-Specialization: Building armies entirely of a single unit type creates vulnerability to enemies who counter that type effectively. Even when facing known enemy compositions, maintaining some diversity provides insurance against unexpected threats or battlefield developments.

    Ignoring Initiative Balance: Armies composed entirely of slow, heavy units often find themselves taking significant damage before they can respond, while all-light armies may lack the durability to survive concentrated enemy fire. Balancing initiative curves ensures productive participation throughout combat rounds.

    Neglecting Terrain Considerations: Building armies without considering typical battlefield terrain for target provinces wastes potential advantages. Light melee-heavy armies struggle in dense terrain that limits mobility, while ranged-heavy forces face difficulties in open terrain where enemy light melee can close quickly.

    Tactical Execution Failures

    Beyond composition, tactical execution errors frequently cost battles that should be winnable

    .

    Poor Initial Deployment: Starting positions significantly influence battle outcomes. Deploying ranged units where enemy light melee can reach them immediately, or isolating heavy melee where they cannot protect vulnerable allies, creates disadvantages that skillful play cannot overcome.

    Target Priority Errors: Attacking the wrong enemies—perhaps focusing on heavily armored units while ignoring dangerous ranged threats, or wasting attacks on nearly-defeated enemies instead of fresh threats—squanders action economy and invites defeat.

    Retaliation Disregard: Attacking enemy melee units without considering retaliation damage gradually depletes your forces unnecessarily. Managing retaliation through attack sequencing, ranged prioritization, or accepting retaliation only when the trade favors you preserves army strength.

    Strategic Military Development Mistakes

    Long-term military development errors can handicap combat capability throughout a player’s Elvenar career

    .

    Under-Investing in Squad Size: Squad size research provides multiplicative benefits to all combat activities. Delaying this research in favor of economic or cultural development creates persistent combat disadvantages that compound over time.

    Wonder Selection Without Combat Consideration: Choosing Ancient Wonders without considering their combat implications—or ignoring military wonders entirely—represents missed opportunities for enhancement. Even economically-focused players benefit from occasional combat capability for tournaments and essential conquests.

    Failure to Adapt to Chapter Advancement: As players advance through chapters, new unit types and enemy capabilities emerge. Continuing to use outdated tactics and compositions without incorporating new options creates growing inefficiency.

    Conclusion

    Elvenar’s rock-paper-scissors combat system represents a triumph of game design, creating deep tactical gameplay that remains engaging across hundreds of hours of play

    . The interplay between unit types, terrain considerations, initiative management, and army composition generates endless strategic possibilities while maintaining accessibility for new players through intuitive relationships.

    Mastering this combat system requires understanding the fundamental rock-paper-scissors dynamics that govern unit effectiveness, developing tactical sophistication in battlefield positioning and timing, building city infrastructure that supports military capability, and adapting to the diverse challenges presented by different encounter types and enemy compositions

    . The investment in combat mastery pays dividends across all aspects of Elvenar gameplay, from efficient province conquest and tournament success to event completion and fellowship contributions.

  • Mastering the Rock-Paper-Scissors Combat System in Elvenar: The Pentagon of War

    Mastering the Rock-Paper-Scissors Combat System in Elvenar: The Pentagon of War

    At the heart of Elvenar’s strategic depth lies a deceptively simple yet profoundly complex combat mechanic: the rock-paper-scissors-pentagon system. This five-way counter relationship forms the foundation of every battle decision, from province conquest to tournament dominance and Spire ascension. Understanding this system transforms combat from a frustrating exercise in attrition into a calculated art of tactical superiority

    .

    The Combat Pentagon: Five Classes, Ten Relationships

    Unlike traditional rock-paper-scissors with three elements, Elvenar employs five distinct unit classes arranged in a pentagonal relationship. Each class maintains specific advantages against two opposing types while suffering vulnerabilities to the remaining two. This creates a sophisticated web of ten bilateral relationships that skilled commanders must navigate

    .

    The five classes are:

    Light Melee (Sword Dancers, Axe Barbarians, Cerberus, Drone Riders) — Fast, aggressive units that close distance quickly to eliminate ranged threats. They excel at reaching enemy backlines before taking damage but remain vulnerable to direct confrontation

    .

    Light Ranged (Archers, Crossbowmen, Rangers, Dryads) — Versatile damage dealers who dominate from a distance. They provide consistent damage output and typically act earlier in initiative order than heavy units

    .

    Heavy Melee (Treants, Paladins, Orc Warriors, Vallorian Veterans) — Durable frontline fighters with high health pools and defensive bonuses. They absorb punishment while crushing lighter opponents but suffer from limited mobility

    .

    Heavy Ranged (Golems, Mortars, Orc Strategists, Primrose) — Devastating artillery that delivers massive damage from safe distances. They decimate formations but require protection and careful positioning

    .

    Mage (Sorceresses, Priests, Blossom Mages, Banshees) — Support casters with magical abilities, special powers, and unique buffs/debuffs that can fundamentally alter combat outcomes

    .

    Understanding the Counter Flow

    The pentagon operates through specific directional relationships. Following the community’s standard visualization: Light Melee counters Light Ranged and Heavy Ranged; Light Ranged counters Heavy Melee and Mage; Heavy Melee counters Light Melee and Heavy Ranged; Heavy Ranged counters Light Melee and Light Ranged; Mage counters Heavy Melee and Heavy Ranged

    .

    This means each unit type faces a predictable threat environment. Light Melee units entering battle know they’ll dominate ranged opponents but must fear Heavy Melee blockers and Mage spells. Conversely, Mages understand they can devastate heavy units while remaining vulnerable to swift Light Melee charges and precise Light Ranged attacks.

    The system’s elegance emerges from its asymmetrical risk-reward structure. Counters don’t guarantee victory—they provide statistical advantages that skilled players amplify through positioning, timing, and support unit coordination. A countered unit can still prevail with superior numbers, terrain advantage, or initiative manipulation

    .

    Initiative: The Hidden Sixth Variable

    While the pentagon governs damage relationships, initiative determines action order—often the decisive factor in combat outcomes. Light units generally possess superior initiative, allowing them to strike before heavier opponents. This creates dynamic where Light Ranged units can eliminate threats before retaliation, while Light Melee can close distance before enemies fire

    .

    The initiative system interacts complexly with the pentagon. A Light Ranged unit countering Heavy Melee benefits doubly: statistical advantage plus first-strike capability. Conversely, Heavy Melee units countering Light Melee must survive initial contact to leverage their defensive bonuses, creating tense tactical dilemmas

    .

    Understanding initiative allows advanced techniques like kiting—attacking and then moving out of retaliation range—or alpha strikes where high-initiative units eliminate threats before they act. These mechanics reward manual combat control over automated fighting, as AI systems rarely optimize initiative advantages

    .

    The “Combat Triangle” Critique: When Theory Meets Practice

    Veteran players have identified significant discrepancies between theoretical pentagon balance and actual battlefield effectiveness. Community analysis suggests the combat triangle (and by extension, the pentagon) contains fundamental imbalances that sophisticated strategies must address

    .

    Ranged dominance represents the primary critique. Light Ranged and Heavy Ranged units benefit from “first strike” and often “first two strikes” capabilities due to initiative and range advantages. When enhanced by combat boosters, Ancient Wonders, and special buildings, ranged units frequently outperform their melee counterparts regardless of theoretical counter relationships

    .

    This creates scenarios where “neutral” ranged units outperform “optimal” melee counters. A player might achieve better results using all Archers against a mixed force rather than deploying theoretically optimal Heavy Melee against Light Melee opponents, particularly with terrain advantages that prevent enemy contact

    .

    Special abilities further complicate the pentagon. Blossom Mages possess “Blossom Winds” which destroys 30% of enemy defense—effectively removing 48% of a Thief’s defensive capabilities despite Thieves’ theoretical 60% defense bonus against Mages. Such abilities can override raw counter relationships, making unit selection more nuanced than the pentagon suggests

    .

    Province-Specific Pentagon Applications

    Different world map provinces feature distinct enemy compositions requiring tailored pentagon strategies:

    Marble Provinces (Heavy Melee, Heavy Ranged, Light Ranged): Early strategies emphasize Light Ranged dominance despite vulnerability to Cannoneers, using superior range to eliminate threats before contact. Mid-game strategies shift toward Mage supremacy with Light Ranged support

    .

    Steel Provinces (Heavy Melee, Light Melee, Mage): Light Ranged units dominate due to bonuses against Heavy Melee and Mage opponents. However, Thief units require immediate priority elimination due to devastating attack bonuses despite lacking defenses

    .

    Planks Provinces (Heavy Melee, Light Melee, Light Ranged): Heavy Ranged becomes essential, though requiring protection from Ancient Orcs and Bandits. Success balances Heavy Ranged damage with sufficient support to handle mixed forces

    .

    Crystal Provinces (Heavy Ranged, Light Melee, Mage): Heavy Melee shines with defensive bonuses against Hellhounds while crushing Light Melee. The challenge involves protecting slow units from Enchantress attacks while closing distance

    .

    Scroll Provinces (Light Ranged, Heavy Ranged, Mage): Light Melee becomes surprisingly effective, particularly Cerberus against Abbots. However, Orc Deserters pose significant threats to Light Melee formations, requiring careful target prioritization

    .

    Advanced Pentagon Violations

    Elite players frequently violate the pentagon when circumstances favor alternative approaches. These violations aren’t ignorant mistakes but calculated risks based on superior understanding

    :

    Range Over Counters: When terrain allows, ranged units can eliminate threats before theoretical counters make contact. An all-Archer force against mixed enemies may suffer zero losses while a “correct” mixed force takes damage during enemy approach

    .

    Boosted Neutrals: Combat boosters (Fire Phoenix, Magnificent Mage Multiplier, Enlightened Light Range) and Ancient Wonders (Needles of the Tempest, Temple of Toads, Dragon Abbey) can make neutral ranged units superior to theoretical counters. A 150-250% attack-boosted Mage unit can annihilate even heavily defended “counter” opponents

    .

    Special Ability Exploitation: Units with defense reduction, area damage, or status effects often outperform their pentagon position. Blossom Mages’ defense destruction, Orc Strategists’ specialization against Light Ranged, and various unit-specific powers create exceptions to standard rules

    .

    Building Your Pentagon Strategy

    Effective pentagon mastery requires several foundational practices:

    Scout First: Deploy a single fast unit (typically Light Melee) to reveal enemy composition and terrain before committing your full force. This allows informed counter-selection rather than blind guessing

    .

    Identify Key and Counter Units: For each encounter, determine your “key unit” (optimal against most enemies) and “counter unit” (what the enemy will use against your key unit). Build your formation around protecting the key unit while neutralizing the counter

    .

    Manage Initiative Windows: Understand which of your units act before which enemy units. Use these windows to eliminate threats before retaliation or position defensively to absorb initial strikes.

    Adapt to Waves: Multi-wave battles require conserving resources across encounters. Sometimes accepting suboptimal round-one efficiency preserves strength for decisive later rounds.

    Balance Your Barracks: Maintain production capacity across all five classes. The pentagon only works if you possess appropriate counters when needed. Over-specialization in “strong” units leaves you vulnerable to specific enemy compositions

    .

    The Evolution of Pentagon Understanding

    Community understanding of Elvenar’s combat system has evolved significantly. Early guides emphasized strict pentagon adherence—”bring counters, win battles.” Contemporary analysis recognizes greater nuance, acknowledging that range, initiative, special abilities, and boosters frequently override raw counter relationships

    .

    This evolution reflects game changes over time: improved AI, mixed-type encounters, multi-wave battles, and full three-star unit promotions have all complicated simple pentagon strategies. Modern combat requires integrating pentagon knowledge with terrain mastery, initiative optimization, and economic sustainability

    .

    Conclusion

    Elvenar’s rock-paper-scissors-pentagon system provides an accessible entry point for new commanders while offering sufficient depth for lifelong mastery. The five-way counter relationship creates immediate tactical clarity—Light Melee beats ranged, Heavy Melee beats light, and so forth—while initiative, terrain, special abilities, and boosters generate infinite strategic variation.

    The most successful players treat the pentagon as foundational grammar rather than rigid law. They understand that Heavy Melee theoretically counters Light Melee, but also recognize when boosted Light Ranged will achieve better results with fewer losses. They respect counter relationships while remaining flexible enough to violate them when circumstances demand.

    Whether you’re conquering your first Marble province or pushing for top tournament rankings, the pentagon remains your essential combat vocabulary. Master its language, understand its exceptions, and deploy its principles with tactical creativity—this is the path from novice to legendary commander in the magical world of Elvenar.

  • The Negotiation System in Elvenar: Mastering Diplomatic Conquest

    Introduction to Negotiation in Elvenar

    The negotiation system in Elvenar represents one of the most sophisticated and strategically significant mechanics in this fantasy city-building MMO, offering players a peaceful alternative to military conquest while introducing complex resource management challenges that can make or break a civilization’s expansion efforts

    . Developed by InnoGames and released in 2015, Elvenar distinguishes itself from other strategy games through this unique diplomatic approach to province acquisition, allowing players to resolve encounters through trade and persuasion rather than bloodshed

    .

    At its core, negotiation provides a method for players to conquer provinces and advance through the game without engaging in combat. This system is particularly valuable for players who prefer economic development over military strategy, those who have not invested heavily in army infrastructure, or situations where military victory would be too costly in terms of troop losses

    . However, negotiation is far from a simple “easy button”—it requires substantial preparation, resource accumulation, and strategic thinking to execute effectively.

    The negotiation mechanic becomes available once you have scouted a province on the world map. Each province contains multiple encounter points that can be resolved through either combat or negotiation

    . When you choose to negotiate, you enter a diplomatic interface where you must offer specific combinations of goods to satisfy the encounter’s requirements. Success grants you control of that encounter point and moves you closer to claiming the entire province and its valuable relics.

    The Mechanics of Negotiation

    Understanding Encounter Requirements

    Each negotiation encounter in Elvenar presents a unique set of demands based on the province’s characteristics, your current chapter progression, and the specific encounter node you are attempting to resolve

    . The game generates these requirements dynamically, ensuring that negotiation remains challenging throughout your journey from early chapters to late-game content.

    The goods demanded in negotiations typically fall into several categories. Basic manufactured goods—including Marble, Steel, and Planks—form the foundation of most early-game negotiations

    . As you progress through the research tree and unlock more advanced chapters, negotiations begin requiring more exotic materials such as Scrolls, Crystal, Silk, and eventually magical goods like Elixir, Magic Dust, and Gems

    . The quantity of goods required scales with your squad size and the number of provinces you have conquered, meaning that late-game negotiations can demand thousands of units of specific resources.

    The negotiation interface presents these requirements clearly, showing exactly which goods are needed and in what quantities. However, the system adds a layer of complexity through its “mystery good” mechanic. In many negotiations, one or more of the required goods are hidden initially, represented by question marks

    . You must deduce which goods are needed based on the encounter’s context, the province type, and sometimes trial and error. This deduction element transforms negotiation from simple resource trading into a puzzle-solving experience.

    The Cost Structure of Negotiation

    Negotiation costs in Elvenar follow an exponential growth curve that mirrors the game’s overall difficulty scaling. Early negotiations might require only a few hundred units of basic goods, making them easily accessible to new players

    . As you advance, however, the costs increase dramatically. Mid-game negotiations can require thousands of goods, while late-game encounters might demand tens of thousands of units spread across multiple good types.

    This escalating cost structure creates strategic tension between negotiation and combat. While combat requires investment in military buildings, unit training, and potentially troop losses, negotiation demands massive stockpiles of manufactured goods that could otherwise be used for research, building upgrades, or trade with other players

    . Neither approach is inherently superior; instead, the optimal strategy depends on your city’s specialization, your fellowship’s trade network, and your personal playstyle preferences.

    The cost also varies based on the encounter type within a province. Some encounters are designated as “easy” negotiations with reduced goods requirements, while others are “hard” encounters demanding substantially more resources

    . Players must assess each encounter individually, sometimes choosing to negotiate the easier encounters while fighting the harder ones, or vice versa depending on their current resource availability and military strength.

    Success and Failure in Negotiations

    When you submit a negotiation offer in Elvenar, the game immediately processes the transaction. If you have provided the correct goods in sufficient quantities, the negotiation succeeds, the goods are deducted from your inventory, and you gain control of that encounter point

    . The encounter node changes color on the world map to indicate your conquest, and you move one step closer to claiming the province’s relics.

    Failed negotiations occur when you provide incorrect goods or insufficient quantities. In these cases, you lose the goods you offered but gain valuable information—the game indicates which of your offered goods were correct and which were wrong

    . This feedback system allows for an iterative approach where you can refine your offers based on partial success, particularly useful for encounters with hidden good requirements.

    Some negotiations feature multiple rounds, where you must satisfy several consecutive demands to achieve ultimate victory. These multi-stage negotiations are more common in advanced provinces and require sustained resource commitment. Failing at any stage means losing all goods invested in previous stages, significantly increasing the risk factor.

    Strategic Considerations for Negotiation

    When to Choose Negotiation Over Combat

    The decision between negotiation and combat is one of the most important strategic choices in Elvenar, and it should be made on a case-by-case basis rather than defaulting to one approach exclusively

    . Several factors should influence this decision:

    Resource Availability: If you have stockpiled large quantities of the goods required for a specific negotiation, and those goods are not urgently needed for other purposes like research or fellowship trades, negotiation becomes attractive. Conversely, if the required goods are scarce or essential for your current development priorities, combat might be preferable despite its risks

    .

    Military Strength: Players with powerful armies, advanced unit technologies, and robust military infrastructure often find combat more efficient than negotiation. A single victorious battle might cost fewer resources than the massive goods expenditure required for negotiation, particularly for hard encounters. However, if your army is weak, under-leveled, or depleted from previous engagements, negotiation offers a safer path forward

    .

    Troop Recovery Time: Combat always carries the risk of troop losses, and replacing those troops requires time and resources. If you are facing a time-sensitive situation—such as a tournament deadline or an event quest requiring rapid province conquest—the immediate nature of negotiation (assuming you have the goods) might outweigh the resource cost

    .

    Fellowship Trade Dynamics: Your fellowship’s trade network significantly impacts negotiation viability. If your fellowship has active traders producing the goods you need, you can acquire negotiation materials through trade rather than production. A well-connected player in an active fellowship can negotiate far more frequently than an isolated player who must produce all goods independently

    .

    Goods Production and Stockpiling Strategies

    Successful negotiation requires proactive goods management that begins long before you encounter a province that needs conquering. Strategic players develop sophisticated production and stockpiling systems to ensure they can negotiate when opportunities arise.

    Boosted Goods Focus: Every player in Elvenar receives boosts to specific goods production based on the relics they have collected

    . These boosted goods produce at significantly higher rates than non-boosted goods, making them your economic foundation. However, negotiations often require non-boosted goods, creating a trade dependency. Efficient players maximize their boosted goods production and trade surplus for the non-boosted goods needed for negotiations

    .

    Diversified Production: While focusing on boosted goods is economically efficient, relying entirely on trade for other goods creates vulnerability. Many experienced players maintain at least minimal production facilities for all basic goods, even non-boosted ones, to ensure they can handle unexpected negotiation demands without waiting for trade partners

    .

    Strategic Stockpiling: Rather than converting all goods immediately into other resources or research, successful negotiators maintain substantial reserves. These stockpiles act as insurance against sudden negotiation needs, tournament requirements, or event quests demanding large quantities of specific goods. The size of these stockpiles should increase as you progress through chapters, with late-game players often maintaining tens of thousands of units of each good type.

    Manufacturing Efficiency: The workshops and manufactories producing your goods can be optimized for negotiation support. Running longer production cycles (3-hour, 9-hour, or 24-hour productions) yields more goods per unit of supplies invested, though with less flexibility than short cycles

    . Players anticipating heavy negotiation periods might switch to longer cycles to maximize output, accepting the reduced responsiveness in exchange for volume.

    Fellowship Coordination and Negotiation

    The negotiation system in Elvenar is deeply intertwined with fellowship dynamics, and active fellowship participation can transform negotiation from a resource-draining burden into a manageable aspect of expansion

    .

    Trade Network Optimization: Fellowships allow members to post trades, offering surplus goods in exchange for needed materials. An effective trade network ensures that even if you cannot produce certain goods efficiently, you can acquire them through exchange. For negotiation purposes, this means you can focus your city on producing your boosted goods while trading for the diverse range of materials needed for province conquest

    .

    Goods Rotation Systems: Advanced fellowships sometimes implement organized goods rotation systems, where members coordinate production to ensure the fellowship collectively maintains stockpiles of all necessary goods. This systematic approach prevents situations where multiple members simultaneously need the same scarce resource for negotiations.

    Negotiation Intelligence Sharing: Fellowship members often share information about province encounters, warning each other about particularly expensive negotiations or highlighting provinces where specific goods are in high demand. This collective intelligence helps all members prepare their resource stockpiles appropriately.

    Fellowship Goods Donations: Some fellowships maintain communal goods reserves, where members contribute surplus production to help others with difficult negotiations. While less common than individual trade, these donation systems can be crucial for helping members overcome bottlenecks in their expansion.

    Advanced Negotiation Tactics

    The Mystery Good Deduction System

    One of the most engaging aspects of Elvenar’s negotiation system is the mystery good mechanic, where certain required goods are hidden behind question marks

    . Mastering the deduction of these mystery goods separates novice negotiators from diplomatic experts.

    The deduction process relies on several information sources. First, the encounter’s context provides clues—certain province types and encounter narratives hint at likely good requirements. Second, the visible goods in the negotiation offer information about the hidden ones; the game rarely requires identical goods in both visible and hidden slots, so you can often eliminate possibilities through logical exclusion.

    Third, failed attempts provide crucial feedback. When you offer goods for a mystery slot and fail, the game indicates whether any of your offerings were correct. Through systematic trial and error—changing one variable at a time—you can deduce the correct goods with minimal waste

    .

    Experienced negotiators develop pattern recognition for common mystery good combinations. Certain encounter types consistently require specific good pairings, and memorizing these patterns accelerates the deduction process and reduces failed attempt costs.

    Cost-Benefit Analysis for Multi-Round Negotiations

    Advanced provinces in Elvenar sometimes feature multi-round negotiations where you must satisfy multiple consecutive demands to achieve victory. These encounters require sophisticated cost-benefit analysis because the investment compounds with each round.

    The key calculation involves assessing the probability of success at each stage and the total resource commitment required. If early rounds require common goods but later rounds demand rare materials, you must decide whether to commit to the full sequence or abandon the negotiation after partial investment.

    Risk management in multi-round negotiations often involves “negotiation insurance”—maintaining larger stockpiles than the visible requirements suggest, ensuring you can complete the full sequence if you choose to begin. Abandoning a multi-round negotiation midway represents a significant resource loss, making the initial commitment decision crucial.

    Tournament and Event Negotiation Strategies

    Elvenar’s tournament system and periodic special events introduce time-sensitive negotiation opportunities that require adapted strategies

    .

    Tournament provinces appear weekly, offering additional chances for rewards beyond the standard world map. These tournament encounters can be resolved through negotiation, but they often feature modified costs and requirements compared to regular provinces. Players must quickly assess whether tournament negotiations offer favorable returns compared to the standard world map, considering the time-limited nature of tournament availability.

    Special events frequently introduce unique negotiation mechanics, such as encounters requiring event-specific currencies or offering negotiation discounts. These events represent optimal times for aggressive expansion, as the modified mechanics can reduce negotiation costs significantly. Strategic players often save their scouting and conquest activities for these periods, maximizing their expansion efficiency.

    Common Negotiation Mistakes and Optimization

    Over-Negotiation and Resource Depletion

    The most common mistake in Elvenar’s negotiation system is over-reliance on diplomatic solutions to the point of resource depletion

    . New players, particularly those uncomfortable with combat, sometimes attempt to negotiate every encounter regardless of cost. This approach can rapidly drain goods stockpiles, leaving players unable to conduct research, upgrade buildings, or participate in fellowship trades.

    The optimization strategy involves maintaining a balanced approach where negotiation is used strategically rather than universally. Some encounters are objectively better suited for combat due to their negotiation costs, while others are diplomatic bargains. Developing the judgment to distinguish these cases is essential for sustainable progression.

    Poor Goods Management

    Inefficient goods management undermines negotiation capability. Common errors include running production cycles that don’t align with negotiation needs, failing to maintain minimum stockpiles of all good types, and neglecting the trade network necessary to acquire non-boosted goods

    .

    Optimization requires treating goods production as a core city function rather than an afterthought. This means dedicating sufficient city space to manufactories, keeping these buildings upgraded to current chapter levels, and actively managing production cycles to maintain balanced stockpiles.

    Ignoring Fellowship Trade Opportunities

    Solo play significantly limits negotiation potential. Players who do not engage with fellowship trade networks must produce all goods independently, creating inefficiencies that make large-scale negotiation prohibitively expensive

    .

    The optimization path involves joining an active fellowship, understanding the trade dynamics within that group, and actively participating in the goods exchange economy. Even players who prefer independent play styles benefit enormously from fellowship trade access for negotiation support.

    The Economic Philosophy of Negotiation

    Negotiation as Investment

    Viewing negotiation through an economic lens transforms how players approach this mechanic. Every negotiation represents an investment of current resources in exchange for future benefits—primarily the relics that boost goods production and the province control that enables further expansion

    .

    The return on investment calculation for negotiation includes several factors: the immediate relic benefits, the long-term production increases from those relics, the access to new trade partners and tournament opportunities, and the progression toward chapter completion that unlocks new technologies and buildings.

    When framed as investment, negotiation decisions become clearer. Expensive negotiations in provinces offering relics for your boosted goods often justify their costs through long-term production increases. Conversely, expensive negotiations for relics of goods you rarely produce might not justify the resource expenditure compared to combat alternatives.

    Opportunity Cost Considerations

    Every good spent on negotiation represents a good not spent on research, building upgrades, or fellowship trades. This opportunity cost is central to negotiation strategy

    .

    Research often provides permanent benefits that compound over time, making it a high-priority resource allocation. Building upgrades increase production efficiency, creating long-term economic advantages. Fellowship trades build social capital and ensure reciprocal support during your own needs. Negotiation must compete with these priorities for limited resources.

    Strategic players maintain resource allocation frameworks that reserve specific percentages of goods production for different purposes—research, upgrades, trade, stockpiling, and negotiation. This structured approach prevents negotiation from consuming resources needed for other critical development areas.

    Conclusion

    The negotiation system in Elvenar represents a masterfully designed mechanic that adds depth, choice, and strategic complexity to the city-building experience

    . By offering a viable peaceful path to expansion alongside military conquest, InnoGames has created a game that accommodates diverse playstyles while ensuring that neither approach is trivially easy.

    Mastering negotiation requires understanding its mechanical intricacies—the mystery good deduction system, the escalating cost structures, and the multi-round encounter dynamics. It demands sophisticated resource management, including boosted goods optimization, diversified production, and strategic stockpiling. It rewards fellowship participation and active trade network engagement. And it challenges players to make constant cost-benefit analyses about when diplomacy serves their interests better than warfare.