Tag: #buildyourcity #virtualcity #empiregame #citystrategy #worldbuilder #kingdomlife

  • The Ultimate Elvenar Buildings Layout Guide: Designing Your Dream City

    The Ultimate Elvenar Buildings Layout Guide: Designing Your Dream City

    Introduction: The Art of Space Optimization

    In Elvenar, every grid square is precious real estate. Whether you’re a new player with a tiny settlement or a veteran managing a sprawling metropolis, efficient city layout determines your economic success, military strength, and overall progression speed. This comprehensive guide reveals proven strategies for organizing your buildings, minimizing wasted space, and creating a city that’s both beautiful and ruthlessly efficient

    .


    Core Principles of Efficient Layout

    The Ten Golden Rules of Space Optimization

    Veteran players have distilled city design into essential principles that maximize productivity while minimizing waste

    :

    1. Corner Your Main Hall Place your Main Hall in a corner with no more than 2 roads leading from it. This bulky, awkwardly-sized building dictates your entire layout if centered—corners minimize road waste and free prime space for production buildings. The top corner works best, building streets downward and sideways from there

    .

    2. Group Buildings by Type Keep all buildings of the same type together in lines or blocks. This makes collection easier, production management simpler, and helps visitors identify your boosted goods for trading

    .

    3. Roads Serve Two Buildings Minimum Every road block should touch at least two buildings. Roads serving only one building waste space that could host productive structures

    .

    4. Narrow Edge to Road For rectangular buildings, place the short side facing the road. A 3×2 building should show its 2-square side to the road, not the 3-square side. This simple rotation can save 20+ road blocks—enough for an extra building

    .

    5. No Edge Roads Never place roads at your city’s edge—they only serve one building. Start roads one square inward, using that edge space for 1×1 culture ornaments or buildings that don’t need road access

    .

    6. Upgrade Roads for Free Culture Convert all roads to the highest unlocked version—each upgrade provides 10-30 culture per block, equivalent to free culture buildings without wasting space. Build new road types directly over old ones without deletion

    .

    7. Culture Buildings in the Center Counter-intuitively, place culture buildings in the city center, not edges. This allows maximum-length straight roads at the perimeter where they’re most efficient. Since culture buildings don’t need road access, central placement optimizes space perfectly

    .

    8. Builder’s Hut at the Edge Place your Builder’s Hut with culture buildings at the edge. It doesn’t need road access, so keep paths far away

    .

    9. Perfect Square Expansion Expand your city in perfect squares (5×5, 6×6, 7×7). This maintains optimal building-to-road ratios and simplifies future expansion planning

    .

    10. Big Buildings at Road Ends Position your largest buildings at road ends—they only need one road square, saving connections for smaller structures

    .


    The Double Spiral Design: Maximum Efficiency

    For players seeking ultimate optimization, the Double Spiral Design represents the pinnacle of space efficiency

    :

    Basic Guidelines

    • Zero crossroads: Keep roads straight until hitting corners
    • Long, straight roads: Maximize building connections per road block
    • Both road sides used: Buildings on each side of every road
    • Central culture cluster: All non-road buildings in the middle
    • Main Hall on edge/corner: Minimize its awkward footprint impact

    Why It Works

    Traditional layouts scatter culture buildings around edges, forcing roads to snake inefficiently. The Spiral Design inverts this: roads run straight along the perimeter, serving maximum buildings, while culture buildings fill the center where roads aren’t needed

    .

    Space Savings: One player converted 91 road tiles into empty building space using this method—enough for multiple manufactories or residences

    .

    Practical Example

    Early-game Spiral cities feature one road spiraling inward, with buildings arranged by size along its length. Late-game versions use two parallel spirals (the “Double Spiral”) with the Main Hall between them, each road serving different building types

    .


    Building-Specific Placement Strategies

    Residences: Your Population Foundation

    Place residences in rows with short sides to roads. Group them together for easy collection and culture bonus maximization. Position near your best culture buildings to boost Coin production

    .

    Upgrade Strategy: Upgrade existing residences rather than building new ones. Upgrades maximize population density while conserving space—critical as your city grows

    .

    Workshops: Production Powerhouses

    Workshops should form production districts with easy access. Place them near each other for batch production management. In late game, 8 workshops set to 1-hour cycles optimize quest completion

    .

    Shape Considerations: Workshops change dimensions as you upgrade (3×6 to 4×5 in later chapters). Plan expansion space for these transitions

    .

    Manufactories: Specialized Zones

    Group manufactories by tier (Basic, Crafted, Magical) in dedicated zones. Keep your boosted goods manufactories closest to roads for frequent access, as these run most often

    .

    Efficiency Math: Two 2×2 manufactories (8 squares) often outperform one 3×3 manufactory (9 squares) while offering more flexibility

    .

    Military Buildings: Strategic Corners

    Place Barracks and Training Grounds at city corners or edges. These large buildings only need one road square when positioned at road ends, saving connections for smaller structures

    .

    Armory Placement: Position armories near military buildings but not at the expense of prime central space. 2-4 armories suffice for most players—excess wastes population better spent on production

    .

    Guest Race Settlements: Temporary Optimization

    Guest Races (Dwarves, Fairies, Orcs, etc.) require dedicated settlement space. Plan spare expansions for these—they grow substantially and disappear after chapter completion

    .

    Teleport Strategy: Use Teleport Spells from the Spire to temporarily store regular buildings, freeing space for guest race structures without permanent loss

    .


    Transitional Layouts: Managing Change

    The Transition Concept

    Buildings change shapes and sizes as you upgrade. Rather than rebuilding constantly, use transitional layouts—temporary arrangements that minimize disruption while moving toward optimal end-state designs

    .

    Implementation Strategy

    1. Identify shape changes: Note which buildings will change dimensions in upcoming chapters
    2. Reserve final positions: Keep space open for upgraded building footprints
    3. Temporary placement: Move changing buildings to flexible locations during transitions
    4. Gradual migration: Shift buildings to final positions as upgrades complete

    Example: When workshops change from 3×6 to 4×5, temporarily place them in flexible zones while reserving their final spots. Once upgraded, move them to permanent positions

    .


    Advanced Space-Saving Techniques

    The Magic Academy Trick

    Position your Magic Academy to use only 1 road tile by placing it at a road end or corner. This bulky 4×4 building often wastes road connections—strategic placement saves 3-4 road blocks

    .

    Barracks Efficiency

    The Barracks can operate with just 2 road tiles when placed strategically at road junctions or corners. Given its large footprint (5×3), minimizing road waste is crucial

    .

    Road-Culture Exchange

    Place 1×1 culture ornaments at road ends that reach the city edge. The buildings on either side only need one road square, and you gain “free” culture from otherwise “wasted” end space

    .

    Event Building Integration

    Event buildings provide culture, population, and special bonuses. Place road-requiring event buildings with regular production buildings, and non-road event buildings with your central culture cluster

    .


    Common Layout Mistakes to Avoid

    The Crossroads Problem

    Every crossroad (4-way intersection) wastes space. Use T-junctions or straight lines instead. If you must turn, use corners rather than four-way splits

    .

    The Centered Main Hall Trap

    New players often center their Main Hall, forcing roads to radiate outward like spokes. This creates massive road waste. Corner placement reduces road connections from 4+ to 1-2

    .

    Scattered Culture Buildings

    Spreading culture buildings around edges forces roads to snake inefficiently. Central clustering allows straight perimeter roads

    .

    Ignoring Road Upgrades

    Every road upgrade provides free culture. A city with Chapter 15 roads gains thousands of culture points versus Chapter 1 footpaths—equivalent to multiple culture buildings without using building space

    .


    Quality of Life Enhancements

    Collection Efficiency

    Group buildings by collection frequency. Place frequently-collected buildings (residences, boosted manufactories) closest to your Main Hall for quick access. Rarely-collected buildings (armories, some event buildings) can sit farther away

    .

    Visitor-Friendly Design

    Place your best culture buildings near the Main Hall where visitors naturally look when helping. This ensures you receive neighborly help on your most valuable structures

    .

    Flexibility Zones

    Always maintain 2-3 spare expansions for restructuring. Use these as staging areas when reorganizing—move buildings to temporary space while rebuilding permanent zones, then return them optimized

    .


    Late-Game Optimization

    The Endgame Transition

    As you approach maximum expansion (457-460 provinces), shift from growth to refinement:

    • Replace basic buildings with Magical variants (Magic Workshops, Magic Residences) for superior production per square
    • Maximize Ancient Wonders that provide population or production bonuses, freeing building space
    • Eliminate redundant structures—2 maxed Prosperity Towers workshops can replace 9 normal workshops

    Tournament and Spire Preparation

    Organize your city for efficient tournament play. Keep military buildings accessible for quick training cycles. Position your Timewarp wonder (if built) for easy access to tournament cooldown management

    .


    Conclusion: Your City, Your Strategy

    The perfect Elvenar layout balances efficiency with playability. While the Double Spiral Design offers maximum space utilization, it requires frequent restructuring as buildings change. More organic layouts sacrifice some efficiency for flexibility.

    Remember: roads are necessary evils, not assets. Minimize them ruthlessly, upgrade them constantly, and position them strategically. Every road block saved is a building block gained—multiplied across hundreds of expansions, these savings transform your city’s potential.

  • How to Grow Fast in Elvenar: The Ultimate Speed Progression Guide

    How to Grow Fast in Elvenar: The Ultimate Speed Progression Guide

    Introduction: The Speed Mindset

    Growing fast in Elvenar requires understanding that this is fundamentally a marathon disguised as a sprint. While the game operates on timers and gradual progression, strategic players can accelerate their development dramatically through optimized decision-making, resource management, and activity patterns. Fast growth isn’t about spending money—though that helps—it’s about eliminating wasted time, maximizing efficiency, and prioritizing high-impact actions over low-value busywork .

    The key insight from experienced players is that Elvenar rewards consistent engagement more than sporadic intensive play. A player who logs in three times daily for 15 minutes will outperform someone who plays for two hours once per week, simply because production timers, scouting, and resource generation favor regular interaction. This guide will show you how to transform that consistent engagement into rapid chapter advancement and city development.

    Early Game Acceleration: Chapters 1-5

    The Foundation Phase

    Your first days in Elvenar determine your trajectory for months. Start by building at least eight Residences immediately—this provides the population and coin income necessary for all subsequent actions. Simultaneously construct Workshops for Supplies production. These two building types form your economic engine, and upgrading them should be your absolute priority before expanding into other areas

    .

    A critical early decision involves choosing between Elves and Humans. While both races progress at identical speeds mechanically, their building shapes impact space efficiency. Elven buildings are circular and compact, while Human buildings are rectangular and easier to organize. For pure speed, many veterans recommend Humans for their predictable layouts, though Elves can be equally fast with proper planning

    .

    Quest Optimization

    Complete Mainline Quests aggressively—these provide substantial rewards including up to 200,000 Gold Coins and 15,000 Supplies in early chapters. The first questline in the Arrival era alone grants 20,000 Gold Coins instantly

    . Don’t ignore Repeatable Quests either; while optional, they provide consistent income that accelerates your early economy significantly.

    Active Scouting

    The fastest way to generate Knowledge Points early is aggressive World Map scouting. Each province encounter completed—whether through fighting or negotiating—rewards KP. Passive generation provides only 24 KP daily, but active scouting can double or triple this. Scout continuously, keeping your scout active at all times, and complete encounters as soon as possible

    .

    Mid-Game Surge: Chapters 6-15

    The Guest Race Priority

    Guest races (Dwarves, Fairies, Orcs, Wood Elves, etc.) introduce temporary settlements that produce chapter-specific goods. The fastest progression strategy prioritizes settlement unlocks above all else. Research Portal Tracks and production buildings immediately upon entering a guest race chapter, delaying residential upgrades, barracks improvements, and other secondary technologies until settlement production begins

    .

    For example, in the Dwarven chapter (Chapter 6), your research sequence should be:

    1. Portal Tracks (connects settlement to city)
    2. Granite Mines (first production building)
    3. Copper Foundries (second production building)
    4. Portal upgrade to Level 2
    5. Only then backfill other technologies

    This approach minimizes “tech lock”—the frustrating state where you cannot progress because you’re waiting for settlement goods production to ramp up. The earlier your settlement produces, the faster you accumulate resources for subsequent research.

    Ancient Wonder Acceleration

    Ancient Wonders provide permanent bonuses that compound over time. For speed growth, prioritize these wonders in order:

    1. Golden Abyss: Provides population and coins; at maximum level offers 18% population discount across your entire city. Build this immediately upon unlocking in Chapter 4 .
    2. Mountain Halls: Another 18% population discount plus goods production bonuses. This pairs with Golden Abyss to create massive space efficiency .
    3. Needles of the Tempest: Reduces barracks training time by up to 40%, accelerating military production for tournaments and map expansion .
    4. Timewarp: Reduces tournament cooldowns, enabling “instant tournament” completion when combined with a fed Polar Bear pet .

    Upgrade one wonder to maximum level before starting another. A level 30 wonder provides exponentially more value than three level 10 wonders. This concentrated power spike accelerates your growth more than spreading resources thinly

    .

    Resource Management for Speed

    The Trading Economy

    Focus production exclusively on your three “boosted” goods—one per tier, indicated by relics surrounding your city. These produce at 400% efficiency compared to non-boosted goods. Trade surplus boosted goods for everything else you need. This specialization allows you to maintain fewer manufactories, freeing space and population for other buildings

    .

    When placing trades, offer slight premiums (10-25% above 1:1 ratio). These attract takers faster, converting your surplus into needed resources more quickly than waiting for perfect trades. Join an active fellowship with robust trading to ensure your trades complete promptly

    .

    Coin to Knowledge Point Conversion

    As your city develops, consistently convert excess coins to Knowledge Points. While costs escalate with each purchase (reaching 10+ million coins per KP in late-game), your Main Hall capacity and coin generation scale faster than costs if you progress normally. Never let your coin storage sit full—excess coins represent wasted potential that could accelerate your research

    .

    Time Booster Optimization

    Time boosters earned from tournaments, Spire, and events should be used strategically. Apply them to:

    • Barracks training before tournaments
    • Guest race settlement construction
    • Ancient Wonder upgrades
    • Long-production manufactories when you need goods urgently

    Don’t waste boosters on short productions or buildings that will complete while you’re offline anyway.

    Tournament and Spire Dominance

    Tournament Speed Strategy

    Tournaments provide Knowledge Points, relics, and premium rewards essential for fast growth. The optimal approach:

    • Fight the first 6-10 provinces (these are “Easy” difficulty)
    • Negotiate provinces beyond Province 10 (resource efficiency)
    • Complete fewer provinces to higher star levels rather than many provinces to low stars
    • Use military boost buildings (Unleashed Unit Upgrade, Dwarven Armorer) late in the week to span two tournament cycles

    Spire of Eternity Priority

    Unlock the Spire in Chapter 3 and run it consistently. Even reaching the Laboratory (first boss) provides diamonds, time boosters, and Magic Residence/Workshop chances. These Magic Buildings are game-changers for speed—a Magic Workshop produces as much as 9 standard workshops while requiring only 2 residences worth of population. This space efficiency allows dramatic city densification and faster progression

    .

    Space Optimization: The Hidden Accelerator

    The Ten Golden Rules

    Space is your most precious resource. Following these principles frees 15-20% more space for production buildings:

    1. Place your Main Hall in a corner to minimize road requirements
    2. Position culture buildings and Builder’s Hut along edges (no road access needed)
    3. Upgrade roads to highest tier immediately for bonus culture
    4. Ensure every road segment serves multiple buildings
    5. Avoid roads touching only one building at your perimeter
    6. Place small culture ornaments at road terminations
    7. Maintain a compact, square city shape
    8. Orient rectangular buildings with short side touching roads
    9. Group similar buildings together for efficient collection
    10. Leave expansion room for building size increases at levels 5-6

    Magic Building Integration

    Prioritize winning Magic Residences and Magic Workshops from the Spire. These buildings allow you to:

    • Replace 8-9 standard workshops with 1-2 Magic Workshops
    • Reduce residential footprint by 60-70%
    • Free enormous space for guest race settlements or additional manufactories
    • Increase production while decreasing population requirements

    Top players in Chapter 24 operate with only 4 Magic Workshops and 8 Magic Residences, freeing space that would otherwise require 40+ standard buildings.

    Common Speed Traps to Avoid

    Over-Scouting Without Preparation

    Scouting more provinces increases difficulty for all future provinces. While aggressive scouting generates KP, reaching “Very Hard” difficulty before developing adequate military or goods production creates bottlenecks where you cannot complete provinces efficiently. Maintain provinces at “Medium” difficulty or below through Chapter 10, then relax restrictions as your strength grows

    .

    Neglecting Culture

    Low culture reduces all production by 20% or more—far more expensive than the culture buildings required to fix it. Maintain “Enthusiastic” culture (130% of required) for optimal production speed. This multiplier affects everything: coins, supplies, goods, and even training speeds indirectly

    .

    Building Too Many Armories

    Armories consume massive population for minimal benefit. Instead, use the Shrine of the Shrewdy Shrooms (or Dwarven Bulwark for Humans) Ancient Wonder to increase training queue capacity without population cost. This wonder-based approach preserves population for production buildings while maintaining military capability

    .

    Immediate Expansion Placement

    Province expansions increase your city grid but also increase tournament and Spire difficulty if placed immediately. Hold expansions unplaced until you specifically need the space for a building project. This prevents difficulty spikes while maintaining rapid expansion potential

    .

    Fellowship Dynamics: The Multiplier Effect

    Join an active fellowship immediately. Fellowships accelerate growth through:

    • Knowledge Point threads: Mutual Ancient Wonder donations generate free KP daily
    • Goods trading: Access to resources you don’t produce, without cross-tier penalties
    • Tournament coordination: Collective rewards for fellowship performance
    • Neighborly Help: Chains of building motivation that increase production

    Choose a fellowship matching your activity level. Competitive players need high-activity groups pushing 10+ tournament chests weekly; casual players become frustrated in hardcore groups with strict requirements.

    Event Participation: Seasonal Acceleration

    Events provide evolving buildings that permanently boost your city. Prioritize:

    • Fire Phoenix: Combat damage boost essential for tournament and Spire progression
    • Brown Bear: Troop production increase for military-focused players
    • Polar Bear: Tournament cooldown reduction for frequent tournament runners

    Craft base plates from the Magic Academy when offered, but don’t place evolving buildings until you have sufficient artifacts for meaningful evolution. A single fully-evolved building outperforms multiple level-1 buildings occupying the same space

    .

    The Speed Mindset: Daily Execution

    Fast growth requires consistent daily habits:

    • Morning: Collect all productions, restart 9-hour productions, check trades, send scout if idle
    • Midday: Collect short productions, check tournament/Spire progress, assist fellowship members
    • Evening: Collect all productions, restart overnight productions, plan next day’s research

    Never let your scout sit idle—queue scouting before sleep. Never let production buildings sit completed—collect and restart promptly. Never let Knowledge Points cap at 10—spend them before regeneration stops.

    Conclusion: The Compound Effect

    Fast growth in Elvenar emerges from thousands of small optimizations compounding over time. Each efficient decision—upgrading a residence instead of building new, scouting one more province, converting coins to KP, using a time booster strategically—accelerates your timeline measurably.

  • Elvenar Best Strategy for Beginners: Building Your Foundation for Success

    Elvenar Best Strategy for Beginners: Building Your Foundation for Success

    Introduction: Your First Steps in Elvenar

    Starting your journey in Elvenar can feel overwhelming with its numerous systems, resources, and strategic choices. This guide provides a clear roadmap for your first weeks and months, helping you avoid common mistakes that hinder long-term progress. Whether you’ve chosen the magical Elves or industrious Humans, these fundamental strategies will set you on the path to building a thriving kingdom

    .

    The Foundation: Understanding Core Mechanics

    Resource Management Triangle

    Your city operates on three fundamental resources that form an interconnected triangle:

    Coins – Generated from Residences through taxation, used for construction and research Supplies – Produced in Workshops, required for building upgrades, training troops, and crafting Population – Housed in Residences, determines how many workers you can support across all buildings

    Pro Tip: You can collect from multiple buildings simultaneously by clicking and holding, then dragging your mouse across ready Residences or Workshops. This efficiency trick saves significant time as your city grows

    .

    The Culture Bonus System

    Unlike decorative elements in other city-builders, Culture Buildings directly impact productivity. They generate happiness, which creates production bonuses at specific thresholds: 125%, 150%, 160%, and 170%

    .

    Key Strategy: Aim for 140-170% happiness through neighborly help rather than building excessive culture structures yourself. It’s more space-efficient to receive help from others than to achieve high bonuses independently

    . Place your largest cultural buildings at the edge of your city where they don’t need road connections, saving valuable central space for production buildings

    .

    Early Game Priorities: First Two Weeks

    Week 1: Establishing Basics

    Day 1-3: Foundation Building

    • Build at least 8 Residences immediately to ensure steady population and coin income
    • Construct 4-6 Workshops for supply production
    • Place 2-3 cultural buildings to reach 125% bonus
    • Connect everything with roads to your Main Hall

    Day 4-7: Expansion and Exploration

    • Begin scouting neighboring provinces on the World Map
    • Complete all Storyline Quests – these act as your tutorial and provide essential rewards including Diamonds
    • Upgrade your Main Hall to increase storage capacity
    • Research the Trader to unlock goods exchange

    Week 2: Optimization

    Critical Focus Areas:

    • Identify your boosted goods in the Main Hall – you’ll have one boosted resource from each tier (Basic, Refined, Precious) that produces at 100% efficiency
    • Build manufactories ONLY for your boosted goods – never produce non-boosted goods as they’re 75% less efficient
    • Join a Fellowship (guild) as soon as you research it in Chapter 2 for trading advantages and support

    The “2x Rule”: Culture Optimization

    One of the most important beginner strategies is maintaining total culture equal to 2× your required culture. This ensures that with neighborly help (which doubles culture output), you consistently achieve 160-170% bonus

    .

    Calculation Example:

    • Required Culture: 10,000
    • Working Population: 15,000
    • Total: 25,000
    • Target Available Culture: 20,000 (80% of 25,000 for 170% bonus)
    • With 2x Rule: Build 20,000 total culture

    This approach is far more space-efficient than trying to reach 170% without neighborly help, which the game explicitly warns “will mean taking up too much space in your city”

    .

    Quest Management: Story vs. Side Quests

    Storyline Quests (Mandatory)

    These quests guide your progression and cannot be declined. They unlock new buildings, technologies, and game areas. Complete these diligently as they provide:

    • Essential resources (Coins, Supplies, Knowledge Points)
    • Premium Diamonds
    • Access to new game features

    Side Quests (Optional)

    The second NPC offers loopable side quests that can be abandoned if unfavorable. These cycle continuously, so skipping one simply moves you to the next in rotation

    .

    Strategic Use: Abandon side quests that require:

    • Resources you don’t want to spend
    • Actions that disrupt your planned progression
    • Manufacture of non-boosted goods

    Building Placement and City Planning

    The Grid System Strategy

    Elvenar operates on a grid where every building requires road connections (except cultural buildings). Your Main Hall serves as the connection hub

    .

    Golden Rules:

    1. Group buildings by type to minimize road usage
    2. Place cultural buildings at edges without roads
    3. Plan for size upgrades – many buildings expand when upgraded (e.g., Residences grow from 2×2 to 2×3 to 3×3)
    4. Keep the Main Hall central for optimal road layout rather than corner placement

    The “Grid View” Technique

    Use the Grid View (available in settings) to plan your city layout. This helps you:

    • Visualize space efficiency
    • Plan for future building size changes
    • Identify wasted tiles

    Military and Combat Basics

    Early Game Military Strategy

    Your initial military focus should be minimal:

    • Build one Barracks when required by quests
    • Train small squads for initial province encounters
    • Focus on negotiation over combat in early chapters

    Combat Fundamentals:

    • Always finish off enemy units completely – even one remaining unit deals full damage
    • Use obstacles to limit how many enemies can attack you simultaneously
    • You can enter battle, scout terrain, and retreat without consequences if the situation looks unfavorable

    The Combat Pentagon

    Understanding unit matchups is essential:

    • Light Melee → Strong vs. Light Ranged and Mages; Weak vs. Heavy Melee and Heavy Ranged
    • Light Ranged → Strong vs. Heavy Melee and Heavy Ranged; Weak vs. Light Melee and Mages
    • Mages → Strong vs. Heavy Melee and Heavy Ranged; Weak vs. Light Melee and Light Ranged
    • Heavy Melee → Strong vs. Light Melee and Light Ranged; Weak vs. Mages and Heavy Ranged
    • Heavy Ranged → Strong vs. Light Melee and Heavy Melee; Weak vs. Light Ranged and Mages

    Economic Efficiency: The Trading Game

    The Boosted Goods Principle

    Your kingdom has three “boosted” goods that produce at 100% efficiency. All others produce at only 25% efficiency

    .

    Economic Strategy:

    1. Build manufactories only for your three boosted goods
    2. Use the Trader to exchange surplus for needed materials
    3. Join an active Fellowship for favorable internal trading rates

    Trading Ratios:

    • Same-tier goods: 1:1 (fair trade)
    • Cross-tier trades: 4:1 or 16:1 ratios

    The Wholesaler

    If desperate for specific goods, the Wholesaler (unlocked via research) allows purchasing resources for Coins or Supplies. Use sparingly – trading with players is far more efficient

    .

    Knowledge Points and Research

    KP Management

    You earn one free Knowledge Point (KP) every hour (cap at 10 for free players). Always spend these before logging off – wasted KP is lost progression

    .

    Research Priority:

    1. Technologies required for Storyline Quests
    2. Trader and Fellowship unlocks
    3. Advanced Scouts for province expansion
    4. Optional technologies that provide immediate benefit

    The “Filled but Unresearched” Technique

    Advanced players keep one technology filled with KP but not researched for event flexibility. This allows instant completion when events require “research a technology” quests

    .

    Social Strategy: Neighbors and Fellowships

    Neighborly Help

    Visit other players’ cities daily to:

    • Polish cultural buildings (doubling their output temporarily)
    • Motivate production buildings (increasing their next collection)
    • Earn Coins and Supplies for yourself

    Reciprocity Matters: Players who help others tend to receive help in return. Check city names for messages like “Culture please!” indicating preferred assistance

    .

    Fellowship Selection

    Join a Fellowship as soon as possible (Chapter 2). Look for:

    • Active members who trade regularly
    • Players at various progression stages
    • Fellowship Adventures participation
    • Helpful, responsive leadership

    Common Beginner Mistakes to Avoid

    1. Wasted Road Space

    Buildings only need to touch one road on one side. Don’t surround structures with roads – that’s wasted space for production buildings

    .

    2. Overbuilding Military Early

    Early military buildings drain resources needed for economic expansion. Focus on production first; you’ll need a strong economy to support an army later

    .

    3. Producing Non-Boosted Goods

    This is perhaps the most expensive beginner mistake. Never build manufactories for non-boosted goods – the inefficiency will cripple your economy

    .

    4. Neglecting the Trader

    The Trader isn’t server-wide – it has limited range. Players you’ve scouted can trade with you without the 50% penalty, so expand your scouting to increase trading opportunities

    .

    5. Poor Building Placement

    Plan for the future. Many buildings change size when upgraded. Before researching upgrades, check the new dimensions and rearrange your city accordingly

    .

    6. Ignoring Events (But Not Obsessing)

    Seasonal events offer powerful limited buildings, but don’t sacrifice core progression. Event rewards are nice but will be replaced as you advance. Prioritize research tree progression

    .

    Ancient Wonders: Early Game Choices

    Your first Ancient Wonder becomes available in Chapter 4. Choose wisely – some are helpful early, others are traps:

    Recommended Early Wonders:

    • Temple of the Spirits (ToS) – Excellent for early game acceleration, provides culture and other benefits

    Avoid Early:

    • Golden Abyss (GA) – While powerful late-game, it can hinder early growth

    General Rule: Don’t build all available Wonders. Focus on 2-3 that complement your playstyle and max them rather than spreading resources thinly

    .

    Long-Term Mindset: The Marathon Approach

    Elvenar is designed as a long-term game. Later chapters can take months – even a year for Chapter 22 – to complete

    . Success requires:

    Sustainable Play:

    • Log in multiple times daily for short sessions rather than occasional marathon plays
    • Maintain consistent production cycles (3-hour, 9-hour, or 1-day productions based on your schedule)
    • Build relationships with active neighbors and fellowship members
    • Accept that your first city won’t be perfectly optimized – learning is part of the journey

    Patience with Progression:

    • Don’t rush chapter advancement without preparing resources
    • Complete all available research and upgrades before advancing
    • Accept temporary inefficiencies as part of growth

    Final Advice: Your First Month Checklist

    Week 1:

    • [ ] Build 8+ Residences and 4-6 Workshops
    • [ ] Reach 125% culture bonus
    • [ ] Complete initial Storyline Quests
    • [ ] Scout 5-10 neighboring provinces

    Week 2:

    • [ ] Identify your 3 boosted goods (check Main Hall)
    • [ ] Build manufactories only for boosted goods
    • [ ] Join a Fellowship
    • [ ] Upgrade Main Hall to level 3-4

    Week 3-4:

    • [ ] Reach 150% culture bonus (with neighborly help: 170%)
    • [ ] Establish regular trading relationships
    • [ ] Participate in first Tournament
    • [ ] Plan city layout for Chapter 2 building size changes

    Ongoing:

    • [ ] Spend all KP before logging off
    • [ ] Help neighbors daily
    • [ ] Check for seasonal events
    • [ ] Upgrade buildings consistently

    Conclusion: Building Your Legacy

    Elvenar rewards thoughtful planning, consistent engagement, and community participation. The choices you make today – building placement, research priorities, economic focus – create ripple effects throughout your gameplay experience.

    Remember that there’s no “perfect” way to play. Some players focus on aesthetics, others on military dominance, others on economic efficiency. The beauty of Elvenar lies in its flexibility – you can reach end-game success through multiple paths.

  • Elvenar Battle Tips: Mastering Combat for Tournament and Map Success

    Elvenar Battle Tips: Mastering Combat for Tournament and Map Success

    Understanding the Combat Fundamentals

    Elvenar’s turn-based combat system operates on a hexagonal grid where strategic positioning and unit matchups determine victory or defeat. Unlike many browser strategy games that use auto-resolve mechanics, Elvenar offers both manual and auto-fight options, with manual control consistently delivering superior results when mastered

    .

    The combat system features five unit types arranged in a rock-paper-scissors dynamic known as the Combat Pentagon:

    Light Melee (LM) → Strong against Light Ranged and Mages; Weak against Heavy Melee and Heavy Ranged Light Ranged (LR) → Strong against Heavy Melee and Heavy Ranged; Weak against Light Melee and Mages
    Mages → Strong against Heavy Melee and Heavy Ranged; Weak against Light Melee and Light Ranged Heavy Melee (HM) → Strong against Light Melee and Light Ranged; Weak against Mages and Heavy Ranged Heavy Ranged (HR) → Strong against Light Melee and Heavy Melee; Weak against Light Ranged and Mages

    Understanding these relationships is fundamental, but advanced combat requires deeper knowledge of initiative, terrain, and enemy behavior patterns.

    The Initiative System: Who Moves First

    Combat turns are determined by initiative values – lower numbers move first. This system creates crucial tactical considerations:

    High Initiative Units (Move First):

    • Light Melee: Initiative 6-9
    • Light Ranged: Initiative 6-9
    • Mages: Initiative 6-9

    Low Initiative Units (Move Later):

    • Heavy Melee: Initiative 12-14
    • Heavy Ranged: Initiative 12-14

    Critical Insight: When units have the same initiative, tie-breakers go by position number (5,4,3,2,1 from top to bottom on the battlefield)

    . This means your unit placement directly affects attack order.

    Manual Fighting vs Auto-Fight

    Why Manual Fighting Dominates

    Experienced players consistently report that manual fighting yields significantly better results than auto-fight, especially in challenging encounters

    . The AI is “dumb as a box of rocks” – great when you’re fighting against it, terrible when it controls your troops

    .

    Key Advantages of Manual Control:

    • Positioning Control: You decide exactly where each unit moves
    • Target Selection: Choose which enemy to attack based on threat priority
    • Retreat Tactics: Strategic withdrawals to preserve units
    • Terrain Utilization: Use obstacles to block enemy movement
    • Bait and Switch: Lure enemies into unfavorable positions

    When to Use Auto-Fight

    Auto-fight has its place for efficiency:

    • First 10 tournament provinces where squad sizes heavily favor you
    • Very Easy (blue) world map provinces
    • When you’re heavily buffed with temporary buildings
    • Farming repeat encounters where losses don’t matter

    However, auto-fight becomes increasingly unreliable in later tournament provinces (around province 20+) where enemy squad sizes double yours

    .

    Advanced Manual Fighting Tactics

    The Scouting Technique

    Before committing your full army, send a single high-initiative unit (like a Ranger or Light Melee) to scout the battlefield. This allows you to:

    • Examine terrain obstacles
    • Identify enemy unit types and positions
    • Plan your approach
    • Retreat without losses if the situation looks unfavorable

    Pro Tip: If enemy Mist Walkers are present, use an Orc Strategist for scouting since they have debuffs against Light Range and can survive the initial strike

    .

    The Three Response Framework

    When making any move, consider three immediate responses

    :

    1. Attack a vulnerable unit – Strike where you have buff advantages (e.g., Archers vs. Mages)
    2. Attack the next enemy to move – Reduce their hit strength before they act
    3. Position for future advantage – Move to block enemies or prepare for next turn

    Engagement Discipline

    Golden Rule: Move forward only enough to engage the enemy. Make the enemy expose themselves by moving into your territory rather than rushing into theirs

    .

    This conservative approach:

    • Prevents overextension
    • Allows counter-attacks
    • Maintains formation integrity
    • Reduces exposure to enemy range

    Kiting and Bait Tactics

    Advanced players use movement to manipulate enemy AI:

    The Chase Scenario: Two slow Heavy Melee units chasing a fast Light Melee (Cerberus with initiative 9) while Heavy Ranged units slowly eliminate them from safety

    .

    Implementation:

    1. Position fast unit just within enemy movement range
    2. Enemy wastes turn moving toward you
    3. Retreat to safe distance
    4. Repeat while ranged units deal damage

    This works because “the enemy units never skip a turn and rarely retreat” – they will chase indefinitely while your ranged units destroy them

    .

    Unit-Specific Strategies

    Light Melee: Cannon Fodder or Precision Tool?

    Light Melee units (Sword Dancers/Axe Barbarians/Cerberus) are controversial. While they have advantages against Mages and Light Ranged, they’re often considered weak due to:

    • Slow movement allowing enemies free hits
    • Vulnerability to Heavy units
    • Difficulty reaching backline Mages

    Expert Verdict: “I don’t train any Sword Dancers. They are free from Bulwark. I might use her to clear map provinces since they are all Very Easy”

    Exception: Cerberus become viable with promotions and are particularly effective against Abbots (Mage units)

    .

    Mages: The Critical Unit

    Mages (Sorceress/Priest/Blossom Mage) are essential for defeating Heavy Melee and Heavy Ranged units.

    Race Difference: Human Priests are significantly superior to Elven Sorceresses. “Priest is the best mage unit in the game” while Sorceress is “the weak point of the entire elven military”

    . Elves must wait until Chapter 7 (Fairies) to get the Blossom Mage for a truly competitive Mage unit.

    Tactics:

    • Protect Mages from Light Ranged (especially Mist Walkers)
    • Use Heavy Melee as meatshields
    • Prioritize eliminating enemy units that can reach your Mages

    Heavy Melee: The Reliable Tank

    Heavy Melee (Treants/Paladins) excel at absorbing damage and protecting vulnerable units.

    Key Difference: Human Paladins have range 2 vs. Elven Treants’ range 1, making Paladins more reliable for auto-fight and better at reaching enemy ranged units

    .

    Best Use: Position between your ranged units and enemy melee to absorb attacks while your damage dealers eliminate threats.

    Heavy Ranged: Damage Dealers

    Heavy Ranged (Golems/Mortars/Orc Strategists) provide devastating damage from safety.

    Critical Insight: “Golems are WAY++ better than Mortars”

    . Mortars are considered “the most useless unit in the game” until the Frog Prince unlocks in late chapters.

    Orc Strategist Exception: These Training Ground units are excellent against Light Range and serve as viable alternatives when Golems aren’t available

    .

    Province-Specific Strategies

    Marble Provinces

    Enemies: Heavy Melee, Heavy Range, Light Range (Orc General, Knight, Cannoneer, Mist Walker)

    Strategy:

    • Early Game: Light Range (Archers/Crossbow) as key units, despite vulnerability to Cannoneers. Use Light Melee support .
    • Mid/Late Game: Mages (Sorceress/Priest/Blossom Mage) as primary damage dealers. Protect them from Mist Walkers .

    Support Options: Light Range work well against Heavy Melee but avoid Cannoneers. Heavy Range (Orc Strategist) excel against Mist Walkers

    .

    Steel Provinces

    Enemies: Heavy Melee, Light Melee, Mage (Swamp Monster, Orc Warrior, Thornrose Mage, Thief)

    Strategy: Light Range (Archer/Crossbow/Ranger/Dryad) are key units with bonuses against Heavy Melee and Mages. Eliminate Thieves first as they have strong attack bonuses despite no defense

    .

    Planks Provinces

    Enemies: Heavy Melee, Light Melee, Light Range (Orc General, Ancient Orc, Bandit, Dryad)

    Strategy: Heavy Range (Golem/Mortar/Orc Strategist) as key units. Focus on eliminating Ancient Orcs first since Heavy Range have minimal defense against them

    .

    Tournament-Specific Tactics

    The Scaling Challenge

    Tournament difficulty scales with province number and round:

    • Provinces 1-10: Extremely easy, “people tried losing and couldn’t”
    • Provinces 15-20: Moderate difficulty, requires attention
    • Province 20+: Enemy squad sizes double yours, designed to be unwinnable without buffs

    Composition Adjustments

    As you progress deeper into tournaments, fights take longer and often devolve into “melee brawls” where ranged units become vulnerable

    .

    Adaptation: “You need to adjust for possibly needing to sprinkle more melee units into the mix the further/deeper you go into Tourney”

    A fight composition that works in Province 4 may fail in Province 24 with identical enemy types – adjust for duration and chaos.

    Common Mistakes to Avoid

    1. The All-Same Brute Force Method

    Using five identical units is simple but suboptimal. “If you understand starting position, you can ween off the ‘brute force’ method of one unit type for all 5 slots”

    .

    2. Ignoring Terrain

    Obstacles on the battlefield can block movement and create bottlenecks. Always scout to identify terrain issues before committing troops

    .

    3. Poor Unit Positioning

    Unit placement affects attack order. Remember: “In a fight of all same units, your units will fight in the order of 5,4,3,2,1” from top to bottom

    .

    4. Attacking Without Planning

    Don’t just click the nearest enemy. Consider:

    • Who moves next?
    • Can you eliminate a threat before it acts?
    • Are you exposing vulnerable units?

    5. Neglecting Squad Size

    Your squad size relative to the enemy determines fight difficulty. Research squad size technologies and adjust your world map scouting strategy to maintain favorable ratios

    .

    Mobile vs Desktop Combat

    Critical Limitation: The mobile app only offers auto-fight, removing the manual control advantage

    . Mobile players should:

    • Focus on troop composition over tactics
    • Accept higher losses
    • Consider using desktop for important fights
    • Complain to InnoGames about the disparity

    Final Thoughts: The Path to Mastery

    Mastering Elvenar combat requires patience and practice. Start with these principles:

    1. Learn the Combat Pentagon – Know your unit matchups
    2. Scout Before Fighting – Never commit blindly
    3. Control the Engagement – Let enemies come to you
    4. Protect Your Damage Dealers – Use tanks to screen ranged units
    5. Adapt to Scaling – Adjust compositions for fight duration
    6. Practice Manual Control – It’s superior to auto-fight when learned

  • The Complete Elvenar Guide: Mastering Your Fantasy Kingdom

    The Complete Elvenar Guide: Mastering Your Fantasy Kingdom

    Getting Started: Your First Steps in Elvenar

    Welcome to Elvenar, InnoGames’ enchanting fantasy city-builder where your strategic decisions shape the destiny of an ancient world. Whether you’ve chosen the mystical Elves with their nature-infused architecture or the industrious Humans with their medieval fortifications, this guide will help you navigate the complexities of building a thriving kingdom from humble beginnings to majestic empire

    .

    Your journey begins with a critical choice that affects aesthetics, building designs, and thematic elements—but rest assured, both races share identical core mechanics. Elves feature sleek, organic structures intertwined with flowers and magical elements, while Humans construct sturdy, practical buildings with industrial flair

    . This choice is permanent for your city, so select the visual style that resonates with your preferences.

    Understanding Core Resources and Buildings

    The Foundation: Coins, Supplies, and Population

    Three fundamental resources drive your city’s growth. Coins, generated primarily from Residences through taxation, fund construction, upgrades, and research. Supplies, produced in Workshops, power production activities, building improvements, and military training. Your Population, housed in Residences, determines how many workers you can support across all buildings

    .

    Residences serve dual purposes: they provide both population capacity and coin generation. Upgrade these regularly to increase both outputs. Strategic placement matters—positioning Residences adjacent to Cultural Buildings boosts their productivity significantly

    .

    Workshops are your supply engines. Early game, maintain at least 4-6 Workshops to meet quest demands and production needs. As you progress, upgrade these before adding more, as higher-level workshops offer better efficiency per tile

    .

    The Culture System: More Than Decoration

    Unlike typical city-builders where decorations serve purely aesthetic purposes, Elvenar’s Culture Buildings directly impact productivity. Every cultural structure generates happiness, which translates to production bonuses when you reach specific thresholds (125%, 150%, 160%, and 170% culture bonus levels)

    .

    Place sanctuaries, sculptures, trees, and other ornaments strategically. The “Ensorcelled Endowment” spell can double a building’s culture output temporarily, making it invaluable for reaching higher bonus tiers. Veteran players recommend maintaining at least two large culture buildings (3×4 or 3×3) that can be “sparkled” by neighbors to ensure consistent high-level bonuses

    .

    Quests and Progression: The Storyline Framework

    Following the Tutorial Quests

    Storyline quests serve as your tutorial and primary progression mechanism. These guided objectives introduce core mechanics gradually while providing essential rewards—Coins, Supplies, Knowledge Points (KP), and even premium Diamonds

    . Complete these diligently; they unlock new buildings, technologies, and game areas while providing resources that accelerate early development.

    Key early quests include building your first Residences and Workshops, researching the Trader, constructing Barracks, and completing initial province encounters

    . Pay special attention to quests marked in red on community guides—these are mandatory progression gates that cannot be skipped

    .

    Chapter-Based Advancement

    Elvenar organizes progression into 22 chapters, each with specific questlines and unlockable technologies. Chapter 1 establishes your foundation with basic production and military units. Chapter 2 introduces Fellowships (guilds), advanced buildings, and the Training Grounds

    . By Chapter 3, you’ll unlock refined goods production (Crystal, Scrolls, Silk), and Chapter 4 opens Ancient Wonders and Tournaments

    .

    Each chapter demands careful planning. For example, Chapter 3 requires upgrading your Main Hall to level 4, maintaining 8 Residences at level 4, and completing numerous provinces

    . Chapter 4 intensifies with requirements like upgrading two Tier 1 factories to level 8, building your first Ancient Wonder, and reaching 53 completed provinces

    .

    City Layout and Space Optimization

    The Grid System and Road Networks

    Elvenar operates on a grid system where every building requires road connections to function. Your Main Hall serves as the connection hub, with roads extending to reach other structures. This creates spatial puzzles where efficient placement maximizes your limited area

    .

    Key layout principles:

    • Group buildings by type to minimize road usage
    • Place cultural buildings to cover multiple production structures
    • Leave minimal “dead space” between buildings
    • Plan for future expansions—don’t build permanently in areas you’ll need later

    The 4×4 and Expansion Strategy

    Experienced players often recommend planning around a 4×4 grid concept, though this becomes insufficient by Chapter 5

    . Prioritize unlocking city expansions early through research, province completion, and premium purchases if desired. Each expansion represents permanent value, while buildings can be sold or teleported as strategies evolve

    .

    Use temporary structures like 1×1 signposts to fill empty tiles until you need the space. Remember: open tiles are wasted tiles, but poorly placed permanent buildings create long-term inefficiencies

    .

    Military Strategy: Combat and Unit Management

    Understanding the Combat Triangle

    Elvenar features five unit types in a rock-paper-scissors dynamic: Light Melee, Light Ranged, Mages, Heavy Melee, and Heavy Ranged. Each type excels against two others while struggling against two more

    .

    Combat fundamentals:

    • Light Melee defeats Light Ranged and Mages; loses to Heavy Melee and Heavy Ranged
    • Light Ranged defeats Heavy Melee and Heavy Ranged; loses to Light Melee and Mages
    • Mages defeat Heavy Melee and Heavy Ranged; lose to Light Melee and Light Ranged
    • Heavy Melee defeats Light Melee and Light Ranged; loses to Mages and Heavy Ranged
    • Heavy Ranged defeats Light Melee and Heavy Melee; loses to Light Ranged and Mages

    Scout enemy compositions before battles and counter-pick accordingly. Manual control generally outperforms auto-fight, especially in challenging encounters

    .

    Training and Army Composition

    Early game, focus on your boosted units and versatile combinations. Training Grounds (unlocked Chapter 2) allow simultaneous training of two unit types—essential for maintaining diverse armies

    . Many veterans succeed using just two unit types for 95% of encounters, such as Cerberi paired with Treants/Paladins for Elves

    .

    Armories increase your training queue capacity, but balance these against production buildings. One level 8+ Armory suffices for many players, supplemented by other troop-producing structures

    .

    Economic Mastery: Production and Trading

    The Boosted Goods System

    Your kingdom has three “boosted” goods—one from each tier (Basic, Refined, Precious)—that produce at 100% efficiency. All other goods manufacture at 25% efficiency, making trade essential

    .

    Production strategy:

    • Focus manufacturing on your three boosted goods exclusively
    • Use the Trader to exchange surplus for needed materials
    • Never produce non-boosted goods unless absolutely necessary

    Trading and Fellowship Economics

    The Trader interface allows you to create offers exchanging your abundant goods for needed resources. Fair trades follow a 1:1 ratio for same-tier goods or 4:1/16:1 cross-tier ratios

    . Joining an active Fellowship (guild) provides trading partners who understand these economics and often offer favorable internal rates.

    Neighborly Help enables daily visits to other players’ cities. Prioritize “polishing” (boosting) cultural buildings, as this provides the most significant mutual benefit

    .

    Advanced Systems: Ancient Wonders and Events

    Ancient Wonders

    These massive structures provide permanent empire-wide bonuses but require significant investment. Your first Ancient Wonder becomes available in Chapter 4 through the “Secret Ancient Wonder” research

    . Choose based on your playstyle—some boost military production, others enhance economy or culture.

    Upgrading Wonders requires rune shards, which come from provinces, tournaments, and events. Plan your Wonder investments carefully; they’re permanent and expensive to change

    .

    Seasonal Events and Limited Buildings

    Elvenar regularly hosts seasonal events offering unique multi-purpose buildings that combine population, culture, and production benefits. These “grand prizes” often outperform standard buildings of similar size, making event participation crucial for efficient city development

    .

    Prioritize events that offer buildings matching your current needs. A building providing 500 population, 400 culture, and 300 supplies daily saves significant space compared to separate structures offering equivalent benefits.

    Long-Term Strategy and Patience

    The Marathon Mindset

    Elvenar rewards patience over rushing. Later chapters can take months—or even a year for Chapter 22—to complete

    . This deliberate pacing targets mature players seeking a long-term hobby rather than instant gratification

    .

    Sustainable practices:

    • Log in multiple times daily for short sessions rather than occasional marathon plays
    • Maintain consistent production cycles (3-hour, 9-hour, or 1-day productions based on your schedule)
    • Participate in weekly Tournaments for rewards and fellowship bonding
    • Plan upgrades during “build” events that offer bonus rewards

    Free-to-Play Success

    Elvenar remains genuinely playable without spending money, though progress requires more time. Free players should prioritize:

    • Daily quest completion for Diamond rewards
    • Tournament participation for premium currency chances
    • Efficient space usage to minimize need for premium expansions
    • Fellowship membership for trading advantages and support

    Common Pitfalls to Avoid

    New players frequently make several mistakes that hinder long-term success:

    Over-building military structures early game drains resources needed for economic expansion. Focus on production first, military second

    .

    Ignoring culture creates production bottlenecks. Maintain at least 170% culture bonus for optimal efficiency

    .

    Producing non-boosted goods wastes enormous resources. Always trade for these instead

    .

    Rushing chapter advancement without preparing resources leads to “paywall” situations where progress stalls. Complete all available research and upgrades before advancing

    .

    Neglecting neighborly relationships reduces your culture bonuses and trading opportunities. Visit neighbors daily and join an active Fellowship as soon as possible

    .

    Conclusion: Your Kingdom Awaits

    Elvenar offers a rich, strategic city-building experience that rewards thoughtful planning and patient execution. By understanding the interplay between culture and production, mastering the combat system, optimizing your city layout, and engaging with the community through Fellowships and trading, you’ll build a kingdom that stands the test of time.

    Remember that Elvenar is a marathon, not a sprint. The choices you make today—building placement, research priorities, economic focus—ripple through months and years of gameplay. Take time to enjoy the journey, appreciate the beautiful fantasy aesthetic you’ve chosen, and celebrate each milestone as your small settlement grows into a magnificent empire.

  • The Elvenar Halloween Event: A Guide to the Misty Forest and All Howl’s Eve

    The Elvenar Halloween Event: A Guide to the Misty Forest and All Howl’s Eve

    In the magical world of Elvenar, seasonal events bring unique challenges, exclusive rewards, and thematic gameplay that breaks from routine city management. The Halloween Event—alternatively known as Misty Forest, Whispers of the Soul, or All Howl’s Eve depending on the year—stands as one of the most atmospheric and strategically engaging annual celebrations. With its spooky aesthetics, evolving building rewards, and distinctive exploration mechanics, the Halloween event has become a cornerstone of the Elvenar calendar since its introduction

    .

    Event Evolution: From Whispers to All Howl’s Eve

    Elvenar’s Halloween event has undergone significant transformation over the years. The 2022 iteration, titled “Weird and Wonderful,” introduced players to Mrs. Sniffles and her headless companion Sir Necklace, tasking adventurers with helping them navigate toward the center of a mysterious forest to discover ancient rewards

    . The 2023 event, “Whispers of the Soul,” featured Professor Freakenspleen conducting experiments with spirits in the Misty Forest, where players collected magical ingredients and explored fog-shrouded terrain

    .

    The 2024 event, “All Howl’s Eve,” marked a narrative shift, bringing back the popular character Crash—the infamous monster hunter. The storyline followed lumberjacks who refused to work due to unearthly howls echoing through the forest, prompting desperate townsfolk to hire Crash out of sheer boredom. Players joined Crash in investigating the supernatural occurrences, with the full moon rising and the forest pulsing with eerie life

    .

    Core Mechanics: Light Sources and Forest Exploration

    The Halloween event employs a distinctive exploration mechanic that sets it apart from other seasonal events. Players must purchase Light Sources using event currency to lift the mist and reveal the forest floor. This exploration system creates strategic depth, as every light source placement must be calculated to maximize reward exposure while minimizing currency expenditure

    .

    The forest floor contains various elements:

    • Hedges and Rocks: Obstacles that block exploration and must be worked around
    • Friendly Spirits: Key collection items that advance Grand Prize progress (typically one spirit per 20 collected grants a Grand Prize)
    • Lost Items: Containers offering chances at daily prizes, including valuable buildings and resources
    • Additional Light Sources: Free tools occasionally found during exploration that extend your investigation capacity

    This exploration system rewards careful planning. Experienced players analyze the revealed terrain before placing light sources, attempting to expose multiple prizes with minimal investment. The fog-of-war mechanic creates tension and excitement, as each illuminated square could reveal anything from common goods to the coveted daily prize

    .

    Quest Structure: Sequential and Daily Challenges

    Like all major Elvenar events, the Halloween celebration features a dual quest system. Sequential quests form the narrative backbone, advancing the story as players complete specific tasks. These quests scale with your chapter progress—a Chapter 5 player faces different requirements than a Chapter 20 player, ensuring appropriate challenge levels across all city development stages

    .

    Daily quests unlock episodically throughout the event, providing fresh objectives every 24 hours. These quests typically involve standard Elvenar activities: producing specific goods, training military units, completing encounters, or constructing buildings. The Halloween event often introduces thematic variations, such as collecting “Magic Ingredients” or crafting spooky items in the Magic Academy

    .

    Quest rewards include event currency (Magic Ingredients or similar), which fuels your forest exploration. Milestone rewards at specific quest completion points provide bonus currency, buildings, and resources. The Royal Prize Pass—Elvenar’s premium reward track—offers additional tiers of exclusive buildings, artifacts, and instants for players willing to invest real currency

    .

    The Evolving Building: Centerpiece Rewards

    Each Halloween event introduces a signature Evolving Building that grows from Stage 1 to Stage 10 (or Stage 5 in earlier versions) through artifact collection. These buildings represent the ultimate reward for dedicated event participation, providing escalating bonuses that often remain relevant for years.

    The Soul Lab from the 2023 event offered switchable production and population benefits, while the Moonlight Party from 2024’s All Howl’s Eve provided different rewards based on evolution stage. These evolving buildings typically feature:

    • Population and Culture: Increasing housing and cultural value as they evolve
    • Switchable Production: Options to produce different resource types based on current city needs
    • Special Bonuses: Unique effects like spell fragment generation, combat boosts, or guest race goods

    The 2024 event introduced a Set Building alongside the evolving structure, requiring multiple connected pieces to achieve maximum bonuses. This architectural puzzle added city planning complexity, as players had to预留 space for optimal set arrangement

    .

    Strategic Preparation: Maximizing Event Success

    Veteran players employ several strategies to optimize Halloween event outcomes:

    Pre-Event Production: Stockpiling coins, supplies, and boosted goods before the event begins enables instant quest completion when daily quests unlock. Many players maintain “production queues”—pre-manufactured goods waiting in workshops and manufactories for immediate collection

    .

    Workshop Focus: Halloween event quests heavily favor workshop production. Maintaining 4-5 upgraded workshops with diverse production options (5-minute, 15-minute, 1-hour, 3-hour, 9-hour, and 24-hour cycles) provides flexibility for any quest requirement. Some players even build temporary “event workshops” specifically for quest-heavy periods

    .

    Military Readiness: Encounter resolution quests appear frequently. Having trained troops ready—or maintaining negotiation goods stockpiles—prevents quest stagnation. The Halloween event’s spooky theme sometimes introduces special combat scenarios or unit types

    .

    Magic Academy Preparation: Spells and crafting capabilities support event participation. Ensuring your Magic Academy is upgraded to level 5 for maximum efficiency, with catalysts and fragments available for emergency crafting, provides strategic flexibility

    .

    Community Resources and Strategy

    The Elvenar community mobilizes extensively for each Halloween event, creating comprehensive resources:

    iDavis Website: This player-maintained site offers chapter-specific quest lists, building production values, and interactive tools. For Halloween events, iDavis provides video tutorials explaining the light source mechanics and practice areas where players can test exploration strategies without spending actual event currency

    .

    Italian Event Site: Always first with complete information, this multi-page resource provides quest lists with variable requirements for different player levels, daily and grand prize displays, interactive building menus, and league reward breakdowns. The site’s translate button enables global accessibility

    .

    Beta Fellowship Platinum Leaf: This dedicated group play-tests every quest across multiple chapter levels, compiling Google Documents with verified information. Their Halloween event docs include production checklists, strategy guides for optimal light source placement, and building set arrangement recommendations

    .

    League Competition and Rewards

    Halloween events feature League systems where players compete for ranking-based rewards. Leagues (typically Wood, Bronze, Silver, Gold, and sometimes Platinum) award progressively valuable prizes based on event currency collection and quest completion speed.

    Top league rewards often include:

    • Exclusive Expiring Buildings: Limited-duration structures with powerful bonuses
    • Artifact Instants: Immediate evolution building advancement
    • Premium Currency: Diamonds for shop purchases
    • Special Decorations: Thematic aesthetic items for city beautification

    The competitive aspect encourages active participation, though the random elements of forest exploration (which prizes light sources reveal) introduce variance that can frustrate players seeking specific daily prizes

    .

    Common Challenges and Solutions

    Players frequently encounter specific Halloween event difficulties:

    Currency Scarcity: Light sources are expensive, and the 420-currency “value packs” deplete quickly. Strategic players balance single-tile illumination against the efficiency of larger light source investments, sometimes waiting for free light sources from exploration rather than purchasing immediately

    .

    Daily Prize RNG: Unlike some events with guaranteed daily prize progression, Halloween’s random reveal system means players might complete the entire event without obtaining specific desired buildings. This variance is intentional design, though community feedback consistently requests more deterministic reward systems

    .

    Evolution Completion: Reaching Stage 10 on evolving buildings requires substantial artifact investment. Players who miss daily prizes or fail to complete all quests may find themselves several artifacts short of maximum evolution. Fellowship Adventures following events sometimes provide additional artifacts, but this requires additional time investment that not all players can commit

    .

    The Future of Halloween in Elvenar

    As Elvenar continues evolving, the Halloween event adapts with new mechanics and narratives. The shift from Professor Freakenspleen’s scientific experiments to Crash’s monster hunting demonstrates InnoGames’ commitment to fresh storytelling within established frameworks. Future Halloween events may introduce:

    • New Exploration Mechanics: Variations on the light source system with different terrain types
    • Additional Evolving Buildings: More complex evolution trees with branching upgrade paths
    • Collaborative Elements: Fellowship-based Halloween challenges requiring cooperative play
    • Combat Integration: Themed military units or spooky battle scenarios

    Conclusion

    The Elvenar Halloween Event encapsulates what makes seasonal content compelling: atmospheric storytelling, unique mechanics that break routine gameplay, valuable rewards worth strategic investment, and community engagement through shared exploration challenges. Whether you’re navigating the Misty Forest’s fog, helping Crash investigate supernatural occurrences, or simply collecting artifacts to evolve your spooky centerpiece building, the Halloween event offers something for every playstyle.

    Success requires preparation—upgraded workshops, stockpiled resources, and active community engagement to stay informed about optimal strategies. But beyond efficiency, the Halloween event invites players to embrace the spooky season, decorating their cities with gothic architecture and enjoying the narrative charm that distinguishes Elvenar from more sterile city builders.

    In a game about magical kingdoms and ancient wonders, Halloween reminds us that even in Elvenar, there’s always room for a little mystery, a little darkness, and the thrill of exploring what lurks in the fog-shrouded forest.

  • League System in Elvenar: The Competitive Hierarchy of Weekly Tournaments

    League System in Elvenar: The Competitive Hierarchy of Weekly Tournaments

    Introduction to the League System

    The League System in Elvenar represents the competitive pinnacle of weekly tournament participation, transforming the fellowship-based tournament structure into an individual player ranking hierarchy that recognizes and rewards consistent excellence across the entire player base

    . Introduced as an evolution of the tournament system, leagues create a stratified competitive environment where players are grouped by performance level, competing against similarly skilled participants for tiered rewards that reflect their dedication, capability, and strategic sophistication.

    Unlike the fellowship tournament rankings that measure collective group performance, the League System focuses on individual achievement, creating personal goals that persist even when fellowship dynamics fluctuate

    . This individual competitive layer adds depth to weekly tournament participation, giving players reasons to push beyond minimum participation thresholds and strive for recognition that is entirely their own. For competitive players, league progression becomes a core gameplay motivation that sustains engagement through the long-term journey of Elvenar’s endgame content.

    The League System operates on weekly cycles synchronized with tournament resets, creating regular opportunities for advancement, regression, or maintenance of league standing based on tournament star accumulation

    . This dynamic environment ensures that league position reflects current performance rather than historical achievement, maintaining competitive tension and preventing stagnation. Understanding how to navigate this system—from initial placement through promotion battles to elite league maintenance—is essential for any player seeking to maximize their tournament rewards and achieve recognition within the Elvenar community.

    This comprehensive guide explores every aspect of the League System in Elvenar, from its structural mechanics and reward structures to advanced strategies for league advancement and maintenance. Whether you are a new player discovering leagues for the first time or a veteran seeking to break into the highest competitive tiers, this analysis provides the knowledge necessary to excel in Elvenar’s individual competitive hierarchy.

    League Structure and Mechanics

    League Tiers and Hierarchy

    The League System organizes players into distinct tiers that reflect performance levels, creating a visible hierarchy of competitive achievement

    .

    Entry League (Wood League): New players and those with minimal tournament participation begin in the Wood League, the foundational tier that introduces league mechanics without intense competitive pressure. Wood League rewards are modest but provide incentive for initial tournament engagement.

    Bronze League: The first promotion tier represents players who have demonstrated consistent tournament participation beyond casual levels. Bronze League competitors show understanding of tournament mechanics and commitment to weekly engagement.

    Silver League: Mid-tier competitive players populate Silver League, where tournament strategies become more sophisticated and participation more intensive. Silver League represents solid competitive performance without elite-level demands.

    Gold League: Advanced players with strong tournament capabilities and consistent high-performance participation compete in Gold League. This tier demands substantial weekly effort and strategic optimization.

    Platinum League: Elite players with exceptional tournament performance and dedicated optimization compete in Platinum League, representing the top tier of regular competitive participation.

    Diamond League (or equivalent top tier): The absolute pinnacle of individual tournament competition, Diamond League contains the most dedicated and capable tournament players on each server, competing for the highest rewards and greatest recognition

    .

    Weekly League Cycles

    League participation operates on weekly cycles that create regular competitive rhythms

    .

    Tournament Synchronization: League cycles align perfectly with weekly tournament resets, with each tournament week constituting one complete league cycle. This synchronization ensures that league performance directly reflects tournament participation.

    Star Accumulation: League standing is determined by tournament stars accumulated during the weekly cycle. More stars result in higher league placement, with specific thresholds determining tier boundaries and promotion eligibility.

    Promotion and Demotion: Based on weekly performance relative to league peers, players may be promoted to higher leagues, demoted to lower leagues, or maintain their current standing. This dynamic movement ensures that league tiers remain representative of current capability.

    League-Specific Competition: Within each league, players compete against others in the same tier, creating appropriately matched competition where advancement is challenging but achievable with effort and skill.

    Placement and Progression Mechanics

    Understanding how league placement and progression work enables strategic participation planning

    .

    Initial Placement: New players or those returning after absence are placed in appropriate leagues based on recent tournament history or default to Wood League if no history exists.

    Promotion Thresholds: Each league has specific star thresholds that must be exceeded for promotion consideration. These thresholds increase at higher leagues, requiring progressively more tournament participation for advancement.

    Demotion Protection: Some league systems include protection mechanisms that prevent immediate demotion after promotion, giving players time to adapt to higher competition levels before facing demotion risk.

    End-of-Week Calculation: League standing is calculated at tournament week end, with rewards distributed and league assignments updated for the subsequent week based on final performance.

    League Rewards and Incentives

    Reward Structure by League Tier

    League rewards escalate dramatically with tier, creating strong incentive for advancement

    .

    Wood League Rewards: Basic rewards including modest Knowledge Points, small resource packages, and minimal special items. These rewards acknowledge participation while encouraging progression to higher tiers.

    Bronze League Rewards: Improved rewards with more substantial Knowledge Point grants, better resource quantities, and occasional valuable items. Bronze rewards begin to justify serious tournament effort.

    Silver League Rewards: Significant rewards including generous Knowledge Point allocations, substantial resources, and regular valuable items. Silver league participation provides meaningful progression acceleration.

    Gold League Rewards: Premium rewards with large Knowledge Point grants, extensive resources, and frequent high-value items. Gold league rewards substantially impact city development speed.

    Platinum League Rewards: Exceptional rewards including massive Knowledge Point allocations, abundant resources, and regular premium items. Platinum rewards represent major progression advantages.

    Diamond League Rewards: The ultimate rewards featuring maximum Knowledge Points, extensive premium resources, and exclusive items unavailable at lower tiers. Diamond league rewards provide transformative benefits that accelerate development dramatically

    .

    Reward Types and Value

    League rewards encompass various valuable resource types that support different aspects of city development

    .

    Knowledge Points: The primary league reward, KP grants accelerate research progress through the extensive technology tree. Higher leagues provide exponentially more KP, creating compounding advantages for league advancement.

    Premium Currency: Some league tiers award Diamonds or similar premium currencies that provide purchasing power for exclusive buildings, instant completions, or other valuable benefits.

    Special Buildings and Items: Higher leagues offer exclusive buildings, powerful enchantments, or rare items that enhance city capabilities beyond standard development paths.

    Resource Packages: Substantial coin, supply, and goods packages support immediate city needs and enable rapid construction, training, or manufacturing programs.

    Relics and Boosts: Tournament-related rewards including relics that boost goods production or temporary boosts that enhance various city functions.

    Long-Term Value Accumulation

    The cumulative value of consistent league participation creates dramatic long-term advantages

    .

    Compound Growth Effects: Weekly league rewards compound over time, with higher league players accumulating advantages that accelerate development, enabling faster advancement that unlocks even greater reward potential.

    Exclusive Access: Some game content, features, or recognition may be restricted to higher league players, creating social prestige and practical advantages beyond direct rewards.

    Skill Development: The competitive pressure of higher leagues drives players to develop superior tournament strategies, efficient city management, and optimized gameplay that benefits all aspects of Elvenar performance.

    Strategies for League Advancement

    Tournament Optimization for League Stars

    Maximizing tournament star accumulation is the foundation of league advancement

    .

    Complete Encounter Clearance: Each tournament province offers multiple stars based on encounter completion. Clearing all encounters in accessible provinces maximizes star accumulation.

    Efficient Resolution Methods: Choosing optimal resolution methods—combat for favorable matchups, negotiation when efficient—ensures maximum star gain per resource invested, enabling sustained participation throughout the week.

    Province Selection Strategy: Prioritizing provinces that offer favorable star-to-effort ratios, considering both encounter difficulty and personal capability, optimizes weekly star totals.

    Daily Participation Patterns: Consistent daily participation prevents missed opportunities and allows recovery from difficult encounters. Spreading effort across the tournament week outperforms concentrated bursts that may exhaust resources.

    City Development for Tournament Support

    League advancement requires city development that specifically supports tournament capability

    .

    Military Infrastructure: For combat-focused tournament approaches, robust military infrastructure—including high-level barracks, substantial squad size, and efficient training capacity—enables encounter resolution that generates stars.

    Goods Production: For negotiation approaches or mixed strategies, extensive goods production infrastructure ensures adequate resources for catering encounters when combat is unfavorable.

    Supply Generation: Workshop tiers and production scheduling must support both military training and goods manufacturing demands of intensive tournament participation

    .

    Ancient Wonder Prioritization: Wonders that enhance tournament performance—Martial Monastery for combat, production-enhancing wonders for economic approaches—provide compounding benefits for league advancement

    .

    Strategic Participation Timing

    Optimal league advancement requires strategic timing of intensive participation efforts

    .

    Push Weeks vs. Maintenance Weeks: Some players alternate between “push weeks” of maximum effort for league advancement and “maintenance weeks” of moderate participation for resource recovery. This pacing prevents burnout while enabling progressive advancement.

    Event Coordination: Timing intensive league pushes to coincide with events that offer tournament-related bonuses or synergistic rewards maximizes effort efficiency.

    Real-Life Scheduling: Aligning intensive tournament weeks with periods of available playtime ensures that participation goals are achievable without creating stress or conflict with other obligations.

    Maintaining Elite League Status

    Diamond/Platinum League Challenges

    The highest leagues present unique challenges that require sustained excellence

    .

    Intense Competition: Elite leagues feature players with optimized cities, extensive experience, and dedicated participation. Maintaining standing requires consistent high-level performance.

    Resource Demands: Sustained elite league participation consumes substantial resources—troops, goods, supplies—requiring robust economic infrastructure and efficient replenishment systems.

    Time Investment: Elite leagues demand significant time investment for tournament participation, encounter resolution, and strategic optimization that may exceed casual player availability.

    Metagame Evolution: Elite competition drives continuous strategy evolution, requiring players to adapt approaches as the competitive meta develops and new optimization techniques emerge.

    Resource Management for Sustained Performance

    Maintaining elite league standing requires sophisticated resource management

    .

    Stockpile Maintenance: Maintaining substantial reserves of all resources—coins, supplies, goods, troops—ensures capability for intensive tournament weeks without depleting city operations.

    Production Scheduling: Optimizing workshop and manufactory production to replenish consumed resources between tournament weeks maintains readiness for sustained participation

    .

    Fellowship Support: Active fellowship trade networks provide resource flexibility, enabling rapid acquisition of needed materials through trade when personal stockpiles are insufficient.

    Recovery Periods: Building recovery periods into participation schedules allows resource regeneration and prevents the depletion spirals that force withdrawal from elite competition.

    Adaptation and Continuous Improvement

    Sustained elite league performance requires continuous adaptation and improvement

    .

    Meta-Game Awareness: Staying informed about evolving tournament strategies, efficient encounter resolution methods, and optimization techniques ensures competitive relevance.

    City Optimization: Continuously refining city layout, building levels, and Ancient Wonder selection to maximize tournament performance maintains competitive edge.

    Personal Skill Development: Improving personal gameplay skills—including combat tactics, negotiation efficiency, and time management—directly impacts tournament star generation.

    Technology and Research Priorities: Prioritizing research that enhances tournament capability—including squad size increases, unit improvements, and economic boosts—provides compounding advantages.

    Common League System Mistakes

    Participation Pattern Errors

    Suboptimal participation patterns undermine league advancement and maintenance

    .

    Inconsistent Engagement: Sporadic intensive participation followed by inactive weeks creates volatile league standing that prevents progressive advancement. Consistency outperforms sporadic intensity.

    Last-Minute Rushing: Attempting to accumulate sufficient stars in final tournament days often results in resource depletion, suboptimal encounter resolution, and disappointing results. Distributed effort across the week succeeds more reliably.

    Overextension: Pushing for leagues beyond current capability creates frustration, resource depletion, and potential demotion that damages morale and progression. Gradual advancement matching capability development sustains engagement.

    Resource Management Failures

    Poor resource management prevents sustained league performance

    .

    Depletion Without Recovery: Intensive tournament weeks that completely deplete resources without replenishment planning create inability to participate effectively in subsequent weeks, forcing league decline.

    Inefficient Spending: Using resources suboptimally—expensive negotiations when combat would suffice, or costly combat when catering is efficient—reduces total star generation per resource invested.

    Neglected Infrastructure: Failing to maintain economic infrastructure that supports tournament participation—workshops, manufactories, military buildings—gradually erodes capability relative to advancing competition.

    Strategic Misalignment

    Strategic errors in approach to leagues create unnecessary difficulties

    .

    Fellowship Conflict: Prioritizing individual league performance over fellowship needs can damage social relationships and reduce fellowship support that ultimately enables better individual performance.

    Method Rigidity: Refusing to adapt resolution methods—always fighting or always catering—regardless of encounter specifics reduces efficiency and star generation potential.

    Short-Term Thinking: Sacrificing long-term city development for immediate league performance creates capability gaps that eventually undermine competitive standing.

    Conclusion

    The League System in Elvenar transforms weekly tournament participation from a fellowship collective activity into an individual competitive journey that recognizes and rewards personal excellence

    . Through its tiered structure of Wood to Diamond leagues, the system creates appropriate competitive environments for players at all skill and dedication levels, while providing escalating rewards that justify the effort required for advancement.

    Success in the League System requires understanding its mechanics—from weekly cycles and star accumulation to promotion thresholds and reward structures—and developing strategies that optimize tournament performance within personal capability and time constraints

    . City development must specifically support tournament capability through appropriate military, economic, and infrastructure investment, while participation patterns must balance intensive push weeks with sustainable maintenance approaches.

    For competitive players, league advancement becomes a core Elvenar goal that provides long-term motivation, measurable progress, and prestigious recognition within the player community. The journey from Wood League beginner to Diamond League elite spans months or years of dedicated participation, representing one of Elvenar’s most challenging and rewarding achievements.

  • Manufactory Tiers in Elvenar: The Complete Production Guide

    Manufactory Tiers in Elvenar: The Complete Production Guide

    In the intricate economy of Elvenar, Manufactories serve as the industrial backbone of every thriving kingdom. These specialized buildings transform raw resources into the nine distinct goods types that fuel technological advancement, negotiation, and trade. Understanding the three-tier manufactory system—Basic, Refined, and Precious goods—along with the advanced Sentient and Ascended tiers that unlock in later chapters, is essential for efficient city development and sustainable resource management

    .

    The Three Basic Tiers: Foundation of Your Economy

    Elvenar’s goods system is organized into three fundamental tiers, each containing three distinct resource types that follow specific production and trading relationships:

    Tier 1 (Basic Goods) consists of Marble, Steel, and Planks. These foundational resources unlock earliest in your technological journey and remain relevant throughout your entire gameplay experience. Basic goods manufactories are the smallest, most space-efficient production facilities, making them ideal for early city layouts when expansion options remain limited

    .

    Tier 2 (Refined Goods) introduces Crystal, Scrolls, and Silk in the middle chapters of your progression. These goods require more complex production chains and larger manufactories, consuming more space and population while delivering higher-value outputs. The jump from Tier 1 to Tier 2 represents your city’s first significant industrial expansion

    .

    Tier 3 (Precious Goods) unlocks Elixir, Magic Dust, and Gems in later chapters. These premium resources demand the largest manufactories with substantial population requirements, but they become crucial for advanced technologies, high-level negotiations, and trading with other players. Precious goods manufactories represent significant city investments that must be carefully planned

    .

    The Boost System: Maximizing Production Efficiency

    The cornerstone of manufactory strategy revolves around boosted goods. When you establish your city, the game randomly assigns one boosted good from each tier—one Basic, one Refined, and one Precious. These boosted goods receive production bonuses based on collected relics, potentially reaching 700% increased output at maximum relic collection

    .

    This boost system fundamentally shapes your manufactory strategy. A player with boosted Planks, Crystal, and Magic Dust should focus exclusively on those three manufactories, using trading to acquire non-boosted goods. Building non-boosted manufactories wastes precious city space and population while delivering fractions of the production efficiency

    .

    The mathematics are stark: a boosted Steel manufactory might produce 3,000 units in three hours, while the same-level unboosted Planks manufactory produces merely 300 units

    . This 10:1 efficiency ratio makes specialization mandatory for competitive play.

    Manufactory Upgrades and Chapter Progression

    As you advance through Elvenar’s 22 chapters, manufactories unlock progressively higher upgrade levels. Each chapter typically introduces new upgrade technologies that improve production efficiency, though the relationship between chapter progression and manufactory efficiency is surprisingly complex

    .

    Early Chapter Efficiency (Chapters 1-5): Manufactories demonstrate consistent efficiency gains with each upgrade. A Level 6 manufactory in Chapter 2 significantly outperforms its Level 1 equivalent, justifying immediate upgrades upon technology unlock. During these formative chapters, building new manufactories and upgrading existing ones both represent sound investments

    .

    The Efficiency Plateau (Chapters 6-15): Community research reveals that manufactories experience efficiency fluctuations during middle chapters. While absolute production increases with each upgrade, the space, population, and culture requirements sometimes grow faster than output gains. Analysis suggests that manufactories occasionally reach “sweet spots” where delaying one chapter’s upgrade until supporting infrastructure (residences, culture buildings) improves can optimize overall city efficiency

    .

    Late Chapter Transformation (Chapters 16+): Advanced chapters introduce fundamental manufactory evolution. Chapter XII unlocks Sentient Goods—advanced versions of basic goods produced by manufactories upgraded to level 24 or higher. These Moonstone, Platinum, and Elven Tree Gum variants feature unique decay mechanics (10% daily conversion back to basic goods) and become essential for late-game technologies

    .

    Chapter XVIII introduces Ascended Manufactories, representing the pinnacle of goods production. These facilities produce Ascended Goods through entirely new mechanics, requiring dedicated research and substantial investment

    .

    Sentient Goods: The Tier 4 Evolution

    Starting from Chapter XII – The Elementals, your manufactories undergo their most significant transformation. Once upgraded to level 24 and beyond, manufactories gain the ability to produce Sentient Goods through modified production options

    .

    The production shift works as follows: 1-day and 2-day production options for regular goods are replaced with Sentient Goods production, while 3-hour and 9-hour options for standard goods remain available. This creates strategic flexibility—players can maintain standard goods production for trading and quests while dedicending longer cycles to Sentient accumulation

    .

    Sentient Goods follow a fixed transformation pattern based on your original boosted good:

    • MarbleMoonstone (boosted if your Basic boost is Planks)
    • SteelPlatinum (boosted if your Basic boost is Marble)
    • PlanksElven Tree Gum (boosted if your Basic boost is Steel)

    The decay mechanic adds management complexity: stored Sentient Goods lose 10% daily, converting 1:1 into their basic counterparts. This means 1,000 Moonstone becomes 900 Moonstone plus 100 Marble overnight. Unlike Mana or Seeds, Sentient Goods don’t vanish entirely, but efficient players develop consumption rhythms that minimize decay losses

    .

    Production Optimization Strategies

    Efficient manufactory management requires balancing multiple variables:

    Time Optimization: Manufactories offer four production durations—3 hours, 9 hours, 1 day, and 2 days (standard goods) or Sentient equivalents. The 3-hour option provides maximum efficiency for active players who can collect and restart frequently. Overnight or extended absences suit longer durations, though at reduced efficiency

    .

    Batch Production: The circle selection tool enables synchronized production across identical manufactories. However, manufactories only batch with others at the same upgrade level and star rating. This creates upgrade synchronization pressure—if you have six Planks manufactories at levels 4, 5, and 6, you must issue production commands separately for each pair, increasing micromanagement

    .

    Spell Enhancement: Magical Manufacturing spells boost manufactory output for 13 hours. Strategic timing maximizes returns—casting before collecting ready production applies the bonus retroactively, while casting before initiating new cycles ensures enhanced yields. Active players can achieve four 3-hour boosted cycles within a single spell duration

    .

    Space and Efficiency Mathematics

    Veteran players debate manufactory efficiency using sophisticated calculations that account for total city impact. A manufactory’s true “cost” includes not just its footprint, but supporting roads, required population (from residences), and necessary culture buildings

    .

    Analysis reveals that higher-level manufactories generally improve efficiency when supported by modern infrastructure. A Level 31 manufactory requires fewer total tiles (including supporting buildings) than multiple lower-level equivalents producing the same output. However, this efficiency assumes access to high-efficiency population sources (Magic Residences) and culture buildings (event structures)

    .

    The breakpoint varies by chapter and available support buildings. Players relying on standard residences and basic culture structures may find that manufactories from 1-2 chapters prior deliver optimal efficiency, while those with premium buildings benefit from immediate maximum upgrades

    .

    Trading and Economic Integration

    Manufactories don’t exist in isolation—they feed into Elvenar’s vibrant trading economy. The Trader building enables goods exchange with other players and the wholesaler, with upgrade levels unlocking new capabilities. Level 3 Trader unlocks Sentient Goods trading, essential for Chapter XII+ progression

    .

    Effective trading strategies leverage your boosted goods production to acquire non-boosted needs. A boosted Planks producer might trade surplus production for Marble and Steel, eliminating the need for inefficient unboosted manufactories. This specialization principle extends through all tiers—focus production on your three boosted goods, trade for everything else

    .

    Cross-tier trading follows established ratios (historically 1:4:16 for Tier 1:2:3), though these evolve with game updates. Understanding these ratios prevents unfavorable trades and maximizes the value of your boosted production

    .

    Common Manufactory Mistakes

    New players frequently undermine their economic potential through preventable errors:

    Building All Nine Manufactories: The impulse to produce every good type domestically wastes massive city space. With three boosted goods and active trading, six manufactories become unnecessary luxuries rather than necessities

    .

    Ignoring Upgrade Efficiency: Failing to research manufactory upgrades stalls production potential. Each chapter’s upgrade technology typically pays for itself through increased output, particularly when combined with improved supporting infrastructure.

    Neglecting Sentient Transition: Reaching Chapter XII without preparing level 24+ manufactories creates production bottlenecks. The shift to Sentient Goods production requires proactive upgrading well before the chapter unlock

    .

    Overlooking Decay Management: Sentient Goods’ 10% daily decay punishes hoarding. Efficient players maintain lean inventories, consuming Sentient Goods in technologies or trading them before decay accumulates

    .

    Conclusion

    Elvenar’s manufactory tier system provides a sophisticated economic progression that rewards strategic planning and specialization. From the humble Basic goods of early chapters through the transformative Sentient Goods of Elementals and the ultimate Ascended Goods of late-game chapters, your production infrastructure must evolve with your kingdom’s needs.

    The boost system creates clear optimization paths—identify your three boosted goods, maximize their production, and trade for everything else. Upgrade timing requires balancing absolute production gains against supporting infrastructure costs, with efficiency calculations guiding optimal decisions.

    Mastering manufactory tiers transforms resource scarcity into abundance, enabling rapid technological advancement, generous fellowship contributions, and tournament dominance. In Elvenar’s magical economy, efficient production isn’t just about having resources—it’s about having the right resources, at the right time, in the right quantities.

  • Evolution Recipes in Elvenar: Crafting Your Path to Powerful Evolving Buildings

    Evolution Recipes in Elvenar: Crafting Your Path to Powerful Evolving Buildings

    In the ever-expanding crafting ecosystem of Elvenar, Evolution Recipes represent some of the most sought-after and strategically significant options available in the Magic Academy. These specialized recipes allow players to acquire Artifacts—the magical keys that transform ordinary buildings into extraordinary, evolving powerhouses. Understanding how to obtain, craft, and deploy these evolution materials separates casual city builders from strategic masterminds who dominate tournaments and Spire ascents

    .

    The Foundation: Evolving Buildings and Artifacts

    Evolving Buildings stand as Elvenar’s most dynamic structure type, capable of growing from humble Stage 1 foundations into magnificent Stage 10 marvels that provide escalating bonuses. Unlike standard buildings with fixed outputs, evolving structures increase their population, culture, and production values with each evolution stage. Some, like the Fire Phoenix, Storm Phoenix, and Aureate Phoenix, even function as pets that provide additional combat bonuses when fed

    .

    The evolution mechanism requires specific Artifacts—magical items unique to each building type. A Fire Phoenix demands Phoenix Artifacts, while a Mermaid’s Paradise requires Mermaid Artifacts. These artifacts serve as the fuel for progression, with each stage requiring an increasing number of artifacts to unlock

    .

    Historically, artifacts were event-exclusive rewards, obtainable only during specific seasonal events. Players who missed the Evolution of the Phoenix event, for example, had no path to acquire Fire Phoenix artifacts or evolve their buildings. This exclusivity created “fear of missing out” (FOMO) and frustrated players who joined after event conclusion or couldn’t complete event objectives

    .

    The Crafting Revolution: Artifacts in the Magic Academy

    The introduction of Evolution Recipes fundamentally transformed artifact accessibility. Now, players can craft artifacts directly through the Magic Academy, creating alternative progression paths independent of event timing. This change democratized evolving building advancement while introducing new strategic considerations

    .

    Evolution Recipes follow standardized costs: typically 3 Blueprints plus Combining Catalysts and Spell Fragments. The exact resource requirements scale with your chapter progress, ensuring costs remain relevant to your economic capacity. A Chapter 5 player faces modest fragment demands, while a Chapter 20 player invests substantially more for the same artifact

    .

    The recipe pool includes artifacts for multiple evolving building sets: Phoenix artifacts (Fire, Storm, and Aureate Phoenixes), Stonehenge artifacts, Mermaid artifacts, Bear artifacts, and numerous others introduced through seasonal events. Each recipe appears randomly in the Magic Academy’s rotation, competing for limited crafting slots against combat boosts, enchantments, and other valuable options

    .

    The Recipe Pool Challenge: Scarcity in Abundance

    While evolution recipes provide artifact access, their random rotation system creates significant frustration. The Magic Academy refreshes every six hours with randomly selected options from hundreds of potential recipes. With artifact recipes, combat boost buildings, pet food, enchantments, and countless other options competing for slots, desired evolution materials may not appear for weeks

    .

    Community reports document extreme variance—some players encounter multiple Phoenix artifact recipes weekly, while others wait seven weeks or longer for a single Fire Phoenix artifact offer. This randomness isn’t malfunction but intentional design, creating scarcity that encourages frequent engagement and, potentially, diamond expenditure for recipe refreshes

    .

    The recipe pool dilution worsens with each new evolving building introduction. When Bears debuted, their artifacts joined Phoenix, Stonehenge, and Mermaid recipes in the already-crowded pool. Unlike some craftable buildings that disappear from rotation once owned, artifact recipes persist indefinitely, meaning players with fully evolved Phoenixes still see Phoenix artifact recipes blocking more relevant options

    .

    Strategic Evolution Crafting

    Effective evolution recipe management requires balancing immediate needs against long-term collection:

    Prioritize Incomplete Sets: Focus crafting on evolving buildings you’ve started but haven’t completed. A Stage 7 Fire Phoenix deserves artifact investment more than starting a new Stonehenge at Stage 1. Partial evolution represents sunk costs that yield maximum returns when finished

    .

    Evaluate Building Utility: Not all evolving buildings merit equal investment. The Fire Phoenix provides universal combat damage bonuses applicable to all unit types, making it universally valuable. More specialized buildings like the Mermaid’s Paradise offer goods production that may overlap with your existing infrastructure. Assess your city’s specific needs before committing scarce catalysts

    .

    Maintain Catalyst Reserves: Evolution recipes require Combining Catalysts—the rarest crafting resource. Spire participation provides primary catalyst income, with weekly climbs generating 3-5 catalysts depending on progress depth. Hoarding catalysts for high-value evolution opportunities prevents wasteful expenditure on marginal recipes

    .

    Consider Event Timing: If the Autumn Zodiac event approaches with its powerful evolving building rewards, conserving catalysts for post-event artifact crafting may prove wiser than immediate Phoenix evolution. Event buildings typically provide 10-12 artifacts during the event itself, potentially completing lower-stage evolutions without crafting investment

    .

    The Tome of Evolution: Advanced Crafting Options

    Beyond individual artifact recipes, Elvenar introduced sophisticated evolution mechanics through Tome of Evolution recipes. These advanced options allow players to exchange sets of evolution tokens for selection chests, providing flexibility in artifact acquisition

    .

    The Tome system enables conversion between artifact types—trading surplus Phoenix artifacts for scarce Bear artifacts, for example. This exchange mechanism helps players with mature, fully-evolved buildings redirect resources toward newer acquisitions. However, conversion recipes carry premium costs and require careful evaluation of exchange ratios

    .

    Recent updates introduced Artifact Powers, allowing old artifacts (including those won in the Spire) to convert into sorceries with multiple artifact options. This system enables players to transform unwanted artifacts into selection opportunities, though with power costs that limit frequency

    .

    Spire Integration: Alternative Artifact Sources

    While crafting provides reliable artifact access, the Spire of Eternity offers direct artifact rewards that complement evolution recipes. Weekly Spire climbs can yield artifact chests containing 5-10 artifacts for specific evolving buildings, potentially bypassing crafting entirely for lucky climbers

    .

    The Spire’s random artifact distribution creates interesting strategic tension. You might receive 10 Stonehenge artifacts while desperately seeking Phoenix materials. This variance encourages maintaining diverse evolving building projects rather than hyper-focusing on single structures, as any artifact type may suddenly become available

    .

    High-level Spire participation (Gold or Silver finishes) dramatically increases artifact income, potentially providing 20-30 artifacts monthly across various building types. For dedicated players, Spire rewards may satisfy evolution needs without significant crafting investment, preserving catalysts for combat boosts and other priorities

    .

    Recipe Pool Manipulation Strategies

    Desperate players employ various techniques to improve evolution recipe appearance odds:

    Inventory Management: Crafting and retaining certain buildings removes them from future rotation. The craftable Chess Set, for example, stops appearing once crafted and stored in inventory. While the expanding recipe pool limits this strategy’s effectiveness, maintaining lean building inventories theoretically improves odds for desired options

    .

    Timing Adjustment: Using diamonds to immediately refresh recipes or temporarily disconnecting the Magic Academy from roads (pausing its function) shifts refresh cycles. These techniques help align recipe availability with your active hours rather than sleep periods, though they require resource investment or temporary production loss

    .

    Selective Crafting: Crafting marginal recipes simply to clear them from rotation represents expensive but effective pool management. Some players craft unwanted Festival Merchants or obsolete enchantments to eliminate these options, hoping to force evolution recipes into subsequent rotations. This strategy demands substantial catalyst reserves and carries no guarantee of success

    .

    Economic Considerations: Cost vs. Value

    Evolution crafting requires significant resource investment that must yield proportional returns:

    Direct Costs: A typical artifact recipe costs 3 Blueprints, 5 Combining Catalysts, and thousands of Spell Fragments. For players with fully upgraded Magic Academies (level 5), fragment costs remain manageable through regular disenchantment and Spire participation. Catalysts represent the true bottleneck, with each artifact potentially requiring a week of Spire climbing to replace

    .

    Opportunity Costs: Every catalyst spent on evolution recipes cannot fund combat boost buildings like Enlightened Light Range or Magnificent Mage Multiplier. During tournament weeks, these combat boosts may provide greater immediate value than gradual building evolution. Balancing long-term infrastructure against short-term performance defines elite crafting strategy

    .

    Evolution Stage Efficiency: Artifacts yield diminishing returns at higher stages. Evolving from Stage 1 to 2 requires minimal artifacts and provides substantial percentage improvements. Advancing from Stage 9 to 10 demands significantly more artifacts for marginal gains. Cost-conscious players often stop evolution at Stage 8-9, redirecting resources to new building starts rather than perfecting existing structures

    .

    Common Evolution Mistakes

    New and experienced players alike sabotage their evolution potential through preventable errors:

    Impulsive Crafting: Using catalysts on available artifacts simply because they appear, regardless of building utility or current stage. A Stage 9 Fire Phoenix deserves priority over starting a Stage 1 Mermaid’s Paradise, but random recipe appearance tempts poor prioritization

    .

    Neglecting Event Participation: Seasonal events provide the most efficient artifact acquisition. Players who skip events or fail to complete artifact milestones create unnecessary crafting burdens. Event participation should be the primary artifact source, with crafting serving as gap-filling rather than primary progression

    .

    Artifact Hoarding Without Evolution: Collecting artifacts without the corresponding building base wastes inventory space and crafting opportunities. Ensure you possess or can craft the evolving building foundation before committing catalysts to artifact acquisition

    .

    Ignoring Recipe Pool Pollution: Allowing inventory to fill with obsolete craftable buildings increases recipe pool clutter, theoretically reducing evolution recipe frequency. Regular inventory audits and strategic disenchantment maintain lean, efficient crafting environments

    .

    The Future of Evolution Crafting

    Elvenar’s evolution system continues expanding with each seasonal event introducing new buildings and artifacts. Community feedback consistently requests deterministic recipe selection—directly purchasing desired artifacts rather than hoping for random rotation. Developers maintain that randomness preserves engagement and economic balance, though quality-of-life improvements like dedicated evolution recipe slots remain popular suggestions

    .

    Recent implementations of artifact conversion and Tome of Evolution mechanics suggest gradual movement toward flexibility. Players can increasingly redirect unwanted artifacts toward desired alternatives, reducing the pain of unfavorable random distribution. These systems, while imperfect, represent evolutionary steps toward player-friendly artifact management

    .

    Conclusion

    Evolution Recipes in Elvenar’s Magic Academy transformed evolving buildings from event-exclusive luxuries into achievable long-term goals. Through strategic crafting, Spire participation, and resource management, players can construct magnificent Stage 10 structures regardless of event timing or historical participation.

    Success requires patience—accepting that artifact recipes appear unpredictably, that catalysts accumulate gradually, and that evolution progresses incrementally. The most effective players balance immediate needs against future possibilities, craft selectively rather than impulsively, and maintain diverse evolving building portfolios that capitalize on whatever artifacts random fortune provides.

    In Elvenar’s magical economy, evolution recipes represent the bridge between chance and choice, between missing out and catching up. Master this bridge, and your city will flourish with ever-growing, ever-powerful evolving wonders.

  • Catering vs Fighting in Elvenar: The Strategic Guide to Diplomacy and Warfare

    Catering vs Fighting in Elvenar: The Strategic Guide to Diplomacy and Warfare

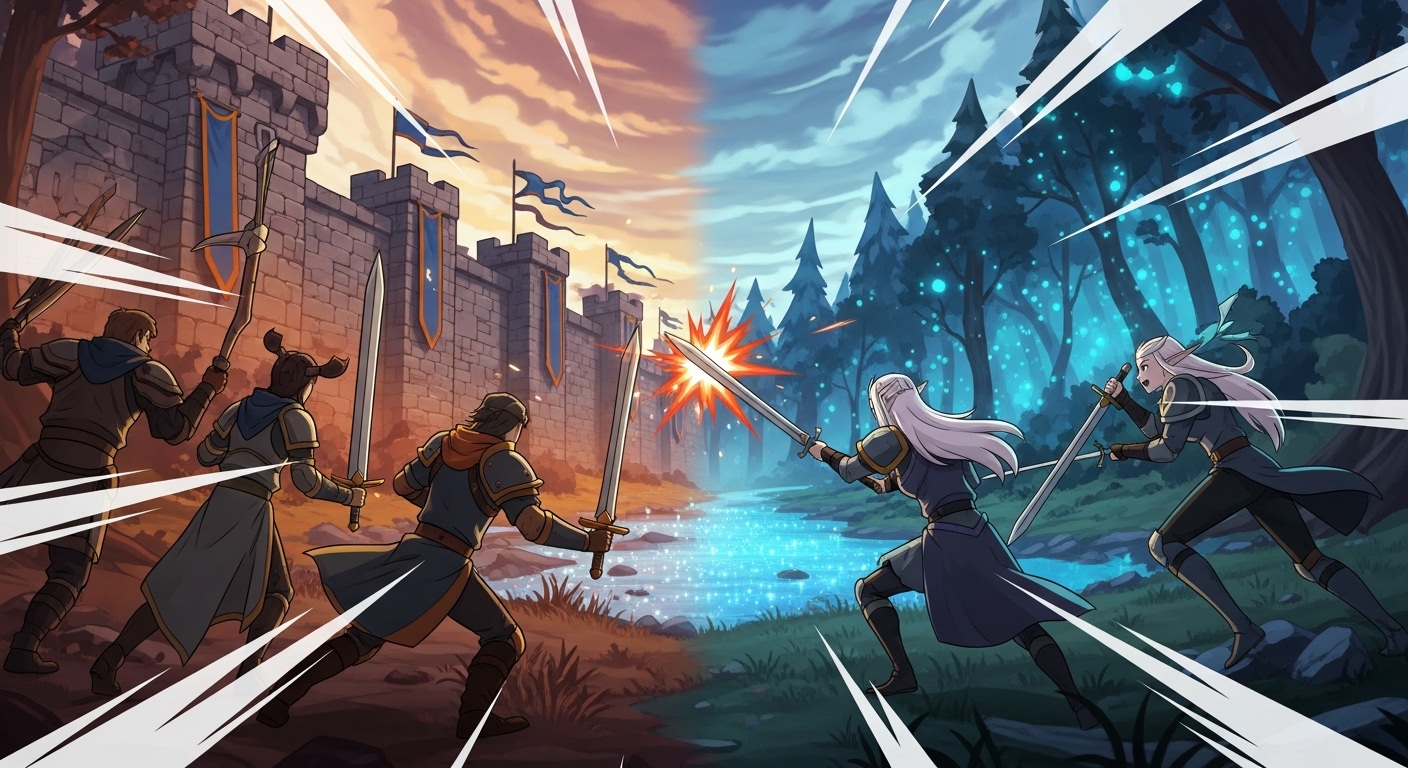
    Introduction to Dual Pathways of Conquest

    Elvenar presents players with a fundamental strategic choice that shapes their entire gameplay experience: the decision between catering (negotiation) and fighting (combat) as primary methods of province expansion and encounter resolution

    . This browser-based fantasy city-building MMO, developed by InnoGames and released in 2015, distinguishes itself from other strategy games through this meaningful choice between peaceful diplomacy and military conquest

    . Unlike games that force players down a single predetermined path, Elvenar allows individuals to develop their civilization according to their personal preferences, playstyle, and strategic priorities.

    The catering versus fighting dynamic permeates every aspect of Elvenar’s world map gameplay, from the initial province scouts to late-game tournament participation and event quest completion . Each approach offers distinct advantages and disadvantages, requiring different city infrastructure, resource management strategies, and long-term planning. Understanding these differences and knowing when to employ each method—or how to balance both—is essential for any player seeking to maximize their civilization’s growth and prosperity.

    This comprehensive analysis explores the intricacies of both catering and fighting in Elvenar, examining their mechanical foundations, strategic implications, economic considerations, and the hybrid approaches that often yield optimal results. Whether you prefer the merchant’s path of peaceful trade or the warlord’s way of military dominance, this guide provides the knowledge necessary to make informed decisions about your civilization’s expansion strategy.

    Understanding Catering: The Diplomatic Path

    The Mechanics of Negotiation

    Catering in Elvenar refers to the negotiation system that allows players to resolve province encounters through resource exchange rather than military engagement

    . When a player chooses to cater an encounter, they enter a diplomatic interface where they must offer specific combinations of manufactured goods to satisfy the encounter’s requirements. Success grants control of the encounter point without risking military losses or requiring troop training.

    The negotiation system operates on a goods-based economy where each encounter demands specific quantities of manufactured resources

    . Early game negotiations might require basic goods like Marble, Steel, and Planks in modest amounts—perhaps a few hundred units per encounter. As players advance through chapters and their squad size increases, catering costs escalate dramatically, with late-game negotiations potentially demanding thousands or even tens of thousands of units across multiple good types

    .

    A distinctive feature of Elvenar’s negotiation system is the mystery good mechanic, where certain required goods are initially hidden behind question marks

    . Players must deduce these hidden requirements through logical reasoning, encounter context clues, or iterative attempts where failed negotiations provide feedback about which offered goods were correct. This puzzle element adds strategic depth to catering, transforming simple resource exchange into an engaging deduction challenge.

    Each successful negotiation consumes the offered goods from the player’s inventory and grants immediate control of the encounter point

    . Unlike combat, which might result in troop losses requiring replacement time and resources, catering provides instant resolution—assuming the player possesses sufficient goods stockpiles. This immediacy makes catering particularly valuable for time-sensitive objectives or when rapid province conquest is prioritized over resource efficiency.

    Infrastructure Requirements for Catering

    Building a catering-capable city requires substantial investment in manufacturing infrastructure and resource management systems

    . Unlike combat-focused cities that prioritize barracks and military buildings, catering-oriented civilizations emphasize goods production above all else.

    Manufacturing Facilities: A catering-capable city maintains high-level manufactories for all good types, not merely those receiving production boosts from collected relics

    . While boosted goods production provides economic advantages, relying entirely on trade for non-boosted goods creates vulnerability when negotiation demands require specific resources. Diversified production ensures self-sufficiency for any encounter requirement.

    Workshop Efficiency: Since workshops produce the supplies necessary for all manufacturing activities, catering cities prioritize workshop upgrades and efficient production scheduling. Running optimal production cycles—often longer-duration runs that maximize output per supply invested—generates the goods volume necessary for extensive negotiation

    .

    Storage Capacity: The Main Hall serves as the primary storage facility for both coins and goods, and its upgrade level determines maximum stockpile capacity

    . Catering cities require higher-level Main Halls to accommodate the substantial goods reserves needed for advanced negotiations. Hitting storage caps wastes production potential and limits negotiation readiness.

    Trade Network Integration: Active fellowship participation and trade network engagement multiply catering capability

    . Even with diversified production, maintaining stockpiles of all goods for high-volume catering requires trade relationships that convert surplus boosted goods into needed non-boosted materials. A strong trade network effectively extends your production capacity beyond city limits.

    Economic Considerations of Catering

    The economic profile of catering differs fundamentally from combat in both resource types consumed and long-term sustainability

    . Understanding these economic characteristics helps players assess whether catering aligns with their strategic goals.

    Immediate Resource Consumption: Catering consumes manufactured goods immediately and permanently. Unlike combat losses, which can be replaced through training given sufficient time and resources, catered goods are gone forever. This consumption pattern means heavy catering depletes resources that could otherwise fund research, building upgrades, or fellowship trades.

    Predictable Costs: Catering costs are known quantities before commitment. Players can see exactly which goods and quantities are required (or deduce hidden requirements through attempts), allowing precise cost-benefit analysis

    . This predictability contrasts with combat, where random elements and tactical execution introduce outcome uncertainty.

    Scaling Expenses: Catering costs increase exponentially with chapter progression and squad size growth

    . Early game catering is economically trivial, while late-game catering can strain even robust economies. This scaling means that catering strategies viable in early chapters may become unsustainable without corresponding economic development.

    Opportunity Cost Implications: Every good spent on catering represents a good not spent on research, construction, or trade. Heavy catering can stall technological advancement or infrastructure development by diverting resources from these permanent improvements

    . The opportunity cost of catering must be weighed against its immediate benefits.

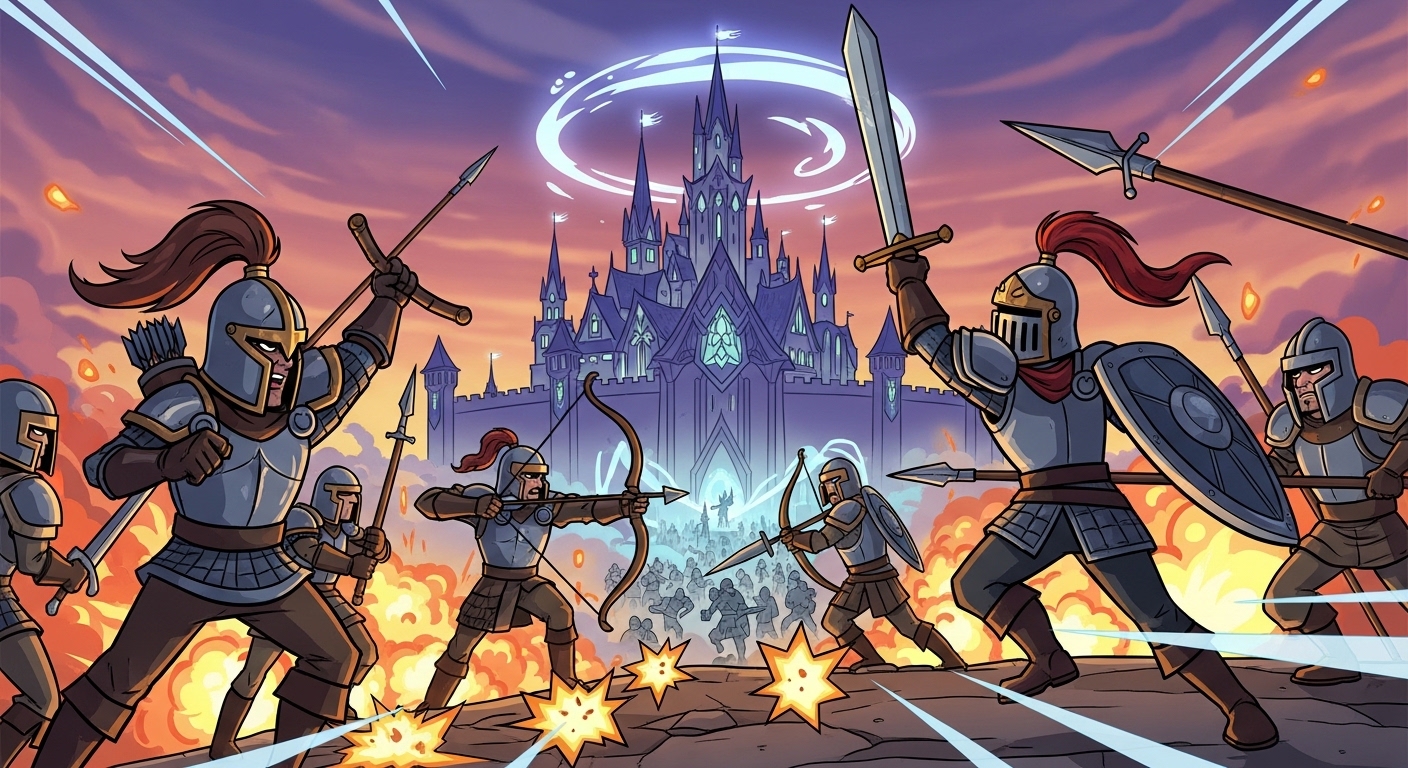
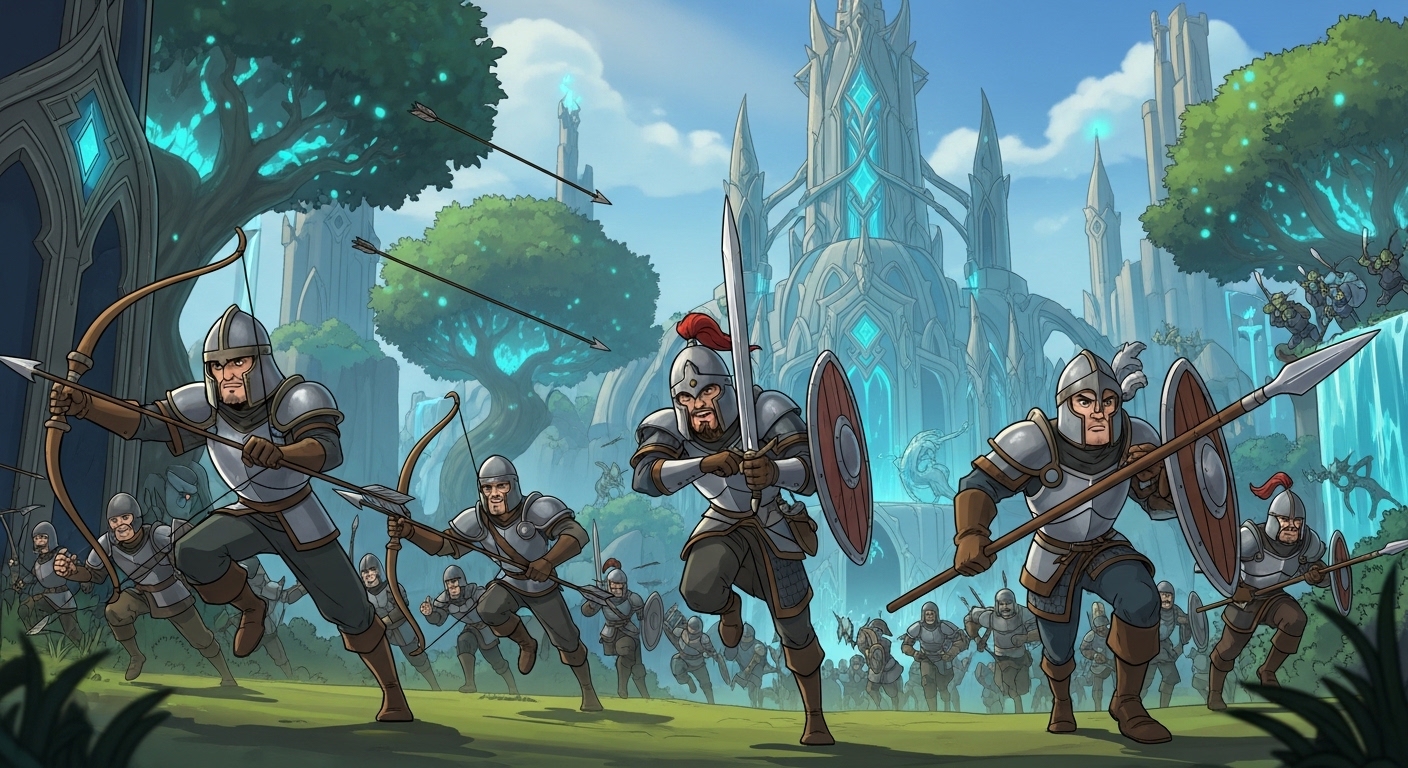
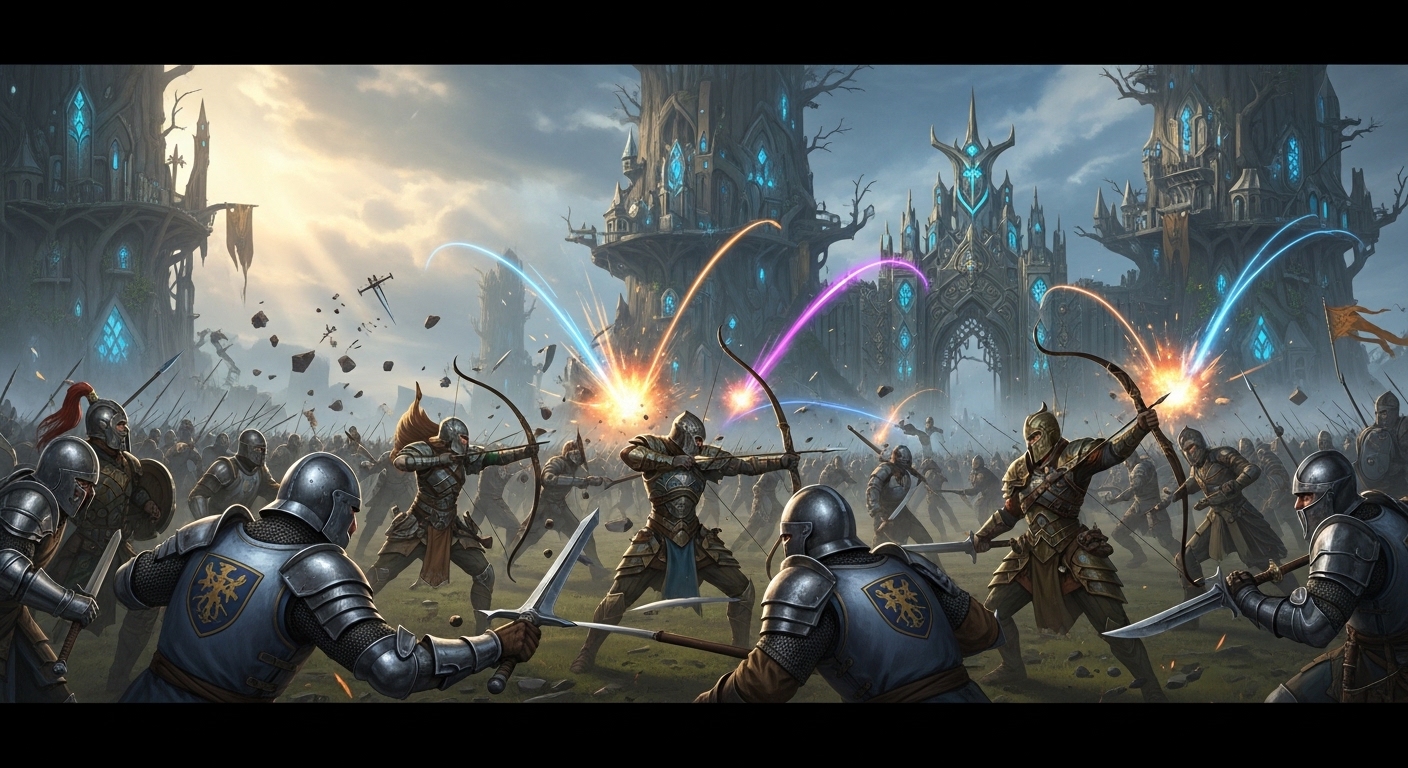
    Understanding Fighting: The Military Path

    The Combat System Foundation

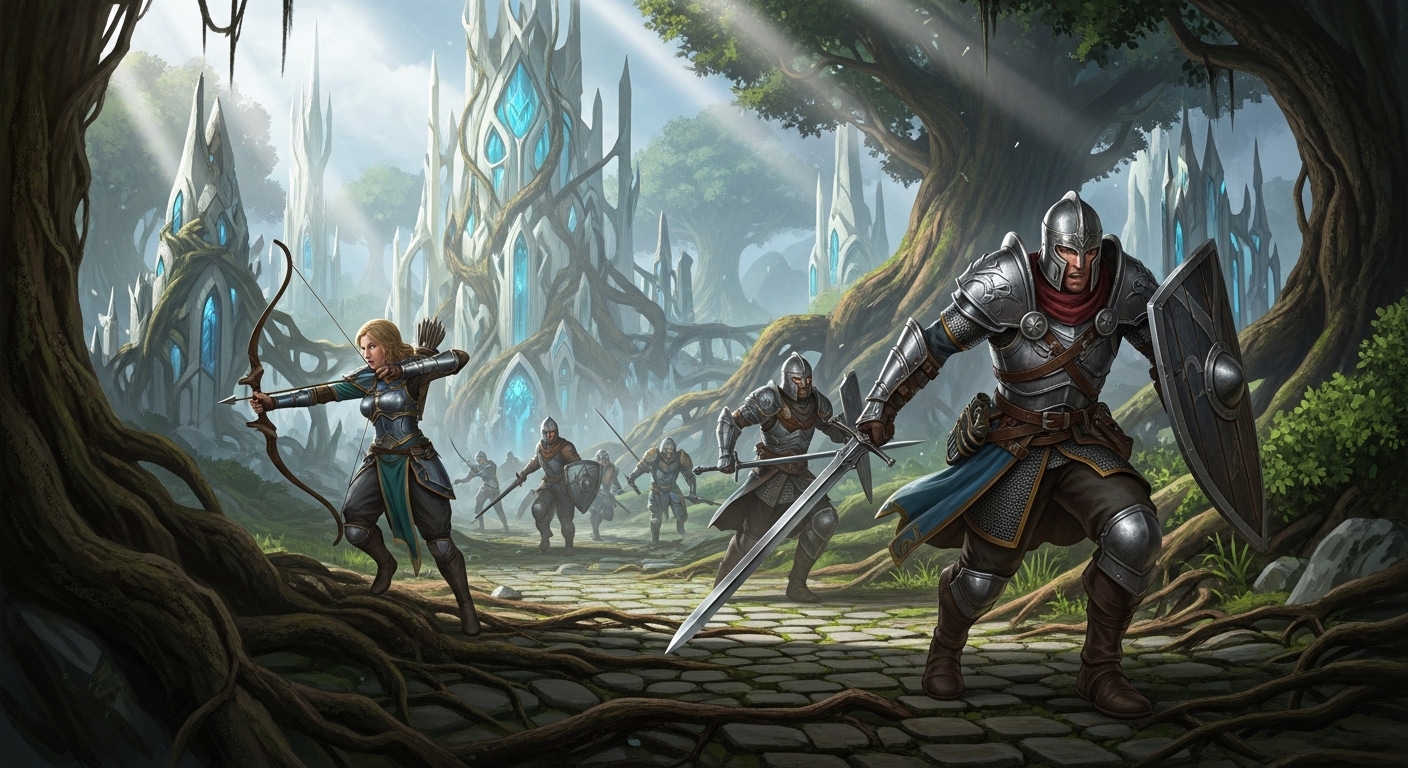
    Fighting in Elvenar involves turn-based tactical combat where players control military units against NPC forces on hexagonal battlefields

    . The combat system employs rock-paper-scissors mechanics where different unit types excel against specific opponents, creating strategic depth through army composition, positioning, and tactical execution

    .

    The five primary unit categories—Light Melee, Heavy Melee, Light Ranged, Heavy Ranged, and Mage units—form the foundation of combat strategy

    . Each category possesses specific strengths and weaknesses: Light Melee excels against Heavy Ranged but struggles against Heavy Melee; Light Ranged devastates Heavy Melee but falls to Heavy Ranged; and so forth through the complex web of relationships that govern battlefield effectiveness.

    Combat encounters begin with army deployment, where players arrange their forces within designated starting zones

    . Initiative order, determined by unit speed statistics, dictates action sequence throughout combat rounds. High-initiative units act early, potentially eliminating threats before they can respond or seizing advantageous positions that shape subsequent turns.

    Battlefield terrain significantly impacts combat outcomes, with forests, hills, and structures providing defensive bonuses, chokepoints controlling movement, and elevation affecting range and damage

    . Mastering terrain usage allows inferior forces to defeat superior numbers through positional advantage and tactical sophistication.

    Military Infrastructure Investment

    Building a combat-capable city requires dedicated infrastructure that competes with economic and cultural development for limited space and resources

    . The extent of military investment determines combat effectiveness and shapes overall city strategy.

    Barracks Development: The Barracks trains core military units and serves as the foundation of army production. Upgrading barracks unlocks advanced unit tiers with improved statistics and abilities. The Needles of the Tempest Ancient Wonder accelerates training, reducing recovery time between battles

    .

    Mercenary Camp Access: Beyond standard barracks units, Mercenary Camps provide specialized forces that fill tactical niches or complement standard army compositions. These facilities expand strategic options and allow adaptation to specific encounter types.

    Squad Size Research: Military technology research increases squad size—the number of soldiers represented by each unit token

    . Larger squads dramatically enhance combat effectiveness, making military research essential for fighting-focused players. This research investment represents a significant Knowledge Point commitment that could otherwise advance economic or cultural technologies.

    Training Grounds and Doctrines: Advanced military buildings unlock unit enhancements or special capabilities that modify combat approaches. These investments allow specialization in specific tactics—speed-focused light melee armies, defensive heavy formations, or ranged bombardment strategies.

    Ancient Wonder Priorities: Military-focused Ancient Wonders like the Martial Monastery (increasing unit health) and Needles of the Tempest (accelerating training) provide permanent combat enhancements

    . Selecting these wonders over economic or cultural alternatives commits the city to military development paths.

    Combat Economics and Sustainability

    The economic profile of combat differs significantly from catering, involving different resource types, recovery dynamics, and risk patterns

    .

    Troop Replacement Costs: Combat losses require replacement through training, consuming time and resources. The cost per unit varies by type and tier, with advanced units demanding substantial investment. Unlike catering’s immediate consumption, combat losses create ongoing replacement obligations that can strain training capacity during intensive warfare periods.

    Risk and Uncertainty: Combat outcomes involve tactical execution, random elements, and opponent variability that create outcome uncertainty

    . Even favorable matchups can result in unexpected losses through poor positioning, initiative disadvantages, or chance. This uncertainty contrasts with catering’s predictable resource costs.

    No Permanent Resource Loss: Victory without losses preserves all resources, making efficient combat economically superior to catering. Perfect combat execution achieves objectives without consuming manufactured goods, preserving these resources for research, construction, or trade

    . However, achieving consistent perfect execution requires substantial skill and appropriate army composition.

    Scaling and Tournament Impact: Combat difficulty scales with squad size and conquered provinces, similar to catering costs

    . However, excessive province conquest increases tournament difficulty, potentially making tournament participation harder regardless of whether those provinces were conquered through combat or catering. This scaling affects both strategies equally in tournament contexts.

    Comparative Analysis: When to Choose Each Approach

    Situational Decision Factors

    The optimal choice between catering and fighting depends on multiple situational factors that vary by encounter, resource availability, and strategic priorities

    .

    Resource Availability: When specific negotiation goods are abundant and not needed for other priorities, catering offers efficient resolution. Conversely, when goods are scarce or essential for research and development, fighting preserves these resources despite its risks and time requirements

    .

    Time Sensitivity: Catering provides immediate resolution assuming goods availability, while combat requires army deployment, battle execution, and potential recovery time. For time-sensitive objectives—tournament deadlines, event quest completions, or rapid expansion goals—catering’s speed may justify its resource costs

    .

    Army Strength: Players with powerful armies, advanced unit technologies, and substantial squad sizes often find combat more efficient than catering. A single victorious battle might cost less than the massive goods expenditure required for negotiation, particularly for hard encounters. Weak armies may find catering the only viable option for difficult provinces

    .

    Encounter Difficulty Assessment: Individual encounters vary in catering costs and combat difficulty. Some encounters are “easy” for one approach and “hard” for the other. Scouting information about enemy compositions and catering requirements allows informed decisions about optimal resolution methods for each encounter

    .

    Long-Term Strategic Position: Players prioritizing rapid technological advancement might prefer fighting to preserve goods for research. Those focusing on immediate territory expansion might accept catering costs for speed. Tournament-oriented players must balance both approaches based on weekly tournament types and their current military readiness.

    Early Game vs. Late Game Considerations

    The viability and optimal balance of catering versus fighting evolves significantly throughout Elvenar’s chapter progression

    .

    Early Game (Chapters 1-5): In early chapters, catering is extremely cheap and combat capabilities are limited by small squad sizes and basic unit types. Most players find catering the default choice for early expansion, as the goods costs are negligible and combat risks outweigh benefits. Military infrastructure investment is minimal, with resources directed toward economic development instead

    .

    Mid Game (Chapters 6-12): As squad sizes grow and advanced units unlock, combat becomes increasingly viable. Catering costs escalate but remain manageable for most encounters. This phase often sees players developing hybrid approaches, using combat for favorable matchups and catering for difficult encounters or when army recovery is impractical. Military infrastructure becomes a meaningful investment priority

    .

    Late Game (Chapters 13+): Late-game catering costs become substantial, often requiring thousands of goods per encounter. Meanwhile, advanced military units, substantial squad sizes, and Ancient Wonder enhancements make combat highly efficient for prepared players. Many late-game players shift toward fighting as their primary approach, reserving catering for specific situations where combat is disadvantageous or impossible

    .

    Fellowship and Social Considerations

    Fellowship dynamics significantly influence catering versus fighting decisions through trade networks, collective strategies, and social expectations

    .

    Trade Network Support: Active fellowships with robust trade networks enhance catering viability by providing access to diverse goods. Players in strong fellowships can maintain catering strategies even with limited personal production by trading surplus for needed negotiation materials. Isolated players or those in inactive fellowships may find fighting more sustainable due to self-sufficiency requirements

    .

    Fellowship Goods Strategies: Some fellowships coordinate goods production, with members specializing in specific types and trading for others. This coordination allows collective catering capability that exceeds individual capacity. Fighting-oriented fellowships might prioritize military coordination and tournament performance over goods trading.

    Collective Tournament Approaches: Tournament participation often requires fellowship coordination, and collective strategies might emphasize fighting or catering based on group capabilities. Fellowships with many combat-focused members might prioritize military tournament approaches, while goods-oriented fellowships might leverage catering for consistent participation.

    Hybrid Strategies: The Optimal Balance

    The Case for Strategic Flexibility

    Pure dedication to either catering or fighting rarely represents optimal play in Elvenar. Instead, most successful players develop hybrid capabilities that allow method selection based on specific situation assessment

    .

    Capability Maintenance: Maintaining both goods production infrastructure and military capability provides optionality. Even fighting-focused players benefit from goods stockpiles for emergencies, tournament variations, or unexpected negotiation requirements. Similarly, catering-oriented players benefit from basic combat capability for easy encounters where fighting would be more efficient than goods expenditure

    .

    Encounter-Specific Optimization: Hybrid approaches allow encounter-by-encounter optimization. Easy combat matchups are fought; expensive or risky encounters are catered. This selective approach maximizes resource efficiency and minimizes unnecessary losses or expenditures.

    Adaptation to Game Changes: Elvenar receives regular updates, event modifications, and balance adjustments that might shift optimal strategies. Players capable of both approaches adapt more easily to meta changes than those committed exclusively to one path.

    Resource Allocation for Dual Development

    Developing both catering and fighting capabilities requires thoughtful resource allocation that balances competing priorities without crippling either approach.

    Infrastructure Balance: Cities need sufficient manufacturing for meaningful catering and adequate military buildings for combat capability. This often means accepting that neither system will be maximally optimized compared to specialized cities, but gaining strategic flexibility in exchange.

    Research Prioritization: The technology tree requires choices between economic, military, and cultural advancements. Hybrid players often prioritize squad size research (enhancing combat) and goods production technologies (supporting catering) while accepting slower progress in other areas.

    Ancient Wonder Selection: Wonder choices significantly impact hybrid capability. Some wonders support both approaches—economic wonders that boost goods production also support catering, while certain military wonders have secondary benefits. Selecting wonders with dual utility or maintaining a mix of economic and military wonders enables balanced development

    .

    Situational Decision Frameworks

    Experienced players develop mental frameworks for rapid catering versus fighting decisions that optimize their hybrid capabilities.

    Cost Threshold Analysis: Establish personal thresholds for acceptable catering costs based on current goods stockpiles and production rates. Encounters below this threshold are catered; those above are evaluated for combat viability. These thresholds adjust as chapter progression changes economic scales.

    Combat Probability Assessment: Develop ability to quickly assess combat difficulty based on enemy composition, terrain, and personal army capabilities. High-probability victories are fought; uncertain or risky encounters are catered or deferred.

    Time Value Evaluation: Consider current time availability and urgency. Quick catering resolves encounters immediately; combat requires engagement time and potential recovery periods. When time is scarce, catering efficiency improves relative to fighting.

    Common Mistakes and Optimization Strategies

    Catering-Specific Errors

    Players prioritizing catering often fall into predictable traps that undermine their effectiveness

    .

    Over-Catering: Defaulting to catering for every encounter regardless of cost creates unsustainable resource drain. Some encounters are objectively better suited for combat due to their catering costs relative to combat difficulty. Selective catering preserves resources for situations where it provides genuine advantage.

    Insufficient Goods Diversification: Relying entirely on boosted goods and trade creates vulnerability when negotiation demands require specific non-boosted materials in large quantities. Maintaining at least minimal production of all goods ensures self-sufficiency for unexpected requirements.

    Neglecting Military Development: Completely ignoring combat capability creates dependency on catering for all expansion, including encounters where fighting would be trivially easy. Basic military development handles simple encounters efficiently, preserving goods for challenging situations.

    Poor Fellowship Integration: Solo catering without trade network support requires massive personal production infrastructure that could otherwise fund city development. Active fellowship participation multiplies catering capability through trade access.

    Fighting-Specific Errors

    Combat-focused players similarly encounter common pitfalls that limit their effectiveness

    .

    Under-Investing in Goods Production: Neglecting goods production entirely creates dependency on combat for all expansion. When facing unfavorable matchups, army depletion, or time constraints, inability to cater creates bottlenecks and stalled progression.

    Ignoring Squad Size Research: Failing to prioritize squad size research creates persistent combat disadvantages that compound over time. Even with tactical skill, small squads struggle against appropriately-sized enemy forces in advanced provinces.

    Over-Aggressive Expansion: Conquering provinces too rapidly through combat increases tournament difficulty and creates army recovery cycles that strain training infrastructure. Measured expansion balances territorial gains with sustainable military operations and tournament performance preservation

    .

    Tactical Inflexibility: Committing to specific army compositions or tactics without adaptation to encounter specifics leads to unnecessary losses. Combat effectiveness requires flexibility and willingness to adjust approaches based on enemy composition and battlefield conditions.

    Economic Management Mistakes

    Both approaches suffer from poor economic management that undermines strategic goals.

    Opportunity Cost Blindness: Failing to consider what resources could alternatively fund—research, upgrades, trade—leads to inefficient allocation. Every catered good or training resource represents foregone alternatives that might provide greater long-term benefit.

    Storage Limitations: Inadequate Main Hall levels create production caps that waste manufacturing potential. When goods production hits storage limits, continuing production wastes resources; when catering demands exceed capacity, opportunities are missed.

    Short-Term Optimization: Prioritizing immediate encounter resolution over long-term development creates cycles of reactive play rather than strategic growth. Sometimes accepting temporary slower progress enables superior long-term capability.

    Conclusion

    The catering versus fighting dynamic in Elvenar represents one of the game’s most compelling strategic dimensions, offering players genuine choice in how they build and expand their civilizations

    . Neither approach holds universal superiority; instead, optimal strategy depends on individual preferences, city development priorities, fellowship dynamics, and specific situational factors.

    Catering offers predictability, immediacy, and accessibility, particularly for early-game players or those preferring economic development over military management

    . Its resource costs create economic trade-offs that must be balanced against other development priorities, and its viability scales with goods production infrastructure and trade network strength

    .

    Fighting provides potential efficiency, resource preservation, and tactical engagement for those who enjoy turn-based strategy combat

    . Its effectiveness scales with military infrastructure investment, squad size development, and player tactical skill. Combat risks and uncertainties create different challenges than catering’s predictable costs, and its sustainability depends on training capacity and recovery management.

    For most players, the optimal path lies not in exclusive commitment to either approach but in developing hybrid capabilities that provide strategic flexibility

    . The ability to choose catering or fighting based on encounter specifics, resource availability, time constraints, and personal preference creates the most robust and adaptable civilization. This flexibility allows response to Elvenar’s diverse challenges—from routine province conquest to time-sensitive tournaments to unexpected event requirements—with appropriate and efficient methods.