Tag: #buildyourcity #virtualcity #empiregame #citystrategy

  • The Complete Elvenar Events Strategy Guide: Maximizing Rewards and Efficiency

    The Complete Elvenar Events Strategy Guide: Maximizing Rewards and Efficiency

    In Elvenar, supplies are one of the most important resources for building, upgrading, and progressing through the game. While coins are used alongside supplies in many actions, it is often supplies that players run out of first. Without a steady supply production system, your city’s growth can slow down dramatically.

    This comprehensive guide will teach you everything you need to know about producing, managing, and maximizing supplies in Elvenar, whether you are a beginner or an advanced player.


    What Are Supplies in Elvenar?

    Supplies are a core resource used for:

    • Constructing and upgrading buildings
    • Producing goods in workshops
    • Completing certain quests
    • Supporting city development

    Unlike coins, which come mainly from residences, supplies are produced through workshops and manufacturing buildings. Managing supplies properly is essential for smooth progression.


    Why Supplies Are So Important

    Many players underestimate the importance of supplies early on, but they quickly become a bottleneck.

    Key Reasons:

    • Almost every building upgrade requires supplies
    • Advanced research consumes large amounts of supplies
    • Goods production depends heavily on supply availability

    Without enough supplies, your entire progression slows down—even if you have plenty of coins.


    1. Build and Upgrade Workshops

    Workshops are your main source of supplies.

    Tips for Workshops:

    • Build multiple workshops early in the game
    • Upgrade workshops regularly instead of building too many
    • Keep them active at all times

    Higher-level workshops produce significantly more supplies, making upgrades more efficient than expansion.


    2. Use Production Cycles Wisely

    Choosing the right production cycle is key to maximizing supply output.

    Production Strategy:

    • Short cycles (5m–15m): Best when you are actively playing
    • Medium cycles (1h–3h): Good for casual play
    • Long cycles (6h–24h): Ideal for overnight or offline time

    Matching production cycles with your schedule ensures that your workshops are never idle.


    3. Keep Your City “Enthusiastic”

    Culture directly affects supply production.

    Why It Matters:

    • An “Enthusiastic” city gives a 25% production bonus
    • Applies to both coins and supplies

    How to Maintain It:

    • Build culture buildings and decorations
    • Avoid dropping to “Content” or lower

    This bonus alone can significantly boost your supply output without extra effort.


    4. Optimize City Layout for Efficiency

    A well-organized city increases production efficiency.

    Layout Tips:

    • Place workshops close to roads
    • Avoid wasting space with unnecessary decorations
    • Use upgraded buildings instead of many small ones

    Efficient use of space allows you to fit more productive buildings in your city.


    5. Balance Between Supplies and Coins

    A common mistake is focusing too much on one resource.

    Balance Strategy:

    • Maintain a healthy ratio of residences and workshops
    • Adjust production based on your needs

    For example:

    • If you’re low on supplies → build/upgrade workshops
    • If you’re low on coins → upgrade residences

    Balance ensures smooth progression without delays.


    6. Use Event Buildings for Supply Boost

    Event buildings are one of the best ways to increase supply production.

    Benefits:

    • Higher production than regular buildings
    • Additional bonuses like culture or knowledge points
    • Save space while increasing efficiency

    Participating in events can give you powerful supply-producing structures that outperform standard workshops.


    7. Take Advantage of Ancient Wonders

    Ancient Wonders provide powerful bonuses that can improve your supply production.

    Key Benefits:

    • Boost resource production
    • Provide passive bonuses
    • Improve overall efficiency

    Investing in the right Ancient Wonders can make a huge difference in long-term supply farming.


    8. Complete Quests for Extra Supplies

    Quests are an easy way to gain additional supplies.

    Types of Quests:

    • Story quests
    • Daily quests
    • Event quests

    Completing these regularly gives you extra resources without additional effort.


    9. Use Boosts and Spells

    Spells and boosts can temporarily increase your supply production.

    Examples:

    • Production boosts
    • Event-based bonuses

    Use these strategically when you need a large amount of supplies quickly.


    10. Trade to Save Supplies

    Trading can reduce the need for excessive supply production.

    Smart Trading Tips:

    • Trade goods instead of producing everything
    • Use marketplace offers wisely
    • Avoid overpaying

    Trading efficiently helps you save supplies for more important tasks.


    11. Expand Your City Carefully

    Expansion gives you more space, but it should be done wisely.

    Tips:

    • Don’t expand too quickly without resources
    • Use new space for high-production buildings
    • Focus on efficiency, not just size

    A well-managed expansion supports better supply production.


    12. Avoid Idle Time

    Idle workshops mean lost supplies.

    How to Avoid It:

    • Log in regularly
    • Set long production cycles before logging off
    • Plan your production ahead

    Consistency is key to maintaining steady supply income.


    13. Advanced Supply Strategies

    Once you master the basics, you can improve further with advanced techniques.

    Advanced Tips:

    • Replace old buildings with high-efficiency event buildings
    • Use optimized city layouts from experienced players
    • Focus on upgrading instead of expanding

    Advanced players prioritize efficiency per tile, not just total production.


    14. Common Mistakes to Avoid

    Avoiding mistakes can significantly improve your supply production.

    Mistakes:

    • Ignoring culture bonus
    • Letting workshops stay idle
    • Expanding too fast
    • Not upgrading buildings
    • Overproducing unnecessary goods

    Fixing these mistakes can instantly improve your gameplay.


    15. Daily Routine for Maximum Supplies

    Here’s a simple daily routine to follow:

    1. Log in and collect all supplies
    2. Start new production cycles
    3. Complete quests
    4. Trade excess goods
    5. Check culture level
    6. Upgrade buildings if possible

    Following this routine ensures consistent growth.


    Conclusion

    Supplies are one of the most critical resources in Elvenar, and managing them efficiently is essential for long-term success. By building and upgrading workshops, maintaining an enthusiastic city, using event buildings, and avoiding idle time, you can significantly increase your supply production.

  • The Complete Elvenar Events Strategy Guide: Maximizing Rewards and Efficiency

    The Complete Elvenar Events Strategy Guide: Maximizing Rewards and Efficiency

    Introduction

    Events represent the lifeblood of accelerated progression in Elvenar, offering exclusive evolving buildings, powerful artifacts, and rare resources unavailable through standard gameplay. Unlike the steady grind of daily city management, events provide concentrated opportunities to dramatically enhance your settlement’s capabilities—but only for players who understand how to optimize their participation. Whether you’re a newcomer struggling to complete your first event or a veteran seeking to maximize artifact collection, this guide covers everything from basic quest management to advanced chest selection strategies that separate casual participants from elite reward collectors.

    Understanding Event Structure

    The Three Pillar System

    Modern Elvenar events operate on three interconnected systems that provide currency for progression

    :

    Sequential Quests: A fixed series of 70+ quests that advance the event narrative and provide substantial currency rewards. These must be completed in order and typically include tasks like “Produce X goods,” “Collect Y supplies,” or “Win Z tournament encounters”

    .

    Daily Quests: New quests appearing every 24 hours throughout the event duration, offering additional currency and often featuring more flexible completion options than sequential quests

    .

    Event Currency Drops: Periodic appearances of event-specific currency (Dwarven Chips, magical ingredients, etc.) around your city that must be manually collected

    .

    Understanding how these systems interact is essential for maximizing rewards. Sequential quests provide the bulk of early currency, daily quests offer sustained income, and currency drops provide the incremental gains necessary for top-tier rewards.

    Currency Collection Optimization

    The 4-Hour Collection Cycle

    Event currency drops appear at approximately 45-minute intervals with a maximum of 6 visible on your map simultaneously

    . This creates a mathematical ceiling: logging in every 4 hours allows collection of 24 currency units per day (6 drops × 4 collections), totaling 504 currency over a 21-day event

    .

    Strategic scheduling:

    • Morning collection (upon waking)
    • Midday collection (lunch break)
    • Evening collection (after work)
    • Night collection (before bed)

    Missing collections directly reduces your final currency total and reward potential. For players seeking maximum evolution artifacts, consistent 4-hour logging is non-negotiable

    .

    The Ashen Phoenix Advantage

    The Ashen Phoenix evolving building, available from the Magic Academy, provides +1 event currency to every quest reward when placed in your city

    . Over 70+ sequential quests and 21 daily quests, this bonus accumulates to 90+ additional currency—potentially the difference between 8 and 9 artifacts. Players serious about event participation should prioritize crafting this building even at level 0.

    Quest Management Strategies

    Preparation is Paramount

    Successful event completion begins before the event starts. Experienced players maintain “event preparation infrastructure”

    :

    Reserve Space for Temporary Buildings: Keep 2-3 level 1 workshops and manufactories available for quest completion. These “event shanties” allow quest fulfillment without disrupting your main production chains

    .

    Scout But Don’t Complete: Leave 2-3 provinces scouted but uncompleted in each ring for emergency “Gain Relics” or “Solve Encounters” quests

    . These provide quick completion options when other quest requirements prove difficult.

    Stockpile Resources: Maintain reserves of coins, supplies, and goods above normal levels. Events frequently require sudden large expenditures, and running short can stall progression for hours or days.

    The Quest List Advantage

    Event quests follow predictable patterns, and accessing the full quest list before starting provides massive strategic advantages

    . Resources like ElvenGems, iDavis, and community spreadsheets provide complete quest sequences, allowing you to:

    • Work Ahead: Prepare production queues for upcoming “Collect X” quests
    • Avoid Traps: Prevent premature collection that blocks subsequent quests (e.g., collecting all supplies when the next quest requires supply collection)
    • Optimize Timing: Delay certain actions until they appear as quest requirements

    Critical example: If quest 15 requires “Collect 4 Wooden Chests” and quest 16 requires “Collect 3 Wooden Chests,” collecting all 7 at once completes both efficiently. Collecting 4 for quest 15, then collecting 3 randomly before reaching quest 16, wastes potential progress

    .

    And/Or Quest Optimization

    Many event quests offer “and/or” completion options—fulfill either condition or a combination

    . These provide flexibility when you’re resource-constrained:

    • Tournament vs. Province Encounters: Tournament encounters often provide multiple relics, making them efficient for “Gain Relics” quests. However, if tournament tents are exhausted, province encounters or crafting become alternatives .
    • Fighting vs. Negotiating: Choose based on your current troop status and goods reserves. Early chapters often favor fighting; later chapters may require negotiation.

    Chest Selection Strategy

    Efficiency Mathematics

    Event progression typically involves selecting from multiple chests/hoops/options, each costing different currency amounts and providing varying progress toward grand prizes

    . The fundamental calculation is currency cost per progress point:

    • Chest A: 45 currency for 2 progress = 22.5 currency per point
    • Chest B: 56 currency for 2 progress = 28 currency per point
    • Chest C: 94 currency for 3 progress = 31.3 currency per point

    While Chest C might offer attractive secondary rewards (daily prizes, instant troops, etc.), Chest A provides the most efficient progress toward evolution artifacts. Players prioritizing maximum artifacts should almost always select the most efficient progress option

    .

    The MinMax Game Calculator

    For players seeking mathematical optimization, external tools like the MinMax Game event calculator allow custom strategy modeling

    . These tools account for your specific reward priorities—whether you value daily prizes, grand prizes, or specific building types—and generate optimal chest selection strategies accordingly.

    Evolution Building Strategy

    The 9-Artifact Goal

    Maximum evolution buildings require 9 artifacts to reach full potential

    . Achieving this requires:

    • Completing all sequential quests
    • Completing all daily quests
    • Collecting approximately 80% of available currency drops
    • Strategic chest selection favoring progress efficiency

    Falling short of 9 artifacts means either accepting a suboptimal building or using Royal Restoration spells to compensate—resources better spent elsewhere.

    Building Selection Priorities

    Not all evolution buildings are created equal. When events offer multiple building choices (like the Tournament of Magic’s three-discipline system)

    , evaluate based on:

    Your City’s Needs: Population-starved cities should prioritize population buildings; culture-poor cities need culture generators; military-focused players want troop producers.

    Chapter Scaling: Buildings that improve with chapter advancement provide long-term value; static buildings become obsolete quickly

    .

    Set Bonuses: Some event buildings form sets with powerful synergy effects. Completing partial sets from previous events may dictate current selection priorities.

    Advanced Event Strategies

    The Trading Post Investment

    For players seeking maximum efficiency, purchasing the Trading Post building (available in some events) provides bonus currency on day one of future events

    . This represents a long-term investment: spending currency now for increased production in subsequent events. The break-even calculation depends on your expected event participation over the next 6-12 months.

    Pet Food and Military Building Timing

    For fighters, event timing creates opportunities to stretch premium consumables across multiple tournaments. Military boost buildings last 5 days; placing them strategically allows coverage of two consecutive tournaments

    . Combine with Polar Bear (cooldown reduction) and Timewarp (tournament acceleration) for maximum efficiency

    .

    Crafting Integration

    The Magic Academy’s crafting system intersects with events in several ways:

    • Spell Fragments: Disenchanting unwanted event buildings provides fragments for crafting Combining Catalysts
    • Event Currency: Some crafting recipes offer event currency as rewards
    • Pre-Event Preparation: Crafting Moonstone Library sets before events provides steady spell fragment income for quest completion

    Common Event Mistakes

    1. Rushing Through Quests: Completing all sequential quests in the first two days leaves you dependent solely on daily quests and currency drops for the remaining weeks. Pace yourself to maintain steady progression .
    2. Disenchanting Prematurely: While disenchanting unwanted buildings provides spell fragments, early-game players often regret losing buildings that would have helped city development. Only disenchant when you’re certain you won’t use the building .
    3. Ignoring Email Verification: Confirming your email at event start provides free currency. Many players miss this easy bonus .
    4. Neglecting Daily Quest Timing: Daily quests appear on a 24-hour timer from event start, not from your last completion. Delaying day-one completion pushes your entire schedule back .
    5. Cross-Tier Trading for Quests: When quests require non-boosted goods, resist the temptation to use the Wholesaler’s 50% penalty trades. Instead, post fair trades with your fellowship or discovered neighbors .

    Conclusion

    Mastering Elvenar events requires understanding the interplay between quest completion, currency collection, and reward optimization. The player who plans ahead using quest lists, maintains consistent 4-hour collection schedules, selects chests based on efficiency mathematics, and prepares infrastructure before events begin will consistently secure maximum evolution artifacts and build a city of legendary power.

  • The Complete Elvenar Army Training Guide: Building Your Military Might

    The Complete Elvenar Army Training Guide: Building Your Military Might

    Introduction

    Military strength in Elvenar isn’t just about having troops—it’s about understanding the intricate systems that govern unit production, training efficiency, and squad composition. Whether you’re preparing for your first tournament, struggling with Spire of Eternity encounters, or simply seeking to reduce negotiation costs in province expansion, mastering army training fundamentals will transform your gameplay experience. This guide covers everything from basic barracks mechanics to advanced Ancient Wonder strategies that separate casual militaries from elite fighting forces capable of conquering the toughest challenges Elvenar offers.

    Understanding Military Infrastructure

    The Three Military Buildings

    Elvenar features three distinct buildings for unit production, each unlocking at different progression points

    :

    Barracks: Available from the start, producing five unique units per race (Light Melee, Light Ranged, Mage, Heavy Melee, Heavy Ranged). These are your “generalist” troops—versatile but not specialized against specific enemy types

    .

    Training Grounds: Unlocked in Chapter 2, offering ten shared units between races. These troops specialize against specific enemy types and become essential for advanced combat

    .

    Mercenary Camp: Available from the Fairies chapter (Chapter 9), providing another ten shared units with different specializations than Training Grounds troops

    .

    All three buildings share a unified production queue, meaning you must balance training across building types rather than running them independently

    .

    Barracks Mechanics and Upgrades

    The Barracks serves as your primary training facility, with mechanics that significantly impact your military efficiency. Each upgrade reduces training time and can increase available training slots up to a maximum of five slots

    .

    Training Slots: The base training size per slot is 6 weight units. Different unit types have different weights—an Axe Barbarian weighs 1, while a Paladin weighs 6

    . This means one slot trains six Axe Barbarians or just one Paladin, creating strategic decisions about unit composition versus training speed.

    Collection Requirement: Unlike automatic production, you must manually collect trained units by clicking the army icon above the Barracks

    . This icon appears when the first slot completes, indicating availability for new training while subsequent slots continue. Failure to collect blocks further production, making regular check-ins essential for maximum efficiency.

    Training Size vs. Training Speed: The Core Strategic Decision

    The fundamental tension in army training involves choosing between two improvement paths: increasing training size (more troops per slot) or increasing training speed (faster completion)

    .

    Training Size Increasers

    Armories: These buildings increase the base training size of slots across all military buildings. More armories mean larger squads per training cycle

    .

    Ancient Wonders:

    • Shrine of Shrewdy Shrooms: Increases training size based on total armory levels in your city. More effective with 5-6+ maxed armories .
    • Dwarven Bulwark: Increases training size based on world map squad size. More powerful for players with extensive province completion and squad size upgrades .

    Training Speed Increasers

    Barracks Upgrades: Each level reduces base training time

    .

    Ancient Wonders:

    • Needles of the Tempest: Speeds up Barracks training specifically .
    • Victory Springs: Accelerates Training Grounds production .
    • Flying Academy: Enhances Mercenary Camp training speed .

    Finding Your Balance

    The optimal configuration depends entirely on your play schedule. A player checking every two hours benefits more from speed enhancements that allow frequent queue reloading. A daily player needs extended training times—10-12 hours across five slots—to maintain overnight production

    .

    Critical benchmark: If your total training time across five slots falls below your longest absence period (typically overnight sleep), you’re losing production capacity. Aim for training queues that match or exceed your offline periods

    .

    Unit Types and Training Priorities

    Base Race Units (Barracks)

    Each race begins with five unit types following standard military roles

    :

    Light Melee: Basic close combat with good HP and damage. Humans favor offense (Axe Barbarians), while Elves balance offense and defense (Sword Dancers)

    .

    Light Ranged: High damage, low HP ranged attackers. Essential for eliminating threats before they reach your lines.

    Mage: Support units with special abilities—weak individually but capable of modifying enemy attributes (reducing attack or defense for subsequent rounds)

    .

    Heavy Melee: Extreme HP, low damage tanks designed to absorb punishment.

    Heavy Ranged: Specialized ranged with protective capabilities against Light Ranged counterattacks

    .

    Shared Units (Training Grounds and Mercenary Camp)

    These buildings provide specialized units that excel against specific enemy types

    :

    • Cerberus/Dogs: Specialized against Mages
    • Rangers: Superior Light Ranged with extra movement and Strike Back ability
    • Orc Warriors: Devastating against Light Melee
    • Vallorian Guards: Heavy Melee specialists against Heavy Ranged
    • Mortars/Frogs: Heavy Ranged with extreme range advantages

    The key distinction: Barracks troops serve as generalists, while Training Grounds and Mercenary Camp troops provide specialized counters. Experienced fighters maintain diverse armies rather than focusing exclusively on one building’s output

    .

    Advanced Training Strategies

    The Brown Bear Strategy

    The Brown Bear evolving building represents one of the most powerful training accelerators available. When fed pet food, it provides massive training speed bonuses that can dramatically increase your troop replacement rate

    . Players serious about military dominance prioritize feeding their Brown Bear before intensive tournament or Spire sessions.

    Power of Provision Integration

    While primarily a supply-boosting spell, Power of Provision indirectly supports military training by reducing supply constraints. Since training consumes substantial supplies, maintaining abundant supply reserves through enchanted workshops enables continuous military production without resource bottlenecks

    .

    Quest Cycling for Supplemental Troops

    Repeatable quests occasionally offer military unit rewards. While not a primary training method, cycling through declinable quests to target troop rewards can provide emergency reserves or specialized units outside your normal production focus

    .

    Squad Size and Scaling Considerations

    As you progress through chapters and research Squad Size Upgrades, your battlefield presence increases—but so does enemy strength

    . This scaling creates the paradoxical situation where advancing actually makes combat more challenging in relative terms.

    Training Implications: Larger squad sizes require more troops to fill slots completely. A player with 12-unit base squads needs twice as many troops per slot as someone with 6-unit squads. This scaling necessitates corresponding increases in training infrastructure—more armories, higher-level military buildings, and wonder investments—to maintain combat effectiveness

    .

    Efficiency Warning: Some experienced players note that smaller, less-developed cities sometimes perform better in Spire and tournaments because the scaling works in their favor. The “lean and mean” approach—minimizing unnecessary expansions and wonders—can paradoxically create more efficient military operations

    .

    Training Cost Management

    Supply Requirements

    Training troops consumes substantial supplies, creating competition with other city functions. Advanced players balance military production against goods manufacturing and building upgrades by

    :

    • Maintaining dedicated supply production (workshops, Prosperity Towers)
    • Using Power of Provision spells during intensive training periods
    • Stockpiling supply instants from events and crafting for emergency troop replacement

    The “Army Camp” Interface

    The Army Camp displays your available squads across all unit types. Understanding this interface helps prevent training mistakes—producing units you don’t need while lacking critical types for upcoming encounters

    .

    Common Training Mistakes

    1. Single-Building Focus: Training exclusively from Barracks while ignoring Training Grounds and Mercenary Camp specializations limits combat effectiveness against diverse enemies .
    2. Insufficient Queue Length: Allowing training times to drop below offline periods wastes overnight production capacity .
    3. Neglecting Collection: Failing to collect completed training blocks further production and wastes time.
    4. Over-Expansion: Excessive city expansions and Ancient Wonders increase squad size requirements without corresponding training infrastructure, making battles disproportionately difficult .
    5. Ignoring Unit Abilities: Training units without understanding their special abilities (initiative values, movement ranges, attack bonuses) leads to poor battlefield deployment .

    Conclusion

    Army training in Elvenar represents a complex optimization puzzle balancing time, resources, and strategic priorities. The player who masters training size versus speed calculations, maintains diverse unit portfolios across all three military buildings, and scales infrastructure appropriately with chapter advancement will find themselves capable of tackling tournaments, Spire encounters, and province conquests with confidence.

    Remember that military strength serves your broader city goals—whether reducing goods costs through fighting rather than negotiating, earning tournament rewards for city development, or simply enjoying the tactical combat system. Invest in your training infrastructure wisely, feed that Brown Bear, and watch your army transform from a ragtag militia into an elite fighting force capable of meeting any challenge the world of Elvenar presents.

  • The Ultimate Elvenar Mana Mastery Guide: From Scarcity to Abundance

    The Ultimate Elvenar Mana Mastery Guide: From Scarcity to Abundance

    Mana represents one of Elvenar’s most transformative resources, fundamentally altering your gameplay experience from the moment you enter the Wood Elves chapter. This magical energy powers advanced technologies, fuels guest race settlements, and becomes increasingly critical as your civilization progresses. Mastering mana production, storage, and consumption separates thriving cities from those perpetually starved of magical potential. This comprehensive guide reveals every strategy for transforming mana from a frustrating limitation into a powerful engine of growth.

    Understanding Mana Fundamentals

    Mana enters your civilization in Chapter 9 (Wood Elves), marking a dramatic shift in resource management

    . Unlike coins or supplies, mana exhibits unique decay mechanics—specifically, you lose 10% of your total stored mana every day around 3-4 AM server time

    . This decay functions as a “soft cap” preventing infinite hoarding, forcing active management rather than passive accumulation

    .

    Your Main Hall serves as mana’s storage vessel, but capacity remains limited until you upgrade through subsequent chapters

    . This constraint creates strategic tension: producing more mana than you can spend or store results in waste through decay, while underproduction stalls chapter progression.

    The production-consumption balance determines your success. As one experienced player notes, “If you spend faster than you earn you are going to struggle”

    . Successful mana management requires measuring actual production rates against consumption needs, then adjusting your infrastructure accordingly.

    Strategy 1: Building Your Mana Foundation – Weeping Willows and Beyond

    Weeping Willows serve as your introductory mana producers upon entering Wood Elves. These 5×5 culture buildings provide 4,480 mana every 24 hours (179 mana per square) while delivering substantial culture bonuses (3,500 points)

    . However, their large footprint creates spatial challenges, particularly for players who’ve optimized cities without large-culture-building zones

    .

    Optimal Willow Placement: Build 7-8 Weeping Willows by the time you reach Main Hall upgrade research, continuing expansion beyond this minimum

    . Some players successfully operate 12-13 willows through the chapter, though 15+ becomes reasonable for rapid progression

    . Space constraints often force difficult decisions between willow density and other city functions.

    The Willow Efficiency Paradox: While willows provide excellent culture, their mana efficiency lags behind alternatives. At Chapter 9 levels, willows generate 7.47 mana per square compared to Festival Merchants’ 18.75

    . This efficiency gap drives advanced players toward alternative sources, though willows remain viable for culture-starved cities.

    Road Connection Requirements: Unlike standard cultural buildings, mana-producing structures require road connections

    . This fundamentally alters city planning, forcing road networks into previously optimized layouts. Plan extensive road reconfiguration when entering Wood Elves to accommodate these new infrastructure demands.

    Strategy 2: Festival Merchants and Crafted Alternatives

    The Magic Academy’s crafting system introduces superior mana production through Festival Merchants and Mana Sawmills. These crafted buildings dramatically outperform chapter-specific structures, becoming essential for competitive players

    .

    Festival Merchant Excellence: These 4×3 buildings produce 5,400 mana every 12 hours (with early collection at 6 hours), delivering 450 mana per square—2.5x more efficient than Weeping Willows

    . The trade-off involves reduced culture (660 versus 3,500), but this becomes manageable through other cultural sources

    .

    Mana Sawmill Viability: At 2×4 producing 2,880 mana every 24 hours (360 mana per square), sawmills offer intermediate efficiency with smaller footprints than willows

    . Their 6-hour full production cycle provides flexibility for players with irregular collection schedules

    .

    Crafting Consistency: Check your Magic Academy daily for these recipes. Their appearance remains random, requiring patience and consistent monitoring. Once crafted, these buildings serve through multiple chapters unless upgraded with Royal Restoration spells (which convert them to seed production in later chapters)

    .

    Strategy 3: Event Buildings and Evolution Structures

    Special events provide the most mana-efficient buildings available, often exceeding crafted alternatives by significant margins. Active event participation becomes mandatory for endgame mana dominance.

    High-Efficiency Event Prizes: The Magical Mana Hut (2×2, 2,200 mana/24h = 550 mana/square), Pond of Autumn (2×2, 1,800/24h = 450/square), and Black Lotus (2×2, 1,440/24h = 360/square) represent exceptional value

    . The Magical Mana Hut particularly stands out, exceeding even Festival Merchant efficiency in half the space.

    Set Building Synergies: The Moonstone Gate, Mana Plant, and Gum Tree combination creates the ultimate mana production system when placed touching each other

    . These Spire of Eternity rewards can exceed 1,000 mana per square at higher chapters, with easy upgrade paths requiring only 1 Royal Restoration each

    . Prioritize these combinations whenever available.

    Evolution Building Potential: Many evolving buildings from previous chapters begin producing mana when upgraded to Wood Elves level using Royal Restorations

    . Before discarding old event buildings, verify their upgraded production profiles—what provided coins in earlier chapters might generate substantial mana now.

    Wood Ghost Housing Micro-Strategy: These 1×1 culture buildings from the “Greetings, Housings, and a Well” technology provide 50 mana every 10 hours

    . While individually modest, filling road ends, corner gaps, and small spaces with these structures accumulates significant production. One player describes backing large buildings off roads by one square specifically to create space for these mini-producers

    .

    Strategy 4: Ancient Wonders – Monumental Mana Solutions

    Ancient Wonders provide endgame mana solutions that transcend conventional building limitations. These massive investments yield exponential returns for dedicated players.

    Dragon Abbey: Widely considered the premier mana Ancient Wonder, Dragon Abbey instantly provides mana every time you cast an enchantment spell

    . At level 13, one player reports receiving 11,300 mana per spell cast

    . With hundreds of spells potentially stockpiled, this creates “mana on demand” capable of funding massive research or settlement projects instantly

    .

    Dragon Abbey Strategy: Accumulate spells through consistent play, then cast them strategically when large mana expenditures are required. Some players maintain 100+ days of culture boosts across all buildings through continuous Enchanted Enthusiasm casting, simultaneously gaining mana and production bonuses

    . This approach effectively converts time and spell inventory into unlimited mana potential.

    Maze of the Dark Matter: This Sorcerers & Dragons chapter wonder reduces mana decay, functioning as a storage capacity expander rather than direct producer

    . However, many experienced players consider it inferior to Dragon Abbey’s active generation model, particularly given the knowledge point investment required for meaningful impact

    .

    Enar’s Embassy: Providing mana based on scouting and tournament points, this wonder suits active world-map expanders

    . At level 7, one player receives 45,500 mana per scout, making it viable for aggressive province completion strategies

    . However, tournament point mechanics have reduced its relative value as shard acquisition became easier

    .

    Strategy 5: Guest Race Space Optimization

    The most sophisticated mana strategy involves repurposing guest race settlement space for temporary mana production, then transitioning these resources into chapter progression.

    The Jump-Start Technique: When entering a new chapter, sell off previous guest race buildings gradually, using returned resources to construct maximum mana producers in the freed space

    . For Wood Elves, fill Orc settlement space with Weeping Willows before needing it for Forest Fabricators and Grafting Sites. As guest race buildings require that space, sell willows individually to fund new construction

    .

    Sorcerers & Dragons Transition: Arcane Libraries replace Willows in this chapter, offering superior mana efficiency (though less culture)

    . Continue the guest race space strategy: fill cleared Orc/Wood Elf space with libraries, then sell as needed for S&D settlement construction.

    Production Continuity: This approach maintains mana income during typically resource-starved transition periods. Rather than suffering production gaps while restructuring, you actually increase output temporarily, creating buffers for upcoming demands.

    Strategy 6: Collection Timing and Decay Management

    Mana decay mechanics reward strategic collection and spending patterns. Optimizing these temporal aspects preserves resources that would otherwise vanish.

    Late-Day Spending: Mana decay occurs at approximately 4 AM Eastern Time

    . Schedule major expenditures—research unlocks, settlement building, portal upgrades—for just before this cutoff. This minimizes the 10% loss on accumulated reserves by reducing pre-decay stockpiles

    .

    Collection Timer Awareness: When performing final daily collections, check building timers. If a structure will reach maximum production before morning collection, gather it immediately to prevent overnight waste. If production continues until after morning collection, leave it running

    . This micro-optimization prevents production loss exceeding decay penalties.

    Daily Rhythm Optimization: Establish consistent collection schedules matching your play patterns. Mana buildings feature varied timers—12-hour, 24-hour, 10-hour cycles—requiring coordination for efficient gathering. Players checking cities frequently benefit from shorter-cycle buildings; those with limited playtime maximize 24-hour structures.

    Strategy 7: Mana Economics and Planning

    Sustainable mana management requires understanding production rates, consumption requirements, and strategic planning horizons.

    Measurement First: “You cannot manage what you have not measured”

    . Track your mana balance across multiple days, noting evening and morning values. Calculate average daily production by accounting for decay: if your balance remains stable, production equals consumption plus 10% decay. Growing balances indicate surplus; shrinking balances signal deficits

    .

    Consumption Forecasting: Examine upcoming research and building requirements. If you need 500,000 mana for research over 30 days plus 100,000 for other purposes, plan 600,000 total plus 10% decay buffer—approximately 22,000 daily production

    . Compare this against current capacity and adjust infrastructure accordingly.

    The 1,529/Hour Benchmark: One player producing 1,529 mana hourly (36,696 daily) with mixed buildings asked if this sufficed

    . The answer depends entirely on your progression speed and upcoming requirements. Calculate your needs, then determine if production requires expansion or if current rates support comfortable advancement

    .

    Strategy 8: Endgame Mana Mastery

    As chapters progress, mana transitions from scarce resource to abundant commodity, eventually becoming secondary to seeds and sentient goods. However, early mana mastery creates compound advantages.

    Portal Profit Revolution: Advanced players eventually accumulate sufficient Portal Profits to ignore manual mana production entirely

    . These powerful items instantly fill guest race good requirements, eliminating production needs. However, reaching this stage requires the mana infrastructure to complete earlier chapters efficiently.

    Sentient Goods Transition: In Elementals chapter, mana-like decay mechanics apply to new resources (Platinum, Moonstone, Elven Tree Gum)

    . Your mana management expertise directly transfers to these successor systems, making early practice invaluable.

    Dragon Abbey Endgame: With sufficient spell stockpiles and high-level Dragon Abbey, mana becomes infinitely available on demand. This eliminates production constraints entirely, allowing city restructuring for other priorities while maintaining mana capability through spell casting alone

    .

    Conclusion: Your Path to Mana Mastery

    Mastering mana in Elvenar requires understanding its unique decay mechanics, diversifying production sources, optimizing spatial efficiency, and planning consumption strategically. Your journey from mana scarcity to abundance involves:

    • Building 7-15+ Weeping Willows as your Wood Elves foundation, accepting their spatial demands for reliable baseline production
    • Crafting Festival Merchants and Mana Sawmills through Magic Academy for 2-3x efficiency improvements over willows
    • Actively participating in every event for high-efficiency buildings like Magical Mana Huts, Ponds of Autumn, and set building combinations
    • Investing in Dragon Abbey to unlock spell-based mana generation that transcends building limitations
    • Exploiting guest race space for temporary mana production surges during chapter transitions
    • Optimizing collection timing to minimize decay losses and maximize production efficiency
    • Measuring production rates against consumption needs to maintain sustainable growth
    • Transitioning to endgame systems where mana abundance enables Portal Profit strategies and Dragon Abbey spell casting

    Remember that mana anxiety diminishes with experience. What initially appears as a terrifying decay mechanic becomes a manageable soft cap that encourages active engagement rather than passive hoarding. The players who thrive are those who embrace mana’s unique properties, building diverse production ecosystems that weather chapter transitions and enable rapid technological advancement.

  • Elvenar Research Tree Guide: Mastering Knowledge Points and Technology Progression

    Elvenar Research Tree Guide: Mastering Knowledge Points and Technology Progression

    Understanding the Research System

    The research tree is the backbone of progression in Elvenar, representing your civilization’s technological advancement through 22 chapters. Each technology requires Knowledge Points (KP) to unlock, along with additional resources like Coins, Supplies, and Goods

    . Understanding how to efficiently manage your research determines whether your city thrives or stagnates.

    Knowledge Points serve as the primary currency for research. You receive 1 KP per hour automatically, up to a maximum of 10 (temporarily extendable to 20 using “Inspiring Meditation” enchantments)

    . Additional KPs come from completing World Map encounters, Tournament rewards, Neighborly Help, and investing in other players’ Ancient Wonders

    .

    KP Acquisition: Maximizing Your Research Speed

    Automatic Generation

    The base KP generation rate is fixed at 1 per hour. For free players, this means 10 KP every 10 hours if you log in regularly to spend them. Missing this window wastes potential progress, making consistent daily engagement crucial

    .

    Active Sources

    • World Map Encounters: Each completed encounter awards 1 KP
    • Tournament Participation: Higher tournament scores yield significant KP rewards
    • Neighborly Help: Daily rewards for helping neighbors include KPs
    • Ancient Wonder Investment: Contributing to other players’ Wonders returns KPs when they level
    • Events: Ancient Knowledge Instants provide immediate KP injections

    Purchasing KPs (Emergency Only)

    You can buy KPs with Coins, Supplies, or premium currency. Warning: Each purchase increases the base cost permanently. The formula adds the base cost to subsequent purchases, making this unsustainable for regular use

    . Reserve purchased KPs for true emergencies or to prevent wasting automatic generation when your bar is full.

    Research Strategy: Short-Term vs. Long-Term

    The Technology vs. Wonder Dilemma

    Every player faces a strategic choice: invest KPs in research technologies for immediate progression, or contribute to Ancient Wonders for long-term benefits

    .

    Short-Term Strategy (Technology Focus):

    • Rapid chapter advancement
    • Quick access to new buildings and features
    • Faster World Map expansion
    • Immediate gameplay variety

    Long-Term Strategy (Wonder Investment):

    • Compounding benefits over time
    • Space efficiency through Wonder bonuses
    • Tournament and Spire advantages
    • Sustainable resource generation

    The Balance: Most experienced players recommend focusing primarily on technology early on, with selective Wonder investment. “Focusing too much on wonders will prevent your progression through the technology tree”

    . Consider Wonders only if you encounter progression blocks or have excess KPs.

    Chapter Structure and Progression

    The Chapter System

    Elvenar organizes research into chapters, each telling part of your race’s story and introducing new mechanics. Chapters typically require around 2,000 KPs to complete, with advanced chapters demanding significantly more

    .

    Chapter Completion Requirements:

    • Research all mandatory technologies
    • Complete province requirements (varies by chapter)
    • Build and upgrade chapter-specific structures

    Advanced Scouts: Each chapter begins with “Advanced Scouts” technology that bridges to the next chapter. Completing this officially advances your chapter status

    .

    Research Order Flexibility

    While many technologies have prerequisites, you often have choices in research order. Strategic sequencing can optimize your progression:

    Priority Technologies:

    1. Required for Storyline Quests – These gates must be opened to continue
    2. Residence/Workshop Upgrades – Increase population and production capacity
    3. Trader and Fellowship – Unlock economic and social features
    4. Manufacturing Upgrades – Boost goods production for your boosted resources
    5. Optional Expansions – Increase city space when needed

    Technologies to Postpone:

    • Squad Size Upgrades (optional ones) – These increase tournament difficulty without mandatory benefits
    • Dead-end technologies – Those not required for chapter progression unless they provide immediate utility

    Strategic Research Techniques

    The “Filled but Unresearched” Technique

    Advanced players keep one technology filled with KPs but not activated for event flexibility. This allows instant completion when events require “research a technology” quests, effectively banking KPs for event currency

    .

    Implementation:

    • Fill a non-critical technology to 1 KP below completion
    • Leave it pending until needed
    • Complete instantly for event credit
    • Resume normal research progression

    KP Club Strategy (Advanced)

    Experienced players join “KP Clubs” – organized groups that systematically level each other’s Ancient Wonders

    . This strategy provides:

    • High return on investment: Targeted contributions level Wonders faster
    • Compounding benefits: Reinvest returned KPs immediately
    • Credit system: Established members operate on 50% cash, 50% credit basis

    How it works:

    1. Designate one Ancient Wonder for targeting
    2. Members contribute KPs to fill it
    3. When it levels, contributors receive KP rewards
    4. Immediately reinvest in next targeted Wonder
    5. Track contributions with “Targeting Points” system

    The Tech Lock Strategy

    Some players intentionally slow research to optimize other aspects:

    • Tournament optimization: Lower squad sizes mean easier tournament enemies
    • Resource stockpiling: Time to accumulate goods for next chapter
    • Wonder leveling: Focus KPs on Wonders without falling behind

    However, extended tech locks can stall overall progression. Use strategically, not permanently.

    Chapter-Specific Research Priorities

    Early Chapters (1-5): Foundation Building

    Focus Areas:

    • Basic production buildings (Residences, Workshops)
    • Trader and Fellowship unlocks
    • Initial goods manufacturing
    • World Map scouting

    Key Technologies:

    • Workshop unlock (Chapter 1)
    • Neighbourhood (enables Neighborly Help)
    • Advanced Scouts for chapter progression

    Mid Chapters (6-11): Economic Expansion

    Focus Areas:

    • Manufacturing upgrades for boosted goods
    • Training Grounds and military expansion
    • Advanced goods production
    • Culture and population optimization

    Guest Race Integration: Chapters 6+ introduce Guest Races (Dwarves, Fairies, Orcs) with special settlement buildings. Research these technologies to unlock settlement production and chapter-specific resources

    .

    Late Chapters (12+): Specialization

    Focus Areas:

    • Sentient Goods (Chapter 12+) – New production types with decay mechanics
    • Ancient Wonder optimization
    • Tournament and Spire specialization
    • Advanced military units

    Sentient Goods Research: Chapter 12 introduces new production requiring Divine Seeds. Plan ahead by upgrading manufactories to level 24 before reaching this chapter

    .

    Resource Management for Research

    The Cost Structure

    Each technology requires three components:

    1. Knowledge Points – The primary gate
    2. Coins/Supplies – Secondary requirements scaling with chapter
    3. Goods – Tier-appropriate goods (Basic, Refined, Precious)

    Scaling Costs: Later chapters demand exponentially more resources. Chapter 22 can take a year to complete, with individual technologies requiring hundreds of KPs and millions of Coins

    .

    Pre-Research Stockpiling

    Before unlocking expensive technologies:

    • Accumulate required Goods through trading
    • Ensure Coin and Supply storage capacity (upgrade Main Hall)
    • Clear inventory space for potential rewards

    The “Resource Production Groups” Strategy: Organize your city into dedicated production zones for each resource type, ensuring steady flow of research materials

    .

    Optimization Metrics and Tracking

    KP Rate Calculation

    Calculate your effective daily KP accumulation:

    • Base generation: 24 KP/day (if spending before cap)
    • World Map: Variable based on scouting
    • Tournaments: 10-50+ KP/day depending on performance
    • Other sources: Neighborly Help, Events, Crafting

    Target Rate: Experienced players achieve 60+ KP/day through tournament focus and consistent engagement

    . Track this by dividing total chapter KPs by days to complete.

    Research Planning Tools

    Use external tools or spreadsheets to:

    • Track technology costs and prerequisites
    • Plan research order based on resource availability
    • Coordinate with Fellowship for goods trading
    • Monitor chapter progression timelines

    Common Research Mistakes to Avoid

    1. Wasting KPs on Optional Squad Sizes

    Optional Squad Size upgrades increase tournament difficulty without mandatory benefits. Skip these unless specifically needed for World Map progression

    .

    2. Ignoring the “Next Chapter” Preview

    Before completing current chapter research, check next chapter’s requirements. Some technologies become more expensive or change function in subsequent chapters

    .

    3. Over-Investing in Wonders Early

    While Wonders provide long-term benefits, early game KPs are better spent on technology for faster progression. “Most players… will tell you to focus entirely on the short-term strategy of technology”

    .

    4. Neglecting Resource Requirements

    Don’t fill a technology with KPs if you can’t afford the Coin/Supply/Goods unlock cost. This wastes potential KP generation while you scramble for resources

    .

    5. Rushing Without Planning

    Blindly researching everything available leads to inefficient city development. Plan your research order based on:

    • Immediate building unlocks
    • Resource production needs
    • Fellowship coordination
    • Event timing

    Advanced Research Coordination

    Fellowship Research Strategy

    Coordinate with your Fellowship to:

    • Distribute goods requirements across members
    • Share KP investment in shared Ancient Wonders
    • Align research timing for group benefits
    • Plan tournament strategies based on collective research levels

    Event Timing

    Seasonal events often feature “research a technology” quests. Time your research completions to coincide with these events for bonus rewards. The “filled but unresearched” technique excels here

    .

    Conclusion: The Path to Mastery

    Mastering Elvenar’s research tree requires balancing immediate needs with long-term goals. The most successful players maintain consistent KP generation, strategically sequence their research, and adapt their approach as chapters progress.

    Remember that research is fundamentally a marathon, not a sprint. With 22 chapters and potentially years of content, sustainable daily engagement trumps rushed advancement. Focus on building a solid foundation in early chapters, optimize your economic engine in mid-game, and specialize for your preferred playstyle in late chapters.

  • The Fastest Way to Level Up in Elvenar: A Comprehensive Speed Progression Guide

    The Fastest Way to Level Up in Elvenar: A Comprehensive Speed Progression Guide

    Introduction: The Need for Speed

    In Elvenar, “leveling up” means advancing through chapters (also called ages or eras) in the research tree. Each chapter unlocks new buildings, technologies, and gameplay features. While Elvenar is fundamentally a game of patience, strategic players can significantly accelerate their progression without spending real money. This guide reveals proven strategies to maximize your chapter advancement speed while maintaining a healthy, sustainable city

    .


    Understanding the Progression Bottlenecks

    Before accelerating, understand what limits your speed. According to expert analysis, Knowledge Points (KP) accumulation is the ultimate limiting factor for fast progression

    . No matter how efficiently you manage other resources, you can only research as fast as you acquire KPs. Therefore, the fastest progression strategy focuses on maximizing KP generation while eliminating all other bottlenecks

    .

    Key Insight: The “fastest progression” means your only limiting factor is KP accumulation. All other resources (goods, supplies, coins, settlement goods) should be abundant enough that you never wait for them—you’re only waiting for KPs to accumulate

    .


    Maximizing Knowledge Point Generation

    1. Never Waste Base KP Generation

    Your KP bar regenerates 1 KP per hour (maximum 10 stored). Never let it cap at 10—wasted regeneration is lost progress forever. Log in regularly to spend KPs on research, even if just for a few minutes

    .

    2. Scout Provinces for Instant KPs

    The most powerful KP acceleration technique: scout nearby provinces and solve encounters. Each completed encounter awards 1 KP instantly plus valuable relics, completely bypassing the hourly regeneration limit

    . This transforms the world map from passive scenery into an active KP farm.

    Strategy: Scout continuously as long as you have sufficient Coins and Supplies. Prioritize “Easy” and “Medium” difficulty provinces for quick completions. The more provinces you scout, the more instant KPs you can generate

    .

    3. Tournament Participation

    Tournaments are the most flexible and significant KP source beyond base generation. High-level tournament play can generate thousands of KPs weekly

    . To maximize tournament KP:

    • Build Timewarp Ancient Wonder to reduce cooldown between tournament rounds
    • Focus on sustainable tournament strategies rather than burning resources on single high-scoring rounds
    • Prioritize KP rewards in tournament chests

    4. Crafting and Special Buildings

    • Carting Libraries and Wishing Wells generate daily KPs
    • Magic Academy crafting can produce KP instants (though spell fragments become limiting)
    • Ancient Wonders like Tome of Secrets provide modest KP generation (1 KP per 5 levels—not huge, but cumulative)

    Eliminating Resource Bottlenecks

    The “No Tech Lock” Principle

    “Tech lock” occurs when you have KPs ready but can’t research because you’re missing goods, supplies, or settlement resources. Eliminate all tech locks by ensuring resource production always exceeds research demands

    .

    Settlement Optimization for Guest Races

    Guest Races (Dwarves, Fairies, Orcs, Woodelves, etc.) often become progression bottlenecks. Speed strategies vary by chapter:

    Dwarves Chapter (Chapter 6):

    • Build the Dwarven Portal immediately upon unlocking
    • Research Portal Tracks first before other technologies—earlier settlement placement means earlier resource generation
    • Upgrade portal to Level 2 ASAP to increase production 15%
    • Build 3+ Granite Mines and upgrade them; more mines beat fewer upgraded mines early on

    Orcs Chapter (Chapter 8):

    • One Rally Point is sufficient for portal upgrades—don’t overbuild like Fairies’ Day Farms
    • Focus on Spare Time Activities for Orc generation rather than overbuilding Rally Points
    • Use Portal Profit spells from the Spire to accelerate settlement construction

    Woodelves Chapter (Chapter 9):

    • Space dedicated to settlement directly correlates with completion speed :
      • 100-150 squares: 40-45 days (very slow)
      • 175-205 squares: 25-30 days (adequate)
      • 240-260 squares: 21-22 days (fast)
      • 290+ squares: Under 20 days (optimal)

    Key Formula: More settlement space = faster chapter completion. Teleport regular buildings using Spire-won Teleport Spells to free maximum space for guest race structures

    .

    Boosted Goods Specialization

    Never build non-boosted manufactories. Check your Main Hall for boosted goods and specialize exclusively in those. One boosted manufactory outproduces three unboosted alternatives

    . Trade for other goods through your Fellowship.

    Collect relics matching your boosted goods to increase production percentages. Each set of 6 matching relics provides significant boosts, reducing production time and increasing output

    .


    Optimal Building and Upgrade Strategies

    Upgrade Timing

    The sooner you fully upgrade production buildings, the earlier you gain maximum output

    . However, balance this with space constraints:

    • Residences: Upgrade to current chapter maximum for population density
    • Workshops: Upgrade to current maximum for supply generation
    • Manufactories: Prioritize boosted goods manufactories; upgrade others only when necessary

    Speed Tip: Players who upgrade bonus good manufactories earlier than Chapter VI are simply “better or faster in playing Elvenar”—early upgrades compound into faster progression throughout the game

    .

    The 3-Builder Strategy

    Use your initial Diamonds (earned through gameplay, not necessarily purchased) to buy a 3rd builder early. Three simultaneous construction queues dramatically accelerate building and upgrade speed compared to the default two builders

    .


    Quest and Event Optimization

    Mainline Quests

    Complete main storyline quests aggressively. These provide massive rewards (up to 200,000 Coins and 15,000 Supplies in early chapters) and unlock critical features

    . They also guide optimal building placement and resource management for new players.

    Repeatable Quests

    Unlike mainline quests, repeatable quests can be declined. Accept them when they align with your current activities (e.g., “Produce X Supplies” when your workshops are running), but don’t go out of your way to complete inefficient ones

    .

    Event Participation

    Events offer limited-time buildings with powerful permanent benefits. Prioritize:

    • Daily reward buildings (16+ squares) for disenchanting value
    • Evolving buildings that grow with your chapter
    • Artifacts to evolve event buildings to higher levels

    Critical Strategy: Save event buildings in inventory until you reach higher chapters. Placing a Fire Phoenix in Chapter 15 versus Chapter 5 means it starts at a much higher base level, requiring fewer Royal Restoration spells to upgrade

    .

    The “Hoarding” Approach

    Some advanced players hoard resources before advancing:

    • Save Spirit Orbs for Vestige upgrades until you have 150+, allowing rapid multiple-level upgrades when beneficial
    • Stockpile Portal Profits for instant guest race settlement completion
    • Accumulate Royal Restoration spells before placing evolving buildings

    Advanced Speed Techniques

    The Chapter 3 Rush

    Experienced players recommend rushing to Chapter 3 as fast as possible because:

    • Unlocks Spire of Eternity (weekly rewards including Teleport Spells, Royal Restorations, and premium goods)
    • Unlocks Mage units and Heavy Ranged units, making combat significantly easier
    • Chapter 3 Spire is the cheapest Spire—ideal for “camping” to build resources before advancing further

    Tournament and Spire Balance

    While tournaments provide KPs, Spire of Eternity provides unique resources:

    • Teleport Spells for city restructuring
    • Royal Restoration spells for evolving buildings
    • Time instants for speeding production

    Balance tournament participation (KPs) with Spire climbing (utility resources) based on your current chapter needs

    .

    Diamond Efficiency

    If spending money, prioritize:

    1. City expansions (permanent space increase)
    2. Magic Academy upgrades beyond level 2 (more crafting options)
    3. 3rd builder (construction speed)

    Avoid spending Diamonds on instant completions or troop revival—these provide poor long-term value

    .


    Common Speed Progression Mistakes

    1. Overscouting Provinces

    Scouting too many provinces before Advanced Scouts technology increases encounter costs permanently. Each province scouted before this research becomes more expensive to complete

    .

    Solution: Scout only the minimum provinces needed for chapter completion until you establish efficient resource generation, then scout aggressively once you can handle higher costs.

    2. The 220-Province Orc Barrier

    At 220 completed provinces, negotiations suddenly require Orcs—unavailable until Chapter 8. Players who overscout get stuck, unable to complete provinces for events or expansion

    .

    Solution: Stop completing provinces around 200-220 until unlocking Orc production. You can continue scouting to claim expansions, but leave encounters incomplete

    .

    3. Neglecting Fellowships

    Join an active Fellowship immediately. Fellowships enable:

    • Resource trading for goods you don’t produce
    • Neighborly help for bonus Coins and culture
    • Tournament coordination for better rewards
    • Spire cooperation for fellowship-level prizes

    Solo play dramatically slows progression compared to Fellowship membership.

    4. Building Non-Boosted Manufactories

    Every non-boosted manufactory is wasted space. Specialize in your boosted goods and trade for everything else—this is exponentially more efficient

    .


    The “Speed Run” Mindset

    Fast progression requires active management:

    • Log in frequently to spend KPs before capping
    • Check production timers to maintain continuous workshop/manufactory cycles
    • Participate in every tournament for maximum KPs
    • Complete events fully for powerful limited buildings
    • Restructure your city as buildings change sizes with upgrades

    Remember: Elvenar rewards consistency over intensity. A player who logs in 3 times daily for 10 minutes progresses faster than one who plays 3 hours once weekly

    .


    Conclusion: Your Fastest Path Forward

    The fastest way to level up in Elvenar combines maximized KP generation (through scouting, tournaments, and never capping your bar), eliminated resource bottlenecks (through boosted goods specialization and efficient settlement management), and strategic event participation (for powerful permanent buildings).

  • Elvenar Resource Farming Guide: Maximizing Your Economic Output

    Elvenar Resource Farming Guide: Maximizing Your Economic Output

    Understanding Elvenar’s Resource Ecosystem

    Elvenar operates on a complex resource management system where efficiency and strategic planning determine your success. The game features multiple resource types that interconnect in intricate ways, requiring players to master farming techniques for sustainable growth. Unlike many strategy games, Elvenar emphasizes steady accumulation over rapid bursts, making consistent farming strategies essential for long-term prosperity

    .

    The fundamental resources—Coins, Supplies, and Goods—form the backbone of your economy. Understanding how to farm these efficiently separates thriving cities from struggling ones. This guide explores advanced farming techniques that maximize output while minimizing space and time investment.

    Coins: The Foundation of Your Economy

    Primary Coin Generation Methods

    Coins represent the most basic yet crucial resource in Elvenar. They fund construction, research, and trading activities. Understanding coin farming requires recognizing that Coins are “a fixed-duration, auto-generating, hard-capped central Resource” that cannot be sped up by any method, though production can be enhanced

    .

    Residence Optimization: Residences are your primary coin source, but placement and upgrades significantly impact output. Strategic positioning next to Cultural Buildings can improve productivity through the culture bonus system

    . However, the most efficient approach focuses on maximizing culture bonus rather than individual building adjacency.

    The Golden Abyss (Late Game): For established players, the Golden Abyss Ancient Wonder becomes a significant coin source, though it’s not recommended for early game due to opportunity costs

    .

    Advanced Coin Farming: The Neighborly Help Strategy

    The most sustainable coin farming method involves Neighborly Help (NH). Polishing cultural buildings in other players’ cities earns you coins while encouraging reciprocal help on your own buildings

    . This creates a virtuous cycle where active community participation directly translates to increased resource generation.

    Implementation:

    • Visit 30+ neighbors daily
    • Focus polishing on large cultural buildings (3×3 or larger)
    • Maintain reciprocal relationships with active players
    • Join an active Fellowship for guaranteed trading partners

    Supplies: Production Optimization

    Workshop Efficiency

    Workshops produce Supplies—the second fundamental resource required for building upgrades, troop training, and crafting. Production efficiency depends on selecting appropriate time cycles based on your play schedule

    .

    Production Cycle Strategy:

    • 5-minute cycles: Maximum efficiency when actively playing (requires constant attention)
    • 1-hour cycles: Balanced efficiency for regular check-ins
    • 9-hour cycles: Optimal for overnight production
    • 1-day cycles: Maximum yield per click for busy schedules

    Key Insight: The hobby room and advertisement features are “much more useful to a low chapter city than to a high chapter city”

    . New players should leverage these features constantly for supply production boosts.

    The “Extra Workshops” Technique

    Experienced players maintain additional low-level workshops specifically for event quests and Fellowship Adventures

    :

    Setup:

    • Maintain 4-6 “baby” workshops at level 1 for quick 2-minute productions
    • Keep 2 “big” workshops for regular supply generation
    • Use Power of Provision (PoP) spells on big workshops for rapid tool recovery

    This approach allows completing event quests requiring multiple 9-hour productions without disrupting regular supply generation

    .

    Goods Production: The Boosted Strategy

    Understanding Production Boosts

    Elvenar features nine Standard Goods across three tiers:

    • Basic Goods: Marble, Steel, Planks
    • Refined Goods: Crystal, Silk, Scrolls
    • Precious Goods: Gems, Magic Dust, Elixir

    Each player receives three “boosted” goods (one per tier) that produce at 100% efficiency. Non-boosted goods produce at only 25% efficiency—a devastating 75% reduction

    .

    Critical Rule: Build manufactories ONLY for your boosted goods. Producing non-boosted goods is “a total waste of resources” that locks up population needed for other purposes

    .

    The Relic Collection System

    Production boosts scale with relic collection from the World Map:Table

    Relics CollectedBoost Percentage
    30 relics171% boost
    100+ relics300%+ boost
    500 relics700% maximum

    The difference between boosted and non-boosted becomes dramatic as you accumulate relics. At just 171% boost, you produce 3x more goods for the same cost as non-boosted

    . At maximum 700% boost, the advantage becomes overwhelming.

    Farming Strategy:

    • Prioritize provinces containing your boosted goods relics
    • Complete encounters to collect relics
    • Participate in Tournaments for additional relic rewards

    Manufacturing Space Optimization

    Rather than counting buildings, experienced players measure production by total square tiles

    :

    Recommended Targets:

    • Early Game: 20 squares of factory space per boosted good
    • Mid Game: Minimum 40 squares per boosted good
    • Late Game: Adjust based on trading relationships and needs

    As chapters progress, buildings grow larger, allowing fewer structures to occupy the same space while producing more goods

    .

    The “Small Factory” Quest Strategy

    For event efficiency, maintain small-level manufactories (level 1-4) specifically for quest completion

    :

    Benefits:

    • Smaller footprint (2×1 for basic goods)
    • Faster upgrade times for “upgrade building” quests
    • Ability to run multiple simultaneous productions
    • Easy to rebuild after selling for space

    Implementation:

    • Keep 6-8 small basic goods manufactories
    • Maintain 4-6 small workshops
    • Use for 9-hour production quests while main factories handle regular production

    Advanced Goods: Sentient and Ascended

    Sentient Goods (Chapter 12+)

    Upon reaching Chapter 12 (The Elementals), you unlock Sentient Goods production. These replace 1-day and 2-day productions in level 24+ manufactories

    .

    Critical Mechanics:

    • Decay System: Sentient Goods lose 10% overnight, transforming back into Standard Goods
    • New Boosts: Your boosted Sentient Good = your boosted Standard Good + 1 (e.g., if Steel is boosted, Platinum becomes your Sentient boost)
    • Production Requirements: Divine Seeds + corresponding Standard Goods

    Farming Strategy:

    • Plan ahead by upgrading manufactories to level 24 before reaching Chapter 12
    • Maintain balanced Sentient Goods production to minimize decay losses
    • Trade excess Basic Sentient Goods for Refined and Precious variants

    Ascended Goods (Chapter 18+)

    Chapter 18 (Team Spirit) introduces Ascended Goods with similar decay mechanics but requiring Unurium instead of Divine Seeds

    .

    Preparation:

    • Upgrade Basic Manufactories to level 32
    • Stockpile Unurium through regular gameplay
    • Understand that Ascended Goods boost = Standard boost + 2

    Trading as Resource Farming

    The Trading Economy

    Since you can only efficiently produce three goods, trading becomes essential for the other six. The Trader interface allows exchanging surplus for needed materials

    .

    Trading Ratios:

    • Same-tier goods: 1:1 (fair trade)
    • Cross-tier trades: 4:1 or 16:1 ratios

    Fellowship Advantages:

    • Guaranteed trading partners
    • Internal trades at favorable rates
    • No penalty for trades within fellowship

    Market Manipulation Strategy

    Advanced players use trading to their advantage:

    Technique:

    • Offer boosted goods at slightly favorable rates (e.g., 100 planks for 95 steel)
    • Ensure trades are snapped up quickly
    • Build reputation as reliable trader
    • Accumulate non-boosted goods without production inefficiency

    Important: Avoid 0-star or 1-star trades visible to neighbors, as these create negative reputation. Use fellowship-only trades for unfavorable exchanges

    .

    Event Building Farming

    Seasonal events offer “hybrid” buildings that provide multiple resource types in single structures. These are space-efficient miracles that outperform standard buildings

    .

    Prioritization:

    • Population + Culture + Goods buildings
    • Culture-only buildings with high efficiency (Lava Codex is “Gold Standard” at 2×2)
    • Buildings matching your current chapter needs

    Strategy: Seasons benefit new cities significantly more than established ones. “A lot of Seasons can be CH5 min, even for that true newb”

    . Delay placing Season buildings until you reach minimum chapter requirements to maximize value.

    Enchantment and Spell Farming

    Magic Academy Production

    The Magic Academy allows crafting enchantments that boost resource production:

    Key Enchantments:

    • Power of Provision (PoP): Boosts Workshop production
    • Magical Manufacturing: Boosts Manufactory production
    • Ensorcelled Endowment (EE): Doubles culture building output (requires 125%+ base culture)

    Farming Technique:

    • Craft enchantments using collected resources
    • Apply PoP to workshops before long productions
    • Use Magical Manufacturing on manufactories during heavy production periods
    • Maintain 125%+ base culture to enable EE effectiveness

    Time Management: The Real Resource

    Elvenar’s most limited resource is time. Efficient farming requires optimizing your play schedule:

    Active Play Sessions:

    • Short, frequent logins (3-4 times daily)
    • Collect and restart 1-hour productions
    • Help neighbors for reciprocal benefits
    • Check Trader for favorable deals

    Passive Play:

    • Set 9-hour productions before sleep
    • Use 1-day productions when away extended periods
    • Accept that progress continues even when offline

    Common Farming Mistakes to Avoid

    1. Building Non-Boosted Manufactories

    This is the most expensive beginner mistake. “You will never be able to collect anything substantial to make them worthwhile even leveled up all the way”

    .

    2. Ignoring Culture Bonus

    Farming at 100% efficiency when you could achieve 170% wastes 70% potential output. Prioritize culture buildings

    .

    3. Neglecting Relic Collection

    Without relics, your boosted goods produce at base levels. Prioritize World Map expansion for relic provinces.

    4. Over-Extending Space

    Don’t place all available expansions immediately. “Keep cities small” for efficient tournament and spire performance

    .

    5. Wasting Time Instants

    Use time boosters strategically for critical productions rather than routine farming.

    Long-Term Farming Sustainability

    Elvenar rewards patient, consistent resource management over rapid expansion. The “marathon, not a sprint” approach applies to farming:

    Sustainable Practices:

    • Balance short-term needs with long-term goals
    • Invest in Ancient Wonders that enhance production (Enar’s Embassy for mana, Prosperity Towers for supplies)
    • Maintain fellowship relationships for trading advantages
    • Adapt strategies as new chapters unlock

  • Elixir Production in Elvenar: The Complete Guide to Mastering Tier 3 Magical Goods

    Elixir Production in Elvenar: The Complete Guide to Mastering Tier 3 Magical Goods

    Introduction: The Potent Power of Magical Goods

    In the rich and strategic world of Elvenar, few resources carry the weight—and the cost—of Elixir. As a Tier 3 (T3) Magical Good, Elixir stands alongside Magic Dust and Gems as the pinnacle of standard resource production. These magical goods are the most demanding to manufacture, requiring substantial investments in population, culture, and coin infrastructure. Yet for players blessed with Elixir as a boosted good, mastering its production unlocks tremendous trading power and accelerates progression through even the most demanding chapters.

    This comprehensive guide will walk you through everything you need to know about Elixir production: from determining if Elixir is your boosted good, to optimizing manufactory levels, understanding efficiency trade-offs, exploring the Sentient Goods connection, and leveraging Elixir in the trading economy. Whether you are a new player deciphering the game’s resource systems or a veteran caterer looking to maximize efficiency, this guide will ensure your Elixir production reaches its full potential.


    What Is Elixir in Elvenar?

    Elixir belongs to the Magical Goods category, which constitutes the third tier of Standard Goods in Elvenar’s economic hierarchy. The three tiers are structured as follows:

    TierCategoryGoods
    Tier 1 (T1)Basic GoodsMarble, Steel, Planks
    Tier 2 (T2)Crafted GoodsCrystal, Scrolls, Silk
    Tier 3 (T3)Magical GoodsElixir, Magic Dust, Gems

    Elixir is unlocked through research in the Technology Tree. Once researched, you can build the Elixir Manufactory, which requires a street connection to your Main Hall to function.

    What makes Elixir unique among the T3 goods is its position in the game’s cycling boost system. As you will learn below, your boosted Elixir production determines not only your T3 efficiency but also your boosted Sentient Goods in later chapters.


    Boosted Goods: The Foundation of Efficient Elixir Production

    Understanding the Boost System

    Every player in Elvenar receives three boosted goods—one from each tier—randomly assigned based on your city’s location on the world map when your account is created. These boosted goods receive a production multiplier based on the number of relics you have collected for that specific good type.

    To determine whether Elixir is one of your boosted goods:

    1. Open your Main Hall
    2. Navigate to the Relics tab
    3. Look for the three goods displayed at the top—these are your boosted goods

    Alternatively, you can look at your World Map. The provinces directly North, South-East, and South-West of your city contain your boosted goods.

    If Elixir appears in this list, congratulations! You are “Elixir-boosted” and should prioritize Elixir manufactories as your primary Tier 3 production.

    The Importance of Focusing on Boosted Goods

    Concentrating production on your boosted goods is one of the most fundamental efficiency principles in Elvenar. As experienced players explain, the difference between boosted and non-boosted production becomes more pronounced as you progress. A player with a high relic count and appropriate Ancient Wonders can produce dramatically more Elixir from a single manufactory than an unboosted player could from multiple buildings.

    The relic boost system allows you to increase your boosted good production up to 700%. This can be further enhanced by Ancient Wonders like the Mountain Halls, making dedicated Elixir producers extremely efficient.

    If Elixir Is Not Your Boosted Good

    If Elixir does not appear among your three boosted goods, the recommended strategy is straightforward: do not build Elixir manufactories at all. Instead, produce your boosted Tier 3 good (Magic Dust or Gems) and trade with neighbors or fellowship members for the Elixir you need.

    This approach saves valuable city space and resources while still giving you access to all goods through the Trader. As one forum user succinctly advises: “Build more of your boosted and none of your non-boosted… and trade”.


    Elixir Manufactory: Production Basics

    Building Footprints: Elves vs. Humans

    One of the first things new players notice is that Elixir manufactories look different—and take up different amounts of space—depending on whether you play as Elves or Humans.

    For Elven players, the Elixir Manufactory starts at 4×3 and can expand to 4×5 at higher levels.

    For Human players, the Elixir Manufactory starts at a more compact 3×3 and can expand to 4×4.

    This difference in footprint means Human players can potentially fit more Elixir production into the same city space, though the production values are adjusted to maintain balance.

    Production Options

    Like all manufactories, the Elixir Manufactory offers multiple production durations:

    • 3-hour production: Best for active players who can collect frequently; offers the best goods-per-hour ratio
    • 9-hour production: Good for players who check in a few times daily
    • 1-day and 2-day productions: These remain available until your manufactory reaches level 24, at which point they are replaced by Sentient Goods production options

    Production Costs and Output

    Elixir production is notably expensive compared to lower tiers. Here are sample production values for an Elven Elixir Manufactory at various levels:

    LevelFootprintPopulationCulture3-Hour Production
    14×321129056 Elixir
    54×4429176176 Elixir
    104×51,017395395 Elixir
    154×52,087571571 Elixir

    For Human players, the numbers differ slightly due to the smaller footprint:

    LevelFootprintPopulationCulture3-Hour Production
    13×312322041 Elixir
    53×4250132132 Elixir
    104×4670317317 Elixir
    154×41,353458458 Elixir

    As you can see, upgrading your Elixir manufactory significantly increases output, but at a steep cost in population and culture requirements.

    Using Enchantments

    Magical Manufacturing spells can significantly boost your Elixir production. For maximum efficiency, cast the spell right before collecting a production run to make the most of its duration. This is particularly valuable when you need large quantities of Elixir for research or upgrades.


    The Relic Boost System for Elixir

    How Relics Increase Production

    Your Elixir production boost percentage is determined by the number of Elixir Relics you have collected. Relics are obtained by:

    • Completing encounters in Elixir provinces on the world map
    • Opening chests when giving neighborly help (random chance)
    • Participating in tournaments when Elixir is the featured good
    • Completing certain event quests

    Finding Elixir Relics on the Map

    Your boosted Elixir provinces are located in a specific pattern on the World Map. The three provinces directly adjacent to your city in the North, South-East, and South-West directions contain your boosted goods—one for each tier. If Elixir is your T3 boost, you will find Elixir relics in one of these three directions.

    Maximum Boost Potential

    The maximum relic boost for Standard Goods is 700%. Achieving this requires collecting a significant number of Elixir relics. The exact thresholds are displayed in your Main Hall’s Relics tab.


    Efficiency Considerations: The Diminishing Returns Challenge

    The Hidden Cost of High-Level Manufactories

    One of the most counterintuitive findings in Elvenar is that higher-level manufactories are not always more space-efficient than multiple lower-level ones. This is because as manufactories are upgraded, they require more people to operate them, but the amount of goods produced does not increase proportionally to the population required.

    Consider this example using Steel manufactories (the same principle applies to Elixir):

    • A level 20 manufactory requires 2,160 people and makes 231 goods → 9.4 people per good
    • A level 23 manufactory requires 4,252 people and makes 290 goods → 14.7 people per good

    The level 23 requires nearly twice the population while producing far less than twice the goods. The same pattern holds for culture requirements. Therefore, the higher-level manufactories need more “support” squares in the form of population and culture buildings, making them, overall, less efficient.

    What “Efficiency” Really Means

    When analyzing manufactory efficiency, you cannot simply look at the building’s footprint. As one analyst explains: “If you happened to be perfectly balanced at 0 population available and 0 culture available, even if you had a beautiful open space of exactly the right size needed for the base of a manufactory, you wouldn’t be able to place it, because it requires population and culture. Since you can’t build or upgrade a manufactory without population and culture, the space those take up must necessarily also be factored in to the production capabilities of the manufactory”.

    This means that a lower-level manufactory with lower population demands can sometimes be more efficient overall than a higher-level one that requires significantly more support buildings.

    Strategic Upgrade Recommendations

    Based on detailed efficiency spreadsheets analyzing manufactories from the Dwarves chapter through Revenge of the Exile, researchers have found that “it is almost always better to have the manufactories most of an available set of upgrades, which is most often four levels, behind where they could be”.

    In practical terms:

    • Upgrade to the first available level in each new chapter to unlock new production options
    • Consider parking at certain levels where efficiency peaks before diminishing returns become severe
    • Use community spreadsheets to check efficiency ratios for your specific chapter

    For players who fight and only use one or two manufactories, the math may differ. But for caterers who need greater production, “the numbers certainly seem to lie in favour of the smaller manufactories”.


    Elixir and Sentient Goods: The Advanced Connection

    Unlocking Sentient Production

    When you reach Chapter XII – The Elementals and upgrade your Elixir manufactory to level 24 or higher, you unlock the ability to produce Sentient Goods. At this point, the 1-day and 2-day production options on your Elixir manufactory are replaced with Sentient Goods options, while the 3-hour and 9-hour options for regular Elixir remain available.

    Your Boosted Sentient Good

    The formula for determining your boosted Sentient Good follows a +1 cycling pattern from your Standard Goods boost. For Elixir producers, this means:

    Your Boosted Standard GoodYour Boosted Sentient Good
    ElixirSilly Soap

    The full mapping for T3 goods is:

    • Elixir → Silly Soap
    • Magic Dust → Alloy Shrooms
    • Gems → Cosmic Bismuth

    Sentient Production Requirements

    Producing Sentient Goods (including Silly Soap) requires:

    • Divine Seeds (introduced in Chapter XI – Halflings)
    • The corresponding Standard Good (Elixir, in this case)

    Later Chapters: Ascended Goods

    In Chapter XVIII – Team Spirit, manufactories at level 32 and higher unlock Ascended Goods production. For Elixir-boosted players, this progression continues with boosted Ascended Goods following a +2 mapping rather than +1.


    Alternative Sources of Elixir

    Event Buildings and the Moonstone Library

    Several event buildings can produce Elixir, particularly for players in earlier chapters. A significant update to the Moonstone Library Set changed how certain buildings produce goods:

    “In chapters 1-8: The Mana Plant and the Gum Tree… will now produce your boosted Precious Standard Good (which is either Elixir, Magic Dust, or Gems)”.

    This means that if Elixir is your boosted good, these buildings will produce Elixir for you, providing an alternative to manufactory production.

    However, as you progress, event buildings become less efficient unless you upgrade them with Royal Restorations—and there are often better buildings to prioritize for these upgrades.

    The Traveling Merchant

    The Traveling Merchant is a craftable building that can produce non-boosted goods more efficiently than building non-boosted manufactories. While not as efficient as event buildings, it can be a good option when event buildings no longer produce the goods you need.


    Trading Elixir: Maximizing Value

    The Trader and Cross-Tier Trading

    The Elvenar Trader uses value ratios for goods, but many players argue these ratios do not fully account for the higher production costs of Tier 3 goods. Elixir, as a T3 good, is more expensive to produce per unit than T1 or T2 goods.

    Fellowship Trading Strategy

    The most effective approach to trading Elixir is to be part of an active, balanced fellowship. If you are producing Elixir as your boosted good, you should:

    1. Produce only your boosted Elixir in quantity
    2. Trade down for the Tier 2 and Tier 1 goods you need
    3. Join an active fellowship where members understand the value of Elixir and will accept fair trades
    4. Use the Wholesaler as a last resort—it offers worse rates but provides guaranteed access to non-boosted goods

    The Blooming Trader’s Guild Option

    For players struggling to acquire non-boosted goods, the Blooming Trader’s Guild Ancient Wonder increases wholesaler returns, making it viable to make trades for non-boosted goods using coins, supplies, or boosted goods.


    Common Mistakes to Avoid

    Building Non-Boosted Elixir Manufactories

    The most common and costly mistake is building Elixir manufactories when Elixir is not one of your three boosted goods. This wastes precious city space and resources that could be better used elsewhere.

    Over-Upgrading Without Checking Efficiency

    Blindly upgrading your Elixir manufactory to the maximum available level in each chapter can actually reduce your space efficiency due to the population and culture demands. Always check the population and culture requirements against the production gains before upgrading.

    Ignoring the Relic Boost

    Failing to collect Elixir relics leaves significant production potential untapped. Prioritize clearing Elixir provinces on the world map and participating in tournaments when Elixir is featured.

    Neglecting Support Infrastructure

    Elixir production requires substantial coins, supplies, population, and culture. Ensure your Workshops, Residences, and Culture buildings are adequate to support your manufactories. An Elixir manufactory without sufficient support will underperform significantly.


    Conclusion: Mastering Your Elixir Production

    Elixir production in Elvenar is a rewarding but demanding endeavor. Whether Elixir is your blessed boosted good or a resource you acquire through trade, understanding its production mechanics, cost structures, and efficiency considerations will make you a more effective city manager.

    If Elixir is your boosted good, embrace it. Build your manufactories strategically—not necessarily to the highest possible level, but to the most efficient level for your chapter. Collect your relics, use enchantments wisely, and leverage your efficient production to become a trading powerhouse in your fellowship.

    If Elixir is not your boosted good, respect its value but do not waste space producing it inefficiently. Trade for it instead, focusing your own production on the goods where you have the boost advantage.

    As you progress into higher chapters, remember that your Elixir manufactories will evolve to produce Sentient Goods (Silly Soap) and eventually Ascended Goods. Plan ahead, build strategically, and your Elixir production will continue to flow through every chapter of your Elvenar journey.

    The key principles to remember are simple: focus on your boosted goods, pay attention to efficiency at each chapter, use enchantments strategically, and never underestimate the importance of population and culture in your production calculations.

  • Ascended Goods in Elvenar: The Complete Guide to Chapter 18 and Beyond

    Ascended Goods in Elvenar: The Complete Guide to Chapter 18 and Beyond

    Introduction: The Next Tier of Resources

    In the ever-expanding world of Elvenar, resource management is the cornerstone of successful city-building. Just when you think you have mastered the basics of Standard Goods and adapted to the complexities of Sentient Goods, the game introduces yet another layer: Ascended Goods . Introduced with Chapter 18, “Team Spirit,” these resources represent the third major tier of manufactory-produced goods and open up entirely new gameplay mechanics . This comprehensive guide will explain everything you need to know about Ascended Goods, from unlocking them to mastering the unique trading system they bring with them.

    What Are Ascended Goods?

    Ascended Goods are a new category of resources that become available when you reach Chapter 18. Like Sentient Goods before them, Ascended Goods represent a higher tier of production that builds upon your existing manufactory infrastructure. However, they come with their own unique characteristics, requirements, and trading mechanics that set them apart from anything that came before .

    These goods are essential for progressing through Chapter 18 and remain relevant in subsequent chapters, including Chapters 19 and 20 . While you might question their purpose initially—as some players have discovered they are not strictly required for every technology in Chapter 18—they become increasingly important as you advance further .

    How to Unlock Ascended Goods

    Manufactory Level Requirement

    To begin producing Ascended Goods, you must upgrade your Basic Manufactories (Marble, Steel, or Planks) to at least level 32 . This significant investment ensures that only established cities with developed production infrastructure can access this new tier.

    Once your manufactories reach this threshold, two new production options become available: 3-hour and 9-hour productions specifically for Ascended Goods . Your existing production options for Standard and Sentient Goods remain unchanged, meaning your level 32+ manufactories can produce all three tiers of goods depending on your needs.

    Research Requirements

    Before you can do anything with Ascended Goods, you must research the appropriate technologies in Chapter 18’s Research Tree. The first Ascended Good you can research is the Basic Ascended Goods technology early in the chapter . Additionally, to trade Ascended Goods with other players, you must research the Superior Trader in Chapter 18 .

    Determining Your Boosted Ascended Good

    One of the most important concepts to understand is how your boosted Ascended Good is determined. The game uses a simple but crucial formula: Your boosted Ascended Good will be your current boosted Regular Good +2 .

    Here is how this works in practice:

    • If your boosted Basic Good is Marble, your boosted Ascended Good will be Scholarly Sprouts (which corresponds to Planks)
    • If your boosted Basic Good is Steel, your boosted Ascended Good will be Primordial Minerals (which corresponds to Marble)
    • If your boosted Basic Good is Planks, your boosted Ascended Good will be Ignited Ingots (which corresponds to Steel)

    This cycling system ensures that every player has a boosted Ascended Good that complements rather than duplicates their existing boosted goods. Just like with Standard Goods, your production boost for Ascended Goods depends on the number of relics you have stored for the respective good type .

    The Three Categories of Ascended Goods

    Following the pattern established by Standard and Sentient Goods, Ascended Goods are divided into three categories :

    • Basic Ascended Goods: The first tier, introduced in Chapter 18
    • Refined Ascended Goods: Become available in later chapters
    • Precious Ascended Goods: The highest tier, required for advanced progression

    Each category builds upon the previous one, creating a layered production chain that rewards strategic planning and efficient resource management.

    Production Requirements: Unurium and Standard Goods

    Producing Ascended Goods is not simply a matter of clicking a button. Each production requires two key inputs :

    1. Unurium: A resource introduced in Chapter 17 that continues to be essential. Unurium decays like Mana and Divine Seeds but has far fewer sources of production, making it a limiting factor 
    2. Corresponding Standard Goods: You need Standard Goods from the same manufactory to produce Ascended Goods

    This dual requirement means you cannot simply convert all your production to Ascended Goods. You must balance your Standard Goods production for other needs while allocating enough to fuel your Ascended Goods creation.

    The Merchant System: Trading Ascended Goods

    A New Way to Trade

    Ascended Goods cannot be traded through the standard Trader interface like other resources. Instead, they require a completely new mechanic: the Merchant . This system becomes available after you research the Superior Trader and upgrade your Trader to level 7 .

    How Merchants Work

    When you trade with a Merchant, you receive your requested goods immediately . This instant gratification comes with a catch: while the Merchant is traveling to fulfill your order, your goods are offered to other players through the regular trading system .

    Key features of the Merchant system include:

    • Fair offers only: Merchants will only accept balanced, two-star trades 
    • Fixed amounts: Each Merchant deal involves specific quantities based on your Main Hall level 
    • Limited slots: You can hire up to five Merchants simultaneously 
    • Temporary availability: Merchants are only available for a limited time once hired 

    Strategic Merchant Use

    Experienced players recommend always keeping your Merchants active. As one forum user noted, “Always be trading for goods. Anytime you’re in the game, check for offers and place some if a slot is available” . This constant trading helps maintain balanced stocks of all three Ascended Good types, which is essential because settlement productions frequently require different combinations.

    The cost to hire Merchants increases with each additional slot, requiring significant coins. Some players have reported needing to use Coin Rains and even bring residences out of storage to meet the coin demands .

    How Many Manufactories Do You Need?

    A common question among players entering Chapter 18 is how many manufactories to dedicate to Ascended Goods production. The answer depends on several factors.

    Some players successfully complete Chapter 18 with just one level 32+ manufactory producing their boosted Ascended Good . However, others argue that two manufactories provide a much better experience, allowing you to produce enough boosted goods to trade for the non-boosted varieties you need .

    The limiting factor is Unurium. With limited Unurium production capabilities, you may not be able to keep multiple manufactories running at full capacity. Players with access to Magical Manufacturing spells and Ancient Wonders that boost Unurium production have more flexibility .

    The Settlement Connection: Chapter 18’s Elemental Hubs

    Ascended Goods are not just another resource to stockpile—they are intimately connected to Chapter 18’s settlement mechanics. The Elemental Hubs, which are the core production buildings of this chapter, require Ascended Goods for their construction and operation .

    The settlement introduces four Element Hub variants (Earth, Wind, Fire, and Water), though experienced players have discovered that you can complete the chapter using only three of them (Earth, Wind, and Fire) . The Water Hub is only required for specific quests and can be built temporarily then teleported away .

    Within this system, you produce Elementals in the Hubs, combine them with volunteers (Humans, Elves, or Elvenar) to earn Medals, and use those Medals to qualify for Trials that reward Team Work badges—the key to unlocking technologies .

    Ascended Goods in Later Chapters

    While some players initially questioned whether Ascended Goods were truly necessary, they become increasingly important as you progress beyond Chapter 18 .

    • Chapter 18: Basic Ascended Goods are required to construct Hubs, upgrade the Gate of Dimensions, and produce Elements 
    • Chapter 19: Both Basic and Refined Ascended Goods are needed to construct Breeding Facilities, upgrade the Fortress of Revenge, and produce Black and White Magic and Matter 
    • Chapter 20: All three Ascended Good types (Basic, Refined, and Precious) are required 

    This progression confirms that investing in Ascended Goods production infrastructure is worthwhile for long-term players.

    Comparison with Sentient Goods

    Ascended Goods share many characteristics with Sentient Goods, but there are important differences. Like Sentient Goods, Ascended Goods are subject to decay—they transform back into lower-tier resources over time . However, the specific mechanics and the resources required for production differ.

    The most significant difference is the trading system. While Sentient Goods can be traded through the standard Trader interface, Ascended Goods require the Merchant system, which introduces new strategic considerations .

    Additionally, Sentient Goods require Divine Seeds for production, while Ascended Goods require Unurium . This shift reflects your city’s evolving resource priorities as you advance through the chapters.

    Strategic Tips for Ascended Goods Management

    Prepare Before Entering Chapter 18

    Before you reach Chapter 18, stockpile Unurium and ensure you have enough space for additional manufactories if needed. Level up your Main Hall to increase the quantity of goods you can trade through Merchants .

    Start with One Manufactory

    Begin Chapter 18 with a single level 32+ manufactory producing your boosted Ascended Good. Assess your Unurium income and production needs before committing to a second manufactory .

    Keep Merchants Active

    Always have your Merchant slots filled with active trades. The instant nature of Merchant trades means you never have to wait for someone to accept your offer—you get goods immediately, and other players can choose to help fulfill your order in the background .

    Maintain Balanced Stocks

    Use your Merchants to trade for non-boosted Ascended Goods regularly. Keeping roughly equal amounts of all three types ensures you can always accept whatever Merchant offers become available .

    Save Magical Manufacturing Spells

    If you have Magical Manufacturing spells stockpiled, Chapter 18 is an excellent time to use them. Boosting your Ascended Goods production can dramatically accelerate your progress through the chapter .

    Conclusion

    Ascended Goods represent the next evolution in Elvenar’s resource management systems. While they may seem complex at first, understanding their production requirements, boosted good determination, and unique Merchant trading system is essential for progressing through Chapter 18 and beyond.

    The key takeaways are simple: upgrade your manufactories to level 32, research the Superior Trader, keep your Merchants active, and maintain balanced stocks of all three Ascended Good types. With these strategies in place, you will be well-prepared to master the Team Spirit chapter and continue your city’s ascent through the ranks.

  • Autumn Events in Elvenar: Harvesting Rewards in the Season of Abundance

    Autumn Events in Elvenar: Harvesting Rewards in the Season of Abundance

    Introduction to Autumn Events

    Autumn events in Elvenar capture the essence of the harvest season, bringing themes of abundance, preparation, and transition to the fantasy city-building experience as the in-game world mirrors the changing seasons of the real world

    . These events, typically occurring between September and October, introduce unique mechanics, exclusive rewards, and atmospheric aesthetics that distinguish them from the spring growth, summer intensity, and winter magic of other seasonal celebrations. For dedicated players, autumn events represent crucial opportunities for resource accumulation, building collection, and preparation for the year-end push through winter events and anniversary celebrations.

    The autumn season in Elvenar lore represents a time of gathering and storing, of completing cycles begun in spring and sustained through summer. Event narratives often feature harvest themes, mystical transformations, and the gathering of rare resources before winter’s approach

    . This thematic coherence creates immersive experiences that connect gameplay mechanics with seasonal storytelling, making autumn events particularly satisfying for players who appreciate Elvenar’s narrative depth alongside its strategic complexity.

    Strategically, autumn events occupy a significant position in the annual event calendar. They follow the summer’s intensity with opportunities for resource rebuilding, precede winter events with preparation-focused mechanics, and often introduce content that will be developed further in year-end celebrations

    . Understanding how to maximize autumn event participation therefore requires both appreciation of their unique features and strategic thinking about their place in annual progression planning.

    This comprehensive guide explores every aspect of Autumn Events in Elvenar, from their typical mechanics and reward structures to preparation strategies and optimization approaches that ensure players harvest maximum value from these seasonal celebrations. Whether you are anticipating your first Elvenar autumn or seeking to refine your approach as an experienced player, this analysis provides the knowledge necessary to make the most of this season of abundance.

    Thematic and Narrative Elements

    Autumn Aesthetics and Atmosphere

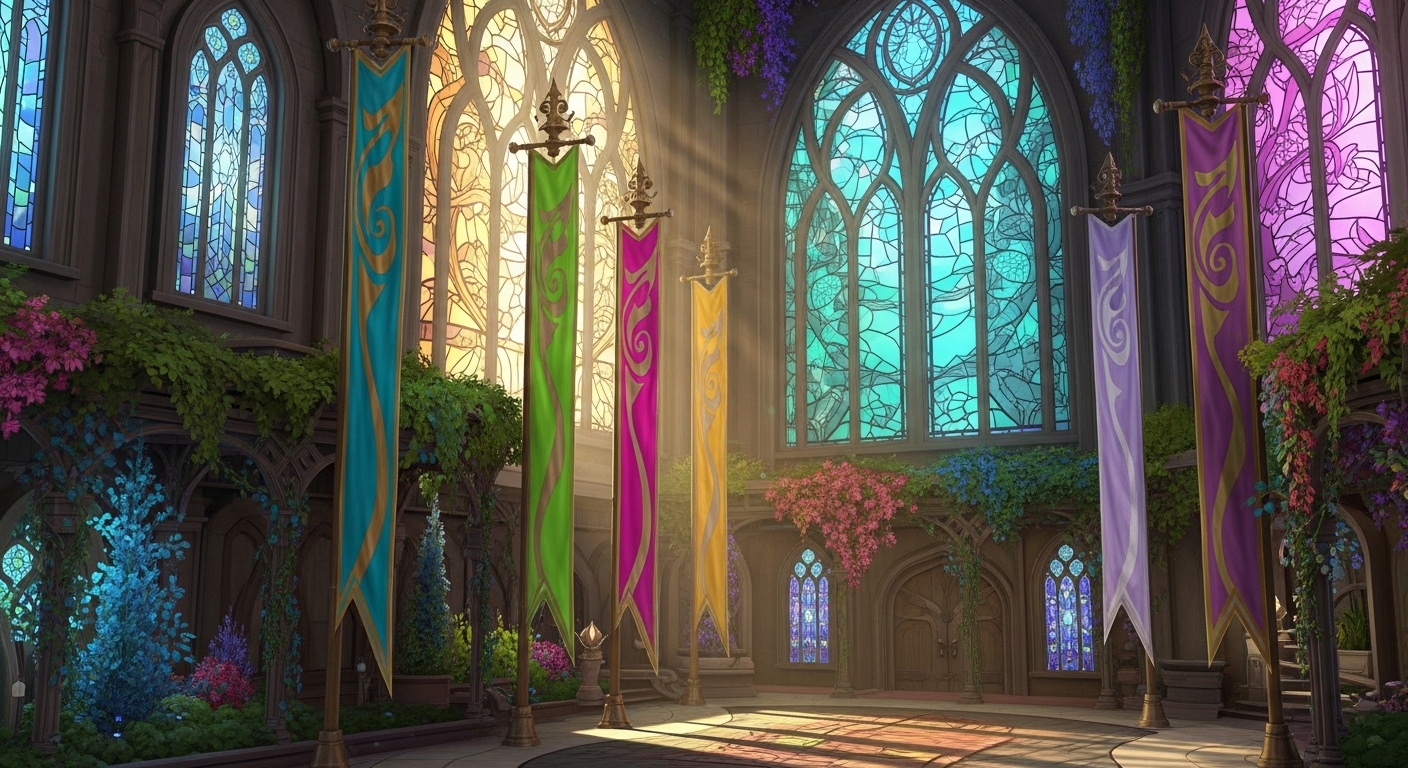
    Autumn events transform Elvenar’s visual experience with seasonal aesthetics

    .

    Color Palettes: Event buildings, decorations, and interface elements adopt autumn color schemes—rich oranges, deep reds, golden yellows, and earthy browns that reflect falling leaves and harvest abundance. These warm tones contrast with summer brightness and winter coolness, creating distinctive seasonal identity.

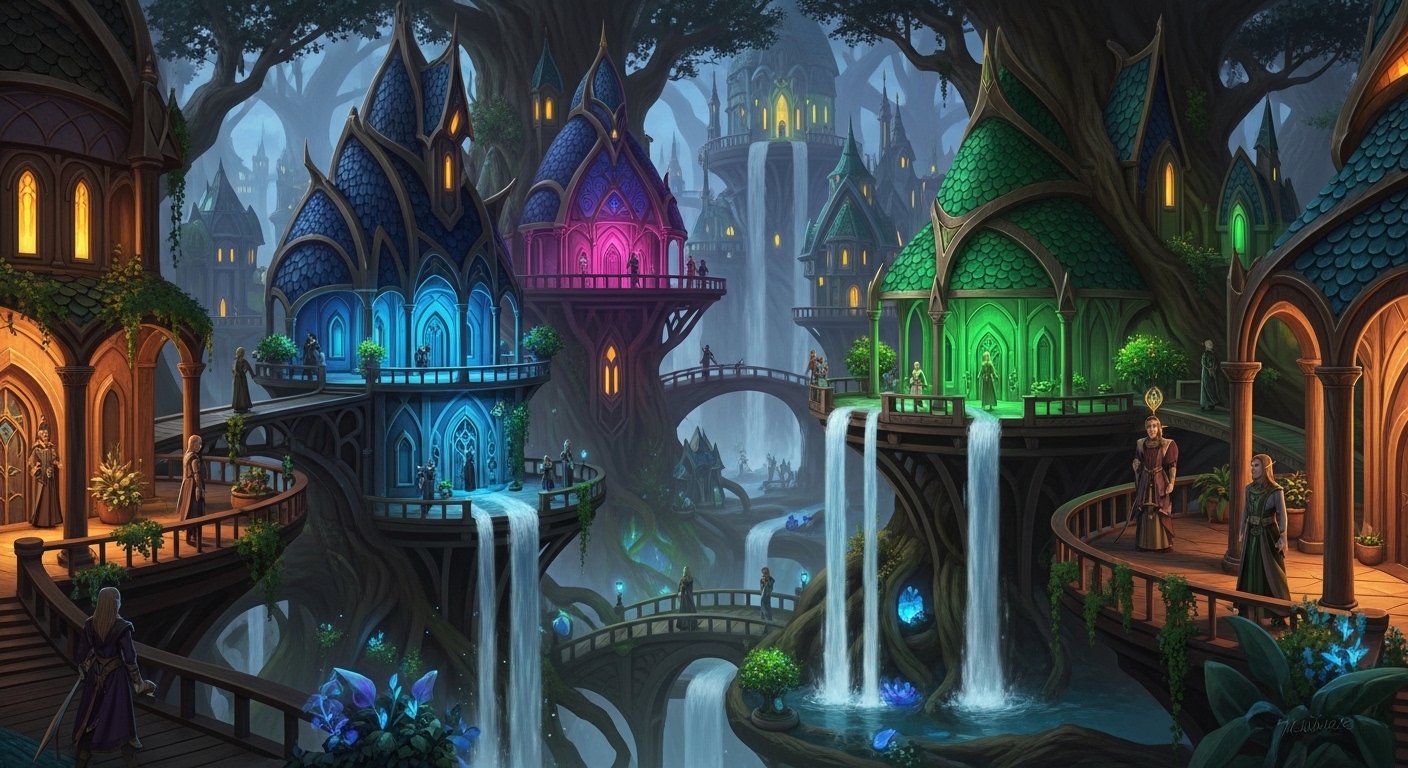
    Nature Transformations: Event narratives often depict the changing seasons in Elvenar’s fantasy world, with trees shedding leaves, harvests being gathered, and creatures preparing for winter. This environmental storytelling enhances immersion and connection to the seasonal cycle.

    Harvest Imagery: Event buildings frequently feature harvest themes—granaries, orchards, harvest festivals, and abundance symbols—that reinforce the season’s focus on gathering and storing resources.

    Mystical Elements: Autumn’s association with transitions and thresholds in folklore inspires mystical event elements—spiritual gatherings, ancestral commemorations, or magical harvests that blend seasonal realism with Elvenar’s fantasy setting.

    Narrative Arcs and Quest Stories

    Autumn event quests typically follow narrative patterns that resonate with seasonal themes

    .

    Preparation and Storage: Quest narratives emphasize preparing for winter, storing resources, and completing seasonal work. These stories justify resource-collection mechanics and reward structures that focus on accumulation.

    Community Gathering: Autumn events often feature fellowship or community gathering themes—harvest festivals, collective preparations, or shared abundance that encourages social gameplay and cooperation.

    Transformation and Change: Reflecting autumn’s transitional nature, event stories may feature transformation elements—changing forms, seasonal magic, or preparation for new beginnings that parallel the approach of winter and the new year.

    Gratitude and Celebration: Thanksgiving and harvest festival influences appear in narratives of gratitude, celebration of abundance, and recognition of the work that produced seasonal bounty.

    Typical Autumn Event Mechanics

    Resource Collection and Harvesting

    Autumn events typically emphasize resource collection mechanics that mirror harvest themes

    .

    Harvesting Mini-Games: Many autumn events feature mini-games where players “harvest” resources through match-three puzzles, collection mechanics, or gathering activities that provide event currency or rewards.

    Production Bonuses: Event mechanics may boost production buildings—workshops, manufactories, or special event structures—during autumn events, encouraging intensive manufacturing and resource generation

    .

    Storage and Accumulation: Autumn events often reward resource accumulation, with quests or mechanics that recognize players for maintaining stockpiles or reaching storage milestones.

    Goods-Focused Requirements: Reflecting harvest themes, autumn event quests frequently require manufactured goods, encouraging diverse production and trade activity.

    Seasonal Building Types

    Autumn events introduce building types that align with seasonal themes and provide specific benefits

    .

    Harvest Production Buildings: Event buildings that generate supplies, coins, or goods with autumn aesthetics and potentially harvest-themed bonuses. These buildings often provide efficient production that supports winter preparation.

    Storage and Granary Structures: Buildings themed around storage and preservation that may offer unique storage bonuses, inventory expansion, or resource protection mechanics.

    Festival and Celebration Buildings: Cultural buildings with autumn festival themes that provide culture bonuses, population benefits, or special event-related functions.

    Preparation-Focused Structures: Buildings that boost preparation for future challenges—perhaps enhancing tournament performance, providing winter event advantages, or offering long-term benefits that extend beyond the autumn season.

    Event Currency and Reward Systems

    Autumn event reward structures typically emphasize accumulation and preparation

    .

    Abundant but Demanding: Autumn events often feature generous event currency availability but substantial requirements for top-tier rewards, creating sustained engagement opportunities.

    Preparation Rewards: Reward shops may feature items specifically useful for upcoming winter events or year-end activities, encouraging strategic spending that looks beyond immediate gratification.

    Storage and Inventory Items: Reward selections often include storage expansions, inventory items, or resource packages that support the accumulation theme and provide lasting utility.

    Building Evolution Artifacts: For ongoing collection systems like Phoenixes, Bears, or other evolving buildings, autumn events may provide evolution artifacts that advance long-term progression goals

    .

    Strategic Preparation for Autumn Events

    Resource and Infrastructure Readiness

    Preparing for autumn events requires specific resource and infrastructure considerations

    .

    Diversified Goods Production: Since autumn events often feature goods-intensive quests and mechanics, maintaining production of all goods types—not merely boosted goods—ensures capability to complete diverse requirements without trade dependency.

    Supply Generation Capacity: Workshop tiers and production scheduling should support intensive manufacturing demands. Autumn events may require substantial supply investment for production, quest completion, or special mechanics

    .

    Storage Optimization: Adequate Main Hall levels ensure storage capacity for resource accumulation without production waste from storage caps

    . Autumn events reward preparation, and storage constraints undermine accumulation strategies.

    Coin Reserves: Maintaining substantial coin stockpiles supports event quest completion, production funding, and potential event shop purchases without disrupting normal city operations.

    City Layout and Space Planning

    Autumn event participation benefits from advance city planning

    .

    Event Building Space: Reserving space for anticipated autumn event buildings ensures immediate deployment and optimal placement without disruptive city reorganization during the event.

    Production Zone Efficiency: Organizing workshop and manufactory zones for efficient collection and production scheduling maximizes output during resource-intensive autumn events.

    Cultural Bonus Maximization: Ensuring event buildings can be placed in high-culture areas maximizes their effective benefits and integrates them optimally with existing city design.

    Timing and Annual Context

    Understanding autumn’s position in the annual calendar informs preparation strategy

    .

    Post-Summer Recovery: If summer events were resource-intensive, autumn preparation includes replenishing depleted stockpiles before the event begins.

    Pre-Winter Preparation: Autumn success can fund or prepare for winter events, creating strategic continuity across seasonal transitions.

    Anniversary Anticipation: With year-end anniversaries approaching, autumn event rewards may contribute to preparation for these milestone celebrations.

    Autumn Event Optimization Strategies

    Quest Completion Approaches

    Maximizing autumn event quest rewards requires efficient approaches

    .

    Harvest-Focused Efficiency: Since autumn events emphasize accumulation, prioritize quests that generate resources or reward stockpiling behavior. The resources invested in quests often return multiplied through event rewards.

    Production Scheduling: Align workshop and manufactory production with quest requirements, running cycles that complete when quests demand collection or that produce required goods types.

    Sustainable Pacing: Autumn events typically reward sustained participation across their duration rather than initial intensity followed by depletion. Pace effort to maintain consistent daily engagement.

    Fellowship Coordination: If autumn events feature collective elements or trade-intensive requirements, coordinate with fellowship members for mutual support and shared success.

    Reward Selection and Spending

    Optimal autumn event reward extraction requires strategic thinking

    .

    Preparation Value Prioritization: Prioritize rewards that support winter preparation or long-term development over immediate consumption. Storage items, resource packages, and preparation-focused buildings often provide superior long-term value.

    Building Collection Strategy: If multiple autumn buildings are available, select those that fill gaps in your city strategy or that provide unique functions not available through other means.

    Evolution Item Acquisition: For players with active evolution targets, prioritizing artifacts and evolution items during autumn events advances long-term collection goals that compound over time

    .

    Currency Efficiency: Calculate expected currency generation against reward costs to set realistic collection targets and avoid disappointment from unattainable goals.

    Mini-Game and Special Mechanic Mastery

    Autumn events often feature unique mechanics that reward mastery

    .

    Harvest Mini-Game Optimization: If match-three or collection mini-games appear, learning optimal strategies, combo patterns, or efficiency techniques maximizes reward generation per time invested.

    Production Bonus Timing: When events feature production bonuses, timing intensive manufacturing to coincide with these bonuses multiplies output and accelerates quest completion.

    Storage Mechanic Utilization: If special storage or accumulation mechanics appear, understanding their optimal utilization prevents waste and maximizes benefit extraction.

    Common Autumn Event Mistakes

    Preparation Shortcomings

    Inadequate preparation undermines autumn event success

    .

    Goods Shortages: Entering autumn events without diversified goods production creates bottlenecks when quests demand specific manufactured materials.

    Supply Constraints: Inadequate workshop tiers or poor production scheduling results in supply shortages that prevent completing production-intensive event content

    .

    Space Scarcity: Failing to reserve space for event buildings forces suboptimal placement or disruptive city reorganization during the event.

    Participation Pattern Errors

    Suboptimal participation patterns reduce autumn event value

    .

    Intensive-Only Approach: Attempting to complete all autumn content in initial days without sustained engagement misses daily rewards, cumulative bonuses, and extended event opportunities.

    Resource Depletion: Over-investing in autumn events without maintaining reserves for normal city operations or upcoming winter events creates post-event deficits.

    Reward Misallocation: Spending event currency on inferior immediate rewards while missing exclusive buildings, artifacts, or preparation items that provide lasting value.

    Strategic Misalignment

    Autumn participation that doesn’t align with broader strategy wastes potential

    .

    Building Mismatch: Selecting autumn buildings that don’t match city needs—military buildings for economic cities, for example—wastes limited acquisition opportunities.

    Short-Term Focus: Prioritizing immediate gratification over preparation for winter events and year-end celebrations misses autumn’s strategic position in the annual calendar.

    Isolation from Fellowship: Neglecting fellowship coordination during potentially collective events misses mutual support opportunities and reduces overall success potential.

    Conclusion

    Autumn events in Elvenar embody the season’s themes of harvest, abundance, and preparation, offering players opportunities to accumulate resources, collect exclusive buildings, and prepare for the challenges and celebrations of winter and year-end

    . These events occupy a crucial strategic position in the annual calendar, following summer intensity with rebuilding opportunities and preceding winter events with preparation-focused content.

    Success in autumn events requires understanding their unique mechanics—from harvest-themed mini-games and production bonuses to accumulation-rewarding quest structures—and preparing appropriately through diversified goods production, robust supply generation, and strategic space planning . During events, optimization through efficient quest completion, strategic reward selection, and mastery of special mechanics ensures maximum value extraction from these seasonal celebrations.