Category: Elvenar

  • Elixir Production in Elvenar: The Complete Guide to Mastering Tier 3 Magical Goods

    Elixir Production in Elvenar: The Complete Guide to Mastering Tier 3 Magical Goods

    Introduction: The Potent Power of Magical Goods

    In the rich and strategic world of Elvenar, few resources carry the weight—and the cost—of Elixir. As a Tier 3 (T3) Magical Good, Elixir stands alongside Magic Dust and Gems as the pinnacle of standard resource production. These magical goods are the most demanding to manufacture, requiring substantial investments in population, culture, and coin infrastructure. Yet for players blessed with Elixir as a boosted good, mastering its production unlocks tremendous trading power and accelerates progression through even the most demanding chapters.

    This comprehensive guide will walk you through everything you need to know about Elixir production: from determining if Elixir is your boosted good, to optimizing manufactory levels, understanding efficiency trade-offs, exploring the Sentient Goods connection, and leveraging Elixir in the trading economy. Whether you are a new player deciphering the game’s resource systems or a veteran caterer looking to maximize efficiency, this guide will ensure your Elixir production reaches its full potential.


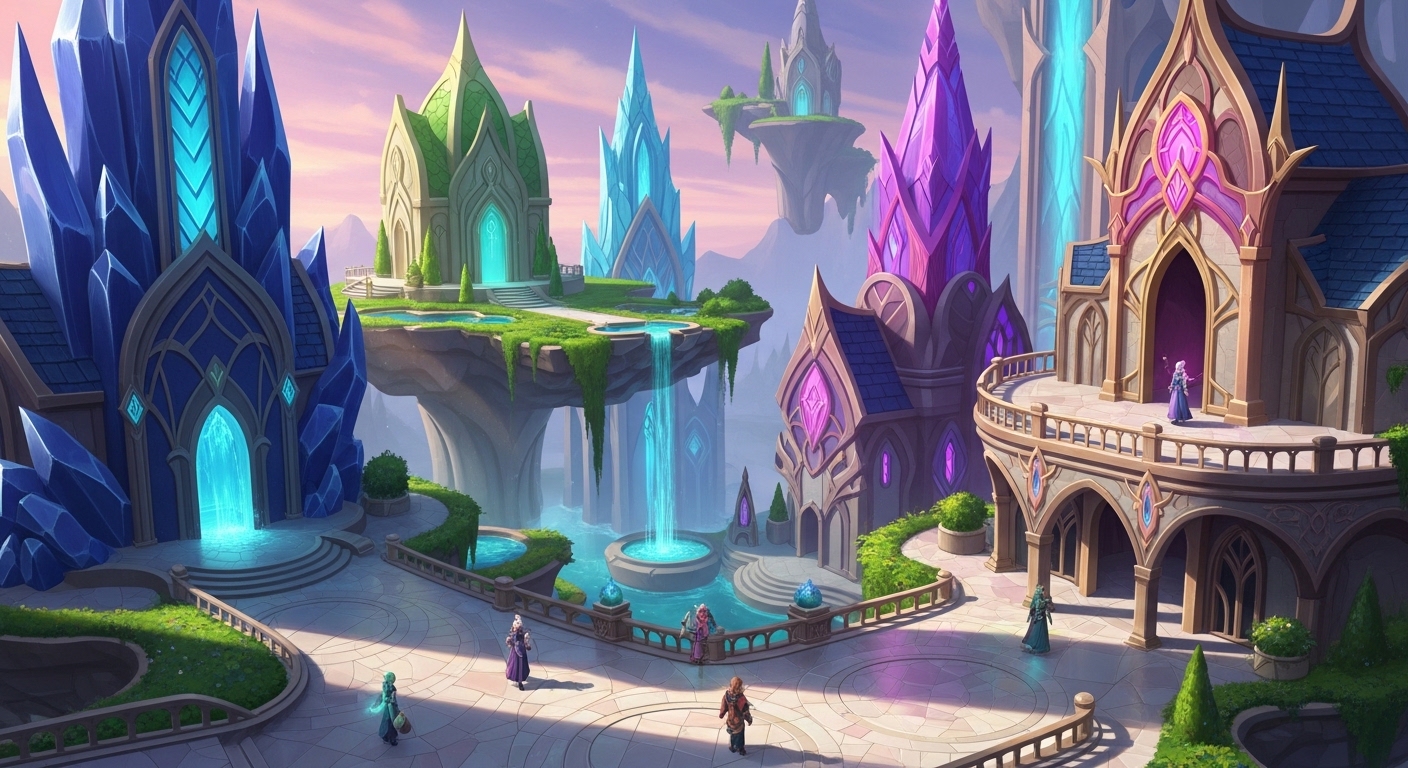
    What Is Elixir in Elvenar?

    Elixir belongs to the Magical Goods category, which constitutes the third tier of Standard Goods in Elvenar’s economic hierarchy. The three tiers are structured as follows:

    TierCategoryGoods
    Tier 1 (T1)Basic GoodsMarble, Steel, Planks
    Tier 2 (T2)Crafted GoodsCrystal, Scrolls, Silk
    Tier 3 (T3)Magical GoodsElixir, Magic Dust, Gems

    Elixir is unlocked through research in the Technology Tree. Once researched, you can build the Elixir Manufactory, which requires a street connection to your Main Hall to function.

    What makes Elixir unique among the T3 goods is its position in the game’s cycling boost system. As you will learn below, your boosted Elixir production determines not only your T3 efficiency but also your boosted Sentient Goods in later chapters.


    Boosted Goods: The Foundation of Efficient Elixir Production

    Understanding the Boost System

    Every player in Elvenar receives three boosted goods—one from each tier—randomly assigned based on your city’s location on the world map when your account is created. These boosted goods receive a production multiplier based on the number of relics you have collected for that specific good type.

    To determine whether Elixir is one of your boosted goods:

    1. Open your Main Hall
    2. Navigate to the Relics tab
    3. Look for the three goods displayed at the top—these are your boosted goods

    Alternatively, you can look at your World Map. The provinces directly North, South-East, and South-West of your city contain your boosted goods.

    If Elixir appears in this list, congratulations! You are “Elixir-boosted” and should prioritize Elixir manufactories as your primary Tier 3 production.

    The Importance of Focusing on Boosted Goods

    Concentrating production on your boosted goods is one of the most fundamental efficiency principles in Elvenar. As experienced players explain, the difference between boosted and non-boosted production becomes more pronounced as you progress. A player with a high relic count and appropriate Ancient Wonders can produce dramatically more Elixir from a single manufactory than an unboosted player could from multiple buildings.

    The relic boost system allows you to increase your boosted good production up to 700%. This can be further enhanced by Ancient Wonders like the Mountain Halls, making dedicated Elixir producers extremely efficient.

    If Elixir Is Not Your Boosted Good

    If Elixir does not appear among your three boosted goods, the recommended strategy is straightforward: do not build Elixir manufactories at all. Instead, produce your boosted Tier 3 good (Magic Dust or Gems) and trade with neighbors or fellowship members for the Elixir you need.

    This approach saves valuable city space and resources while still giving you access to all goods through the Trader. As one forum user succinctly advises: “Build more of your boosted and none of your non-boosted… and trade”.


    Elixir Manufactory: Production Basics

    Building Footprints: Elves vs. Humans

    One of the first things new players notice is that Elixir manufactories look different—and take up different amounts of space—depending on whether you play as Elves or Humans.

    For Elven players, the Elixir Manufactory starts at 4×3 and can expand to 4×5 at higher levels.

    For Human players, the Elixir Manufactory starts at a more compact 3×3 and can expand to 4×4.

    This difference in footprint means Human players can potentially fit more Elixir production into the same city space, though the production values are adjusted to maintain balance.

    Production Options

    Like all manufactories, the Elixir Manufactory offers multiple production durations:

    • 3-hour production: Best for active players who can collect frequently; offers the best goods-per-hour ratio
    • 9-hour production: Good for players who check in a few times daily
    • 1-day and 2-day productions: These remain available until your manufactory reaches level 24, at which point they are replaced by Sentient Goods production options

    Production Costs and Output

    Elixir production is notably expensive compared to lower tiers. Here are sample production values for an Elven Elixir Manufactory at various levels:

    LevelFootprintPopulationCulture3-Hour Production
    14×321129056 Elixir
    54×4429176176 Elixir
    104×51,017395395 Elixir
    154×52,087571571 Elixir

    For Human players, the numbers differ slightly due to the smaller footprint:

    LevelFootprintPopulationCulture3-Hour Production
    13×312322041 Elixir
    53×4250132132 Elixir
    104×4670317317 Elixir
    154×41,353458458 Elixir

    As you can see, upgrading your Elixir manufactory significantly increases output, but at a steep cost in population and culture requirements.

    Using Enchantments

    Magical Manufacturing spells can significantly boost your Elixir production. For maximum efficiency, cast the spell right before collecting a production run to make the most of its duration. This is particularly valuable when you need large quantities of Elixir for research or upgrades.


    The Relic Boost System for Elixir

    How Relics Increase Production

    Your Elixir production boost percentage is determined by the number of Elixir Relics you have collected. Relics are obtained by:

    • Completing encounters in Elixir provinces on the world map
    • Opening chests when giving neighborly help (random chance)
    • Participating in tournaments when Elixir is the featured good
    • Completing certain event quests

    Finding Elixir Relics on the Map

    Your boosted Elixir provinces are located in a specific pattern on the World Map. The three provinces directly adjacent to your city in the North, South-East, and South-West directions contain your boosted goods—one for each tier. If Elixir is your T3 boost, you will find Elixir relics in one of these three directions.

    Maximum Boost Potential

    The maximum relic boost for Standard Goods is 700%. Achieving this requires collecting a significant number of Elixir relics. The exact thresholds are displayed in your Main Hall’s Relics tab.


    Efficiency Considerations: The Diminishing Returns Challenge

    The Hidden Cost of High-Level Manufactories

    One of the most counterintuitive findings in Elvenar is that higher-level manufactories are not always more space-efficient than multiple lower-level ones. This is because as manufactories are upgraded, they require more people to operate them, but the amount of goods produced does not increase proportionally to the population required.

    Consider this example using Steel manufactories (the same principle applies to Elixir):

    • A level 20 manufactory requires 2,160 people and makes 231 goods → 9.4 people per good
    • A level 23 manufactory requires 4,252 people and makes 290 goods → 14.7 people per good

    The level 23 requires nearly twice the population while producing far less than twice the goods. The same pattern holds for culture requirements. Therefore, the higher-level manufactories need more “support” squares in the form of population and culture buildings, making them, overall, less efficient.

    What “Efficiency” Really Means

    When analyzing manufactory efficiency, you cannot simply look at the building’s footprint. As one analyst explains: “If you happened to be perfectly balanced at 0 population available and 0 culture available, even if you had a beautiful open space of exactly the right size needed for the base of a manufactory, you wouldn’t be able to place it, because it requires population and culture. Since you can’t build or upgrade a manufactory without population and culture, the space those take up must necessarily also be factored in to the production capabilities of the manufactory”.

    This means that a lower-level manufactory with lower population demands can sometimes be more efficient overall than a higher-level one that requires significantly more support buildings.

    Strategic Upgrade Recommendations

    Based on detailed efficiency spreadsheets analyzing manufactories from the Dwarves chapter through Revenge of the Exile, researchers have found that “it is almost always better to have the manufactories most of an available set of upgrades, which is most often four levels, behind where they could be”.

    In practical terms:

    • Upgrade to the first available level in each new chapter to unlock new production options
    • Consider parking at certain levels where efficiency peaks before diminishing returns become severe
    • Use community spreadsheets to check efficiency ratios for your specific chapter

    For players who fight and only use one or two manufactories, the math may differ. But for caterers who need greater production, “the numbers certainly seem to lie in favour of the smaller manufactories”.


    Elixir and Sentient Goods: The Advanced Connection

    Unlocking Sentient Production

    When you reach Chapter XII – The Elementals and upgrade your Elixir manufactory to level 24 or higher, you unlock the ability to produce Sentient Goods. At this point, the 1-day and 2-day production options on your Elixir manufactory are replaced with Sentient Goods options, while the 3-hour and 9-hour options for regular Elixir remain available.

    Your Boosted Sentient Good

    The formula for determining your boosted Sentient Good follows a +1 cycling pattern from your Standard Goods boost. For Elixir producers, this means:

    Your Boosted Standard GoodYour Boosted Sentient Good
    ElixirSilly Soap

    The full mapping for T3 goods is:

    • Elixir → Silly Soap
    • Magic Dust → Alloy Shrooms
    • Gems → Cosmic Bismuth

    Sentient Production Requirements

    Producing Sentient Goods (including Silly Soap) requires:

    • Divine Seeds (introduced in Chapter XI – Halflings)
    • The corresponding Standard Good (Elixir, in this case)

    Later Chapters: Ascended Goods

    In Chapter XVIII – Team Spirit, manufactories at level 32 and higher unlock Ascended Goods production. For Elixir-boosted players, this progression continues with boosted Ascended Goods following a +2 mapping rather than +1.


    Alternative Sources of Elixir

    Event Buildings and the Moonstone Library

    Several event buildings can produce Elixir, particularly for players in earlier chapters. A significant update to the Moonstone Library Set changed how certain buildings produce goods:

    “In chapters 1-8: The Mana Plant and the Gum Tree… will now produce your boosted Precious Standard Good (which is either Elixir, Magic Dust, or Gems)”.

    This means that if Elixir is your boosted good, these buildings will produce Elixir for you, providing an alternative to manufactory production.

    However, as you progress, event buildings become less efficient unless you upgrade them with Royal Restorations—and there are often better buildings to prioritize for these upgrades.

    The Traveling Merchant

    The Traveling Merchant is a craftable building that can produce non-boosted goods more efficiently than building non-boosted manufactories. While not as efficient as event buildings, it can be a good option when event buildings no longer produce the goods you need.


    Trading Elixir: Maximizing Value

    The Trader and Cross-Tier Trading

    The Elvenar Trader uses value ratios for goods, but many players argue these ratios do not fully account for the higher production costs of Tier 3 goods. Elixir, as a T3 good, is more expensive to produce per unit than T1 or T2 goods.

    Fellowship Trading Strategy

    The most effective approach to trading Elixir is to be part of an active, balanced fellowship. If you are producing Elixir as your boosted good, you should:

    1. Produce only your boosted Elixir in quantity
    2. Trade down for the Tier 2 and Tier 1 goods you need
    3. Join an active fellowship where members understand the value of Elixir and will accept fair trades
    4. Use the Wholesaler as a last resort—it offers worse rates but provides guaranteed access to non-boosted goods

    The Blooming Trader’s Guild Option

    For players struggling to acquire non-boosted goods, the Blooming Trader’s Guild Ancient Wonder increases wholesaler returns, making it viable to make trades for non-boosted goods using coins, supplies, or boosted goods.


    Common Mistakes to Avoid

    Building Non-Boosted Elixir Manufactories

    The most common and costly mistake is building Elixir manufactories when Elixir is not one of your three boosted goods. This wastes precious city space and resources that could be better used elsewhere.

    Over-Upgrading Without Checking Efficiency

    Blindly upgrading your Elixir manufactory to the maximum available level in each chapter can actually reduce your space efficiency due to the population and culture demands. Always check the population and culture requirements against the production gains before upgrading.

    Ignoring the Relic Boost

    Failing to collect Elixir relics leaves significant production potential untapped. Prioritize clearing Elixir provinces on the world map and participating in tournaments when Elixir is featured.

    Neglecting Support Infrastructure

    Elixir production requires substantial coins, supplies, population, and culture. Ensure your Workshops, Residences, and Culture buildings are adequate to support your manufactories. An Elixir manufactory without sufficient support will underperform significantly.


    Conclusion: Mastering Your Elixir Production

    Elixir production in Elvenar is a rewarding but demanding endeavor. Whether Elixir is your blessed boosted good or a resource you acquire through trade, understanding its production mechanics, cost structures, and efficiency considerations will make you a more effective city manager.

    If Elixir is your boosted good, embrace it. Build your manufactories strategically—not necessarily to the highest possible level, but to the most efficient level for your chapter. Collect your relics, use enchantments wisely, and leverage your efficient production to become a trading powerhouse in your fellowship.

    If Elixir is not your boosted good, respect its value but do not waste space producing it inefficiently. Trade for it instead, focusing your own production on the goods where you have the boost advantage.

    As you progress into higher chapters, remember that your Elixir manufactories will evolve to produce Sentient Goods (Silly Soap) and eventually Ascended Goods. Plan ahead, build strategically, and your Elixir production will continue to flow through every chapter of your Elvenar journey.

    The key principles to remember are simple: focus on your boosted goods, pay attention to efficiency at each chapter, use enchantments strategically, and never underestimate the importance of population and culture in your production calculations.

  • Magic Dust in Elvenar: The Complete Guide to Mastering Tier 3 Magical Goods

    Magic Dust in Elvenar: The Complete Guide to Mastering Tier 3 Magical Goods

    Introduction: The Sparkle of High-Tier Production

    In the intricate economic ecosystem of Elvenar, few resources carry the prestige and production challenges of Magic Dust. As a Tier 3 (T3) Magical Good, Magic Dust represents the pinnacle of standard resource production alongside Elixir and Gems . These magical goods are the most resource-intensive to manufacture, requiring substantial investments in population, culture, and coin/supply infrastructure. Yet for players blessed with Magic Dust as a boosted good, mastering its production unlocks tremendous trading power and accelerates progression through even the most demanding chapters.

    This comprehensive guide will walk you through everything you need to know about Magic Dust production: from determining if Magic Dust is your boosted good, to optimizing manufactory levels, managing production costs, understanding the Sentient Goods connection, and leveraging Magic Dust in the trading economy. Whether you are a new player deciphering the game’s resource systems or a veteran caterer looking to maximize efficiency, this guide will ensure your Magic Dust production truly sparkles.


    What Are Magic Dust in Elvenar?

    Magic Dust belongs to the Magical Goods category, which is the third tier of Standard Goods in Elvenar’s economic hierarchy. The three tiers are structured as follows:

    TierCategoryGoods
    Tier 1 (T1)Basic GoodsMarble, Steel, Planks
    Tier 2 (T2)Crafted GoodsCrystal, Scrolls, Silk
    Tier 3 (T3)Magical GoodsElixir, Magic Dust, Gems

    Magic Dust is unlocked through research in Chapter 3 of the Research Tree . Once the technology is researched, you can build the Magic Dust Manufactory, which requires a street connection to your Main Hall .

    Magic Dust is the most expensive of the Standard Goods to produce, requiring significant population and culture support. However, this high cost comes with a correspondingly high value in the trading system, making Magic Dust a powerful tool for acquiring the lower-tier goods you need.


    Boosted Goods: The Foundation of Efficient Production

    Understanding the Boost System

    Every player in Elvenar receives three boosted goods—one from each tier—randomly assigned based on your city’s location on the world map when your account is created . These boosted goods receive a production multiplier based on the number of relics you have collected for that specific good type.

    To determine whether Magic Dust is one of your boosted goods:

    1. Open your Main Hall
    2. Navigate to the Relics tab
    3. Look for the three goods displayed at the top—these are your boosted goods 

    If Magic Dust appears in this list, congratulations! You are “Magic Dust-boosted” and should prioritize Magic Dust manufactories as your primary Tier 3 production.

    The Importance of Focusing on Boosted Goods

    Concentrating production on your boosted goods is one of the most fundamental efficiency principles in Elvenar. As experienced players explain, “There is no wrong way to play Elvenar but you will save a lot of precious city space if you concentrate on boosted goods. In the beginning, this difference may be minimal but the longer you play and the higher you increase your % boost, the bigger the difference will get” .

    The relic boost system allows you to increase your boosted good production up to 700% , and this can be further enhanced by Ancient Wonders like the Mountain Halls . A player with a high relic count and appropriate Wonders can produce dramatically more Magic Dust from a single manufactory than an unboosted player could from multiple buildings.

    If Magic Dust Is Not Your Boosted Good

    If Magic Dust does not appear among your three boosted goods, the recommended strategy is straightforward: do not build Magic Dust manufactories at all. Instead, produce your boosted Tier 3 good (Elixir or Gems) and trade with neighbors or fellowship members for the Magic Dust you need .

    As one forum user succinctly advises: “Build more of your boosted and none of your non-boosted (only exception is level 1 buildings for use in events of course) and trade” . This approach saves valuable city space and resources while still giving you access to all goods through the Trader.


    Magic Dust Manufactory: Production Basics

    Building and Placement

    The Magic Dust Manufactory is a production building that, like all manufactories, must be connected to your Main Hall via streets. Its footprint and upgrade requirements change as you progress through chapters. For both Elves and Humans, the Magic Dust Manufactory starts at 4×3 and can expand to 5×4 at higher levels .

    Production Options

    Like all manufactories, the Magic Dust Manufactory offers multiple production durations:

    • 3-hour production: Best for active players who can collect frequently; offers the best goods-per-hour ratio
    • 9-hour production: Good for players who check in a few times daily
    • 1-day and 2-day productions: These remain available until your manufactory reaches level 24, at which point they are replaced by Sentient Goods production options 

    Production Costs

    Magic Dust production is notably expensive compared to lower tiers. For example, a level 8 Elixir manufactory producing 400 units in a 3-hour cycle requires significant supply and population support. When factoring in the supporting residences, workshops, and culture buildings needed, T3 production requires roughly half the space of T2 production but still represents a substantial investment .

    The exact costs for each manufactory level are displayed in the build menu. For Elven players, a level 1 Magic Dust Manufactory requires 4,800 coins and produces 56 units, while higher levels dramatically increase output at proportionally higher costs .

    Using Enchantments

    Magical Manufacturing spells can significantly boost your Magic Dust production. For maximum efficiency, cast the spell right before collecting a production run to make the most of its duration. This is particularly valuable when you need large quantities of Magic Dust for research or upgrades.


    The Relic Boost System for Magic Dust

    How Relics Increase Production

    Your Magic Dust production boost percentage is determined by the number of Magic Dust Relics you have collected. Relics are obtained by:

    • Completing encounters in Magic Dust provinces on the world map
    • Opening chests when giving neighborly help (random chance)
    • Participating in tournaments when Magic Dust is the featured good
    • Completing certain event quests

    Maximum Boost Potential

    The maximum relic boost for Standard Goods is 700% . Achieving this requires collecting a significant number of Magic Dust relics. The exact thresholds are displayed in your Main Hall’s Relics tab.

    Ancient Wonder Enhancements

    The Mountain Halls Ancient Wonder further increases your boosted goods production beyond the relic cap. For dedicated Magic Dust producers, this Wonder is an invaluable investment.


    Efficiency Considerations: Leveling Your Magic Dust Manufactory

    The Diminishing Returns Challenge

    One of the most counterintuitive findings in Elvenar is that higher-level manufactories are not always more space-efficient than multiple lower-level ones. Detailed spreadsheets analyzing manufactory efficiency across all chapters reveal that as you upgrade manufactories, the population and culture requirements increase faster than production output .

    This is because “as the manufactories are upgraded, they require more people to operate them but the amount of goods produced does not increase proportionally to the population required” . For example, with a Steel manufactory (the same principle applies to Magic Dust), a level 20 requires 2,160 people and makes 231 goods, meaning it takes 9.4 people to make 1 good, while a level 23 requires 4,252 people and makes 290 goods, meaning it takes 14.7 people to make 1 good .

    Therefore, from a pure space-efficiency perspective, having several moderately-leveled Magic Dust manufactories may actually produce more goods per total square (including support buildings) than a single maximally-upgraded manufactory.

    When to Upgrade

    The optimal upgrade strategy depends on your chapter and available space. General guidelines include:

    • Upgrade to the first available level in each new chapter to unlock new production options
    • Consider parking at certain levels where efficiency peaks before diminishing returns become severe
    • Use community spreadsheets to check efficiency ratios for your specific chapter

    Population and Culture Requirements

    Since you cannot build or upgrade a manufactory without population and culture, the space those take up must necessarily be factored into the production capabilities of the manufactory . This is why a lower-level manufactory with lower population demands can sometimes be more efficient overall than a higher-level one that requires significantly more support buildings.


    Magic Dust and Sentient Goods: The Advanced Connection

    Unlocking Sentient Production

    When you reach Chapter XII – The Elementals and upgrade your Magic Dust manufactory to level 24 or higher, you unlock the ability to produce Sentient Goods . At this point, the 1-day and 2-day production options on your Magic Dust manufactory are replaced with Sentient Goods options, while the 3-hour and 9-hour options for regular Magic Dust remain unchanged .

    Your Boosted Sentient Good

    The formula for determining your boosted Sentient Good follows a +1 cycling pattern from your Standard Goods boost. For Magic Dust, which is a Tier 3 good, your boosted Sentient Good is Alloy Shrooms .

    The full mapping for Magic Dust producers is:

    Your Boosted Standard GoodYour Boosted Sentient Good
    Magic DustAlloy Shrooms

    This mapping applies to both Elven and Human manufactories .

    Sentient Production Requirements

    Producing Sentient Goods (including Alloy Shrooms) requires :

    • Divine Seeds (introduced in Chapter XI – Halflings)
    • The corresponding Standard Good (Magic Dust, in this case)

    Later Chapters: Ascended Goods

    In Chapter XVIII – Team Spirit, manufactories at level 32 and higher unlock Ascended Goods production. For Magic Dust-boosted players, this progression continues with boosted Ascended Goods following a +2 mapping rather than +1.


    Trading Magic Dust: Maximizing Value

    The Trader and Cross-Tier Trading

    The Elvenar Trader uses value ratios for goods, but many players argue these ratios do not fully account for the higher production costs of Tier 3 goods. A detailed analysis concluded that “the game is set so that options and advantages are really limited” when it comes to cross-tier trading .

    Fellowship Trading Strategy

    The most effective approach to trading Magic Dust is to be part of an active, balanced fellowship. As one player notes: “I produce my boosts knowing my fellowship mates have my weakside and produce their boosts—then we all come out ahead” .

    If you are producing Magic Dust as your boosted good, you should:

    1. Produce only your boosted Magic Dust in quantity
    2. Trade down for the Tier 2 and Tier 1 goods you need
    3. Join an active fellowship where members understand the value of Magic Dust and will accept fair trades
    4. Use the Wholesaler as a last resort—it offers worse rates but provides guaranteed access to non-boosted goods

    The Blooming Trader’s Guild Option

    For players struggling to acquire non-boosted goods, the Blooming Trader’s Guild Ancient Wonder increases wholesaler returns, making it viable to make trades for non-boosted goods using coins, supplies, or boosted goods . This wonder also provides settlement bonus increases, making it excellent for future chapters as well.


    Alternative Sources of Magic Dust

    The Traveling Merchant

    The Traveling Merchant is a craftable building that can produce non-boosted goods more efficiently than building non-boosted manufactories. As one player explains, “It isn’t as efficient as event buildings, but if the event buildings you are getting no longer produce the goods you are looking for, then the Traveling Merchant can be a good option” .

    Do not confuse the Traveling Merchant with the Festival Merchant—they are both craftable but serve different purposes.

    Event Buildings

    Many event buildings produce Magic Dust or other Tier 3 goods. When evaluating these buildings, consider:

    • Production per square compared to your manufactories
    • Population and culture implications (many event buildings provide these rather than consuming them)
    • Upgrade requirements using Royal Restorations

    Common Mistakes to Avoid

    Building Non-Boosted Magic Dust Manufactories

    The most common and costly mistake is building Magic Dust manufactories when Magic Dust is not one of your three boosted goods. As one player noted, “You should notice that you will produce more for your boosted good than the other two… It is far efficient if you concentrate on producing only your boosted goods” .

    Over-Upgrading Without Checking Efficiency

    Blindly upgrading your Magic Dust manufactory to the maximum available level in each chapter can actually reduce your space efficiency. Always check the population and culture requirements against the production gains before upgrading.

    Ignoring the Relic Boost

    Failing to collect Magic Dust relics leaves significant production potential untapped. Prioritize clearing Magic Dust provinces on the world map and participating in tournaments when Magic Dust is featured.

    Neglecting Support Infrastructure

    Magic Dust production requires substantial coins, supplies, population, and culture. Ensure your Workshops, Residences, and Culture buildings are adequate to support your manufactories. A Magic Dust manufactory without sufficient support is like a car without fuel.


    Conclusion: Mastering Your Magic Dust Production

    Magic Dust production in Elvenar is a rewarding but demanding endeavor. Whether Magic Dust is your blessed boosted good or a resource you acquire through trade, understanding its production mechanics, cost structures, and efficiency considerations will make you a more effective city manager.

    If Magic Dust is your boosted good, embrace it. Build your manufactories, collect your relics, and leverage your efficient production to become a trading powerhouse in your fellowship. If Magic Dust is not your boosted good, respect its value but do not waste space producing it inefficiently—trade for it instead.

    The key principles to remember are simple: focus on your boosted goods, pay attention to efficiency at each chapter, use enchantments strategically, and never underestimate the importance of population and culture in your production calculations.

  • Gems Production in Elvenar: The Complete Guide to Mastering Tier 3 Manufactories

    Gems Production in Elvenar: The Complete Guide to Mastering Tier 3 Manufactories

    Introduction: Understanding the Most Valuable Standard Goods

    In the intricate economy of Elvenar, few resources carry the prestige and production challenges of Gems. As a Tier 3 (T3) Standard Good, Gems represent the pinnacle of basic resource production—more expensive to manufacture, more valuable in trade, and more demanding of your city’s infrastructure than their Tier 1 and Tier 2 counterparts. Yet for players blessed with Gems as a boosted good, mastering their production unlocks tremendous trading power and accelerates progression through even the most demanding chapters.

    This comprehensive guide will walk you through everything you need to know about Gems production: from understanding whether Gems are your boosted good, to optimizing manufactory levels, managing production costs, and leveraging Gems in the trading economy. Whether you are a new player trying to decipher the game’s resource systems or a veteran caterer looking to maximize efficiency, this guide will ensure your Gem production shines.

    What Are Gems in Elvenar?

    Gems belong to the Magical Goods category, which is the third tier of Standard Goods in Elvenar’s economic hierarchy . The three tiers are structured as follows:

    TierCategoryGoods
    Tier 1 (T1)Basic GoodsMarble, Steel, Planks
    Tier 2 (T2)Crafted GoodsCrystal, Scrolls, Silk
    Tier 3 (T3)Magical GoodsElixir, Magic Dust, Gems

    Gems are the most resource-intensive of the Standard Goods to produce, requiring significant population, culture, and coin/supplies investments . However, this high cost comes with a correspondingly high value in the trading system, making Gems a powerful tool for acquiring the lower-tier goods you need.

    Boosted Goods: The Foundation of Efficient Production

    Understanding the Boost System

    Every player in Elvenar receives three boosted goods—one from each tier—randomly assigned based on your city’s location on the world map when your account is created . These boosted goods receive a production multiplier based on the number of relics you have collected for that specific good type.

    To determine whether Gems are one of your boosted goods:

    1. Open your Main Hall
    2. Navigate to the Relics tab
    3. Look for the three goods displayed at the top—these are your boosted goods 

    If Gems appear in this list, congratulations! You are “Gems-boosted” and should prioritize Gems manufactories as your primary Tier 3 production.

    The Importance of Focusing on Boosted Goods

    Concentrating production on your boosted goods is one of the most fundamental efficiency principles in Elvenar. As one experienced player explains, “There is no wrong way to play Elvenar but you will save a lot of precious city space if you concentrate on boosted goods. In the beginning, this difference may be minimal but the longer you play and the higher you increase your % boost, the bigger the difference will get” .

    The relic boost system allows you to increase your boosted good production up to 700% , and this can be further enhanced by Ancient Wonders like the Mountain Halls. A player with a high relic count and appropriate Wonders can produce dramatically more Gems from a single manufactory than an unboosted player could from multiple buildings.

    If Gems Are Not Your Boosted Good

    If Gems do not appear among your three boosted goods, do not despair. The recommended strategy is straightforward: do not build Gems manufactories at all. Instead, produce your boosted Tier 3 good (Elixir or Magic Dust) and trade with neighbors or fellowship members for the Gems you need .

    As one forum user succinctly advises: “Build more of your boosted and none of your non-boosted (only exception is level 1 buildings for use in events of course) and trade” . This approach saves valuable city space and resources while still giving you access to all goods through the Trader.

    Gems Manufactory: Production Basics

    Building and Placement

    The Gems Manufactory is a production building that, like all manufactories, must be connected to your Main Hall via streets. Its footprint and upgrade requirements change as you progress through chapters, so always check the Elvenar Wiki or in-game build menu for current specifications.

    Production Options

    Like all manufactories, the Gems Manufactory offers multiple production durations:

    • 3-hour production: Best for active players who can collect frequently; offers the best goods-per-hour ratio
    • 9-hour production: Good for players who check in a few times daily
    • 1-day and 2-day productions: Replaced by Sentient Goods production options once your manufactory reaches level 24 and you have entered Chapter XII 

    Production Costs

    Gems production is notably expensive compared to lower tiers. A detailed analysis from the Sorcerers and Dragons chapter revealed that a level 19 Gems manufactory (the maximum for that chapter) produces 247 Gems per 3-hour run but requires:

    • 7,900 Supplies
    • 79,000 Gold

    For comparison, a level 23 Marble manufactory producing the player’s boosted Tier 1 good required only 580 Supplies and 5,800 Gold for a similar production run . This 13.6x cost difference highlights why Gems are so valuable in trade and why focusing on your boosted goods is critical.

    Using Enchantments

    Magical Manufacturing spells can significantly boost your Gems production. For maximum efficiency, cast the spell right before collecting a production run to make the most of its duration . This is particularly valuable when you need large quantities of Gems for research or upgrades.

    The Relic Boost System for Gems

    How Relics Increase Production

    Your Gems production boost percentage is determined by the number of Gems Relics you have collected. Relics are obtained by:

    • Completing encounters in Gems provinces on the world map
    • Opening chests when giving neighborly help (random chance)
    • Participating in tournaments when Gems are the featured good
    • Completing certain event quests

    Maximum Boost Potential

    The maximum relic boost for Standard Goods is 700% . Achieving this requires collecting a significant number of Gems relics. The exact thresholds are displayed in your Main Hall’s Relics tab.

    Ancient Wonder Enhancements

    The Mountain Halls Ancient Wonder further increases your boosted goods production beyond the relic cap. For dedicated Gems producers, this Wonder is an invaluable investment.

    Efficiency Considerations: Leveling Your Gems Manufactory

    The Diminishing Returns Challenge

    One of the most counterintuitive findings in Elvenar is that higher-level manufactories are not always more space-efficient than multiple lower-level ones. Detailed spreadsheets analyzing manufactory efficiency across all chapters reveal that as you upgrade manufactories, the population and culture requirements increase faster than production output .

    This means that from a pure space-efficiency perspective, having several moderately-leveled Gems manufactories may actually produce more goods per total square (including support buildings) than a single maximally-upgraded manufactory.

    When to Upgrade

    The optimal upgrade strategy depends on your chapter and available space. General guidelines include:

    • Upgrade to the first available level in each new chapter to unlock new production options
    • Consider parking at certain levels where efficiency peaks before diminishing returns become severe
    • Use the Elvenar Wiki or community spreadsheets to check efficiency ratios for your specific chapter

    Population and Culture Requirements

    As one forum analyst explained: “If you happened to be perfectly balanced at 0 population available and 0 culture available, even if you had a beautiful open space of exactly the right size needed for the base of a manufactory, you wouldn’t be able to place it, because it requires population and culture. Since you can’t build or upgrade a manufactory without population and culture, the space those take up must necessarily also be factored in to the production capabilities of the manufactory” .

    This is why a level 20 manufactory requiring 2,160 people to produce 231 units might be more efficient than a level 23 requiring 4,252 people to produce only 290 units—the population cost per unit nearly doubles .

    Gems and Sentient Goods: The Advanced Connection

    Unlocking Sentient Production

    When you reach Chapter XII – The Elementals and upgrade your Gems manufactory to level 24 or higher, you unlock the ability to produce Sentient Goods . For Gems-boosted players, your boosted Sentient Good follows the +1 cycling pattern:

    Your Boosted GoodYour Boosted Sentient Good
    GemsCosmic Bismuth 

    Sentient Production Requirements

    Producing Sentient Goods (including Cosmic Bismuth) requires:

    • Divine Seeds (introduced in Chapter XI – Halflings)
    • The corresponding Standard Good (Gems, in this case)

    The 1-day and 2-day production options on your Gems manufactory are replaced with Sentient Goods options once you reach this stage .

    Later Chapters: Ascended Goods

    In Chapter XVIII – Team Spirit, manufactories at level 32 and higher unlock Ascended Goods production . For Gems-boosted players, this progression continues, though the specific Ascended Good mapping differs (boosted regular good +2 rather than +1) .

    Trading Gems: Maximizing Value

    The Trader and Fair Trades

    The Elvenar Trader uses a value ratio of approximately 2.25:1.5:1 for T1:T2:T3 goods . This means:

    • 1 unit of Gems (T3) is worth roughly 1.5 units of Tier 2 goods
    • 1 unit of Gems (T3) is worth roughly 2.25 units of Tier 1 goods

    However, many players argue that these ratios do not fully account for the higher production costs of Tier 3 goods. A detailed analysis concluded that “even accounting for a 2.25:1 production ratio as suggested by the trader, marble is actually 17% cheaper to produce in terms of space than gems and that’s without accounting for all the coin needed for the gems” .

    Cross-Tier Trading Considerations

    There is an ongoing debate in the Elvenar community about “fair” cross-tier trades. Some players refuse cross-tier trades entirely, while others accept them at a discount. If you are producing Gems as your boosted good, you may need to offer slight discounts to attract trading partners for lower-tier goods.

    Trading Strategy for Gems Producers

    1. Produce only your boosted Gems in quantity
    2. Trade down for the Tier 2 and Tier 1 goods you need
    3. Join an active fellowship where members understand the value of Gems and will accept fair trades
    4. Use the Wholesaler as a last resort—it offers worse rates but provides guaranteed access to non-boosted goods

    Event Buildings and Alternative Gems Sources

    The Shift Away from T3-Only Events

    Historically, most event buildings that produced goods gave Tier 3 outputs . However, recent events have shown a shift toward more balanced production options. For example, in the Autumn Zodiac event, only one of three new production buildings produced Tier 3 goods .

    This trend means that relying solely on event buildings for Gems is becoming less reliable. Building and maintaining your own Gems manufactories (if boosted) or establishing strong trading relationships is increasingly important.

    Evaluating Event Buildings

    When considering event buildings that produce Gems, evaluate:

    • Production per square compared to your manufactories
    • Population and culture implications (many event buildings provide these rather than consuming them)
    • Upgrade requirements using Royal Restorations—some buildings may not be worth the investment 

    Common Mistakes to Avoid

    Building Non-Boosted Gems Manufactories

    The most common and costly mistake is building Gems manufactories when Gems are not one of your three boosted goods. As one player noted, “You should notice that you will produce more for your boosted good than the other two… It is far efficient if you concentrate on producing only your boosted goods” .

    Over-Upgrading Without Checking Efficiency

    Blindly upgrading your Gems manufactory to the maximum available level in each chapter can actually reduce your space efficiency. Always check the population and culture requirements against the production gains before upgrading.

    Ignoring the Relic Boost

    Failing to collect Gems relics leaves significant production potential untapped. Prioritize clearing Gems provinces on the world map and participating in tournaments when Gems are featured.

    Neglecting Support Infrastructure

    Gems production requires substantial coins, supplies, population, and culture. Ensure your Workshops, Residences, and Culture buildings are adequate to support your manufactories. A Gems manufactory without sufficient support is like a car without fuel.

    Conclusion: Mastering Your Gem Production

    Gems production in Elvenar is a rewarding but demanding endeavor. Whether Gems are your blessed boosted good or a resource you acquire through trade, understanding their production mechanics, cost structures, and efficiency considerations will make you a more effective city manager.

    If Gems are your boosted good, embrace them. Build your manufactories, collect your relics, and leverage your efficient production to become a trading powerhouse in your fellowship. If Gems are not your boosted good, respect their value but do not waste space producing them inefficiently—trade for them instead.

    The key principles to remember are simple: focus on your boosted goods, pay attention to efficiency at each chapter, use enchantments strategically, and never underestimate the importance of population and culture in your production calculations.

  • The Ultimate Guide to Advanced Scouts in Elvenar: Mastering the Map

    The Ultimate Guide to Advanced Scouts in Elvenar: Mastering the Map

    In the city-builder strategy game Elvenar, few technologies cause as much quiet confusion—or offer as much subtle power—as Advanced Scouts. At first glance, it appears to be just another minor research option: a small, temporary bonus to scouting. In reality, it is one of the most important permanent upgrades you will ever unlock. Understanding Advanced Scouts is the difference between a smooth, prosperous expansion and a slow, resource-starved grind.

    This guide will explain exactly what Advanced Scouts does, how its math works, why it matters for both fighters and negotiators, and how to use it strategically across all chapters of the game.

    What Exactly Are Advanced Scouts?

    Advanced Scouts is a special, repeatable technology that appears near the beginning of most chapters (usually as the first or second research option after unlocking the chapter’s new settlement buildings). Unlike standard technologies that unlock a new building or unit, Advanced Scouts provides a permanent, multiplicative reduction to three key activities on the world map:

    1. Scouting cost (the gold and sometimes goods required to send your scout to a new province)
    2. Catering cost (the goods required to negotiate with a province instead of fighting)
    3. Combat difficulty (the inherent strength of enemy units when you choose to fight)

    Crucially, this reduction applies to all provinces you scout after completing the research. It is not a temporary boost, nor does it affect provinces you have already discovered.

    The Mathematics of Diminishing Returns

    Each Advanced Scouts technology reduces the current cost and difficulty by approximately 25%. However, because it applies to an already-reduced number, the effective percentage improvement from one chapter to the next shrinks. This is known as diminishing returns, and it is intentional game design.

    Let us walk through a concrete numerical example. Assume a brand new province in Chapter 1 has a baseline cost of 100 units of gold to scout, requires 100 goods to cater, and has enemies with 100% of their normal strength.

    • After completing Advanced Scouts in Chapter II, the costs drop to 75% of Chapter I’s baseline.
      New cost: 75 gold, 75 goods, 75% enemy strength.
      Actual reduction from previous chapter: 25%
    • After Chapter III’s Advanced Scouts, the reduction is 25% of *75*, not of 100.
      New cost: 56.25 gold, 56.25 goods, 56.25% enemy strength.
      Actual reduction from previous chapter: 18.75%
    • After Chapter IV: 25% of 56.25 = 42.19.
      Reduction: 14.06%
    • After Chapter V: 31.64.
      Reduction: 10.55%
    • After Chapter VI: 23.73.
      Reduction: 7.91%
    • After Chapter VII: 17.80.
      Reduction: 5.93%

    As you can see, the earliest Advanced Scouts technologies provide massive, game-changing reductions. The later ones still help, but the marginal benefit shrinks. However, because province costs naturally increase exponentially with distance from your city, even a 5–6% reduction late-game can save millions of resources.

    Why This Matters: The Hidden Cost of Ignoring Advanced Scouts

    Many new players make the same mistake: they beeline for the “exciting” technologies like new troops or guest race buildings, leaving Advanced Scouts for later. This is a trap. Here is why.

    In Elvenar, the world map is not just a side activity—it is central to progression. Provinces provide:

    • Relics needed to boost your boosted goods production
    • Expansion slots to place more buildings
    • Access to tournaments and fellowship activities
    • Necessary resources for certain event quests

    If you scout too many provinces before researching the current chapter’s Advanced Scouts, you permanently lock in higher costs for those provinces. The game does not retroactively reduce them. Consequently, you might find yourself facing a province that costs 500,000 gold to scout and 50,000 goods to cater, simply because you scouted it two chapters too early.

    Conversely, a player who always researches Advanced Scouts immediately upon unlocking a new chapter will pay a fraction of those costs for all subsequent provinces. Over the course of 15–20 chapters, the cumulative savings reach astronomical levels.

    Strategic Implications for Fighters vs. Negotiators

    Your playstyle affects how much you should prioritize Advanced Scouts.

    For the Pure Fighter

    If you prefer to defeat provinces through auto-fight or manual combat, Advanced Scouts remains vital. The 25% reduction to enemy strength is not merely a number—it directly affects:

    • Squad size of the enemy relative to yours
    • Damage dealt by enemy units
    • Health pools of enemy troops

    Fighting a province at 75% strength vs. 100% strength can mean the difference between losing zero units and losing half your army. Since training troops costs time and resources (especially orcs and other sentient goods later on), reducing enemy difficulty saves you more than just goods—it saves hours of training time.

    For the Pure Negotiator

    If you prefer to cater provinces using goods, Advanced Scouts is arguably even more critical. Catering costs scale aggressively with province difficulty. A province that costs 10,000 marble at 100% difficulty might cost only 5,600 marble at 56% difficulty (Chapter III). That is a 44% real savings.

    Moreover, because negotiators must maintain diverse goods production across all tiers, reducing catering costs means you can:

    • Allocate more goods to upgrading buildings
    • Trade less frequently on the market
    • Participate more heavily in tournaments without bankrupting your stockpiles

    For the Hybrid Player

    Most players mix fighting and negotiating depending on the province and their current troop availability. Advanced Scouts benefits both approaches simultaneously, making it the single most efficient research for hybrid players. You pay once (in knowledge points) and receive permanent benefits for both combat and catering.

    When to Research Advanced Scouts: A Turn-by-Turn Priority

    Given the above, the optimal strategy is clear: Research Advanced Scouts as the first or second technology in every chapter. The only exception might be if you are desperately blocked by a mandatory guest race building that produces a unique resource required for further research. Even then, delay Advanced Scouts only as long as absolutely necessary.

    Here is a recommended priority order at the start of any new chapter:

    1. Advanced Scouts (if available)
    2. First Guest Race Production Building (if required to unlock the rest of the tech tree)
    3. Any other scouting or expansion-related techs
    4. Military upgrades
    5. Guest race culture and decoration techs

    If a chapter forces you to build a specific portal or settlement structure before Advanced Scouts appears, complete that minimum requirement, then immediately pivot to Advanced Scouts before scouting a single new province.

    Common Misconceptions and Mistakes

    Let us address three frequent misunderstandings about Advanced Scouts.

    Mistake #1: “I’ll just scout a few provinces now and get Advanced Scouts later.”
    This is the most dangerous error. Every province you scout before researching Advanced Scouts is permanently more expensive and more difficult. Unless a quest explicitly requires you to scout immediately, wait.

    Mistake #2: “Advanced Scouts only helps scouting cost, not combat.”
    False. The technology explicitly reduces both negotiation and combat difficulty. Check your province window before and after researching—you will see enemy squad sizes drop.

    Mistake #3: “Later Advanced Scouts are useless because the reduction is tiny.”
    While the percentage reduction shrinks, the absolute resource savings remain significant. In later chapters (e.g., Fairies, Orcs and Goblins, Woodelves), a single province might cost over 1 million gold to scout. A 6% reduction saves 60,000 gold per province—multiplied by dozens of provinces, that is millions saved.

    Practical Example: Two Players, Same Chapter

    Imagine two players reaching Chapter V (Dwarves) at the same time. Both have scouted 50 provinces.

    • Player A researches Advanced Scouts immediately, then scouts 30 more provinces over the chapter. Each of those 30 provinces costs 32% of the baseline (due to cumulative reductions from Chapters II, III, IV, and V).
    • Player B ignores Advanced Scouts, scouts those same 30 provinces first, then researches Advanced Scouts later. Each of those 30 provinces costs 100% of the baseline.

    By the end of the chapter, Player A has saved roughly 68% of all scouting, catering, and combat difficulty on those 30 provinces. That could be millions of gold, hundreds of thousands of goods, and dozens of hours of troop training.

    Now extrapolate that over 15 chapters. Player A will reach the endgame provinces faster, with more resources, and with less frustration.

    Advanced Scouts and Events

    Special events (like the Fellowship Adventure, Pharaoh event, or Misty Forest) often include quests that require scouting provinces or solving encounters. If you have neglected Advanced Scouts, those event quests become expensive barriers. A player up-to-date on Advanced Scouts can complete those quests cheaply and quickly, earning more event currency and better rewards.

    Final Verdict: Always Prioritize Advanced Scouts

    To summarize:

    • What it does: Permanently reduces scouting cost, catering cost, and combat difficulty for all future provinces by ~25% (multiplicative, diminishing returns).
    • When to research: As soon as it becomes available in each new chapter, before scouting any new provinces.
    • Who benefits: Everyone—fighters, negotiators, hybrids, casuals, and hardcore min-maxers alike.
    • What to avoid: Never scout a province before researching the current chapter’s Advanced Scouts unless forced by a quest.

    In the grand strategy of Elvenar, knowledge points are abundant but resources are not. Advanced Scouts is one of the few technologies that directly saves you resources forever. Treat it with the respect it deserves, and your city will prosper through every age from the humble beginnings of Chapter I to the advanced sentient goods of the Amuni and beyond.

  • Tournament Scores as a Motivational Engine

    Tournament Scores as a Motivational Engine

    For a “motivation buff,” tournament scores are not just numbers — they are feedback loopsaccountability markers, and social proof of progress.

    1. The Leaderboard Effect

    Tournament scores create a visible ranking. Research shows that seeing your name on a leaderboard (even a small one) increases:

    • Effort – People try harder when they know they’re being compared.
    • Persistence – Falling behind can trigger a “catch-up” motivation spike.
    • Social comparison – Healthy rivalry drives improvement.

    Motivation takeaway: If you want to boost your own drive, join a tournament (even a casual one). The scoreboard becomes an external accountability partner.

    2. Score = Objective Feedback

    Unlike vague self-assessments (“I did okay”), a tournament score is unambiguous. It tells you:

    • Exactly where you stand
    • How far you are from the next tier
    • Whether your training methods are working

    This aligns with goal-setting theory (Locke & Latham): specific, challenging goals paired with clear feedback produce the highest motivation.

    3. The “Near Win” Phenomenon

    Psychologists have studied the “near win” — finishing just a few points behind the leader. Far from being demotivating, near misses often fuel greater effort in the next tournament. The brain treats a close loss as a learning signal, not a failure.

    Famous example: Olympic silver medalists are often less happy than bronze medalists (because silver compares upward to gold). But in repeated tournaments (e.g., a season), close losses predict the biggest performance jumps.

    4. Tournament Scores vs. Personal Bests

    A pure motivation buff balances two metrics:

    • Absolute score (how you rank against others)
    • Personal score improvement (how you rank against your past self)

    Research suggests that focusing only on tournament placement can increase anxiety. The healthiest approach:

    “I want to win, but my real goal is to beat my previous round’s score.”

    This is called a mastery orientation (improving self) paired with a performance orientation (beating others). The combination is powerful.


    Example: Applying Tournament Scores to Daily Life

    You don’t need an official event. Create a personal tournament:

    ActivityTournament FormatScore Metric
    Work tasksPomodoro challenge with friendsCompleted cycles per day
    FitnessWeekly step leaderboard (family/neighbors)Total steps or workout reps
    LearningQuiz yourself every SundayCorrect answers vs. previous week
    Neighbor visits (from your last request)“Friendly knock” challengeNumber of unique neighbors met

    Key Takeaway for Motivation Buffs

    Tournament scores externalize your progress. They turn invisible improvement into visible numbers. That visibility triggers dopamine, fuels friendly competition, and creates a story of growth.

    But remember: the score is a tool, not the goal. The real win is the discipline and community you build along the way.


    If you meant a specific tournament (e.g., chess, golf, esports, academic decathlon), let me know and I can give you exact score formats, ranking systems, or motivational strategies tailored to that sport.

    Fair trade system

    It sounds like you’re shifting from motivation and competition (tournament scores) into a broader structural or ethical concept: the fair trade system.

    Given your previous interests—motivation buffs, neighbor visits, and tournament scores—I’ll connect fair trade to those themes. Specifically, I’ll show how fair trade principles can motivate ethical action, function like a “good neighbor” agreement on a global scale, and create a different kind of scoring system where the metric isn’t just profit, but human dignity.

    Here is a focused, motivation-friendly breakdown of the fair trade system.


    What Is the Fair Trade System?

    At its simplest, fair trade is an organized social and commercial movement designed to help producers in developing countries achieve better trading conditions. It’s the opposite of “race-to-the-bottom” globalization.

    Instead of asking “How cheaply can we get this product?” fair trade asks: “How do we ensure the farmer, weaver, or factory worker gets a living wage and works in safe conditions?”

    Core Principles (The “Rules of the Tournament”)

    Think of fair trade as having its own rulebook, similar to how a tournament has scoring rules:

    1. Fair Price – Producers receive a minimum price that covers sustainable production costs, plus a premium for community investment (schools, clean water, healthcare).
    2. Direct Trade – Eliminates middlemen who exploit information gaps. Buyers work directly with cooperatives.
    3. No Child or Forced Labor – Strict, auditable standards.
    4. Safe Working Conditions – Basic occupational safety, no harassment, reasonable hours.
    5. Environmental Sustainability – Encourages organic methods, bans harmful pesticides, protects biodiversity.
    6. Long-Term Partnerships – Buyers commit to multi-year relationships, allowing farmers to plan ahead.
    7. Democratic Decision-Making – Producer cooperatives vote on how to spend the fair trade premium.

    You’ll see a Fair Trade Certified™ label on products like coffee, chocolate, bananas, cotton, tea, flowers, and gold.


    Why Should a “Motivation Buff” Care About Fair Trade?

    Most self-improvement focuses on personal gains: better habits, more discipline, higher scores. Fair trade flips that. It asks: *What if your motivation included the well-being of a farmer 5,000 miles away?*

    Here’s the motivational case:

    1. Purpose-Driven Motivation Outlasts Selfish Motivation

    Research in positive psychology (Seligman, Pink) shows that autonomy, mastery, and purpose drive deep, sustainable motivation. Fair trade adds purpose to your daily purchases. When you buy fair trade coffee, you’re not just getting caffeine—you’re saying, “I am part of a system that refuses to exploit.”

    That sense of being a good ancestor or an ethical participant produces a cleaner, longer-lasting dopamine hit than buying the cheapest possible item.

    2. It Turns You from a Passive Consumer into an Active Voter

    Every purchase is a “vote” for the kind of world you want. Motivation buffs love agency—the feeling that your choices matter. Fair trade hands you that agency every time you reach for a chocolate bar or a banana.

    Compare: Buying conventional chocolate → likely supports forced labor (reported in West African cocoa farms). Buying Fair Trade chocolate → supports schools and safety. Same action (eating chocolate), completely different motivational identity.

    3. It Builds “Global Neighbor” Consciousness

    Your earlier request asked about neighbor visits—the lost art of local connection. Fair trade extends that metaphor globally. The farmer in Colombia or Kenya is your global neighbor. You’ll never knock on their door, but your purchase is a form of visit. It says: “I see you. I value your work. I want you to thrive.”

    Motivation researchers call this expanding the circle of moral concern. People who practice this report higher life satisfaction and lower rates of existential boredom.


    The “Scoring System” of Fair Trade (How to Measure Impact)

    You asked about tournament scores earlier. Fair trade has its own scoring metrics, though they’re not about winning—they’re about thresholds.

    MetricConventional SystemFair Trade System
    Farmer incomeVolatile, often below poverty lineMinimum price + premium (stable)
    Child labor riskHigh in many supply chainsZero tolerance, audited
    Environmental costOften externalizedBanned pesticides, protected ecosystems
    Buyer relationshipSpot market, anonymousLong-term, cooperative-based
    Consumer feedbackPrice onlyPrice + ethical story

    For a motivation buff who loves tracking progress, you can “score” yourself: How many of my weekly purchases are fair trade? Treat it like a leaderboard against your past self.


    Criticisms (Honest and Fair)

    No system is perfect. Fair trade has legitimate critiques:

    • Premium pricing – Fair trade goods often cost 10–50% more. Critics argue this creates a niche for wealthy ethical consumers while leaving the majority in conventional trade.
    • Bureaucracy – Certification costs money, which can exclude the smallest farmers.
    • Limited reach – Only certain commodities are certified. You can’t buy fair trade car parts or electronics easily.
    • Imperfect enforcement – Some audits have been criticized as superficial.

    The motivation buff’s response: These criticisms are not reasons to abandon fair trade. They are reasons to push for better fair trade—and to complement it with other ethical systems (e.g., direct trade, B Corporations, worker-owned co-ops).

    Perfectionism kills motivation. Progress over purity.


    Practical Steps: How to Start Using Fair Trade Today

    You don’t need to overhaul your life overnight. Use the same habit-stacking approach popular in motivation literature:

    1. Pick one product – Coffee, chocolate, or bananas. Commit to buying fair trade for that product for 30 days.
    2. Learn the labels – Look for Fair Trade Certified (US/Canada), Fairtrade International (global), or Fair for Life.
    3. Ask one store – Next time you’re at your grocery store, ask the manager: “Do you carry fair trade options? If not, could you?” This tiny act of advocacy builds motivational momentum.
    4. Talk to a neighbor (back to your earlier interest) – Mention fair trade to someone on your street. You’re not lecturing. You’re sharing: “Hey, I started buying this coffee—tastes great and the farmers get a fair deal.”
    5. Track your impact – Some fair trade organizations offer calculators. For example, a single fair trade coffee purchase might mean a child in a farming family can attend school for one day. That’s a real “score.”

    The Bottom Line for Motivation Buffs

    The fair trade system is not charity. It is not guilt. It is strategic, systemic, ethical alignment between your daily choices and your deepest values.

    For someone who loves tournament scores, neighbor visits, and personal growth, fair trade offers a unique challenge: Can you expand your definition of “winning” to include the dignity of strangers?

    If you can, you unlock a level of motivation that pure self-interest can never reach. You become the kind of person who doesn’t just get things done—but gets good things done.

  • The Lost Art of the Neighbor Visit: A Surprising Key to Motivation

    The Lost Art of the Neighbor Visit: A Surprising Key to Motivation

    In the golden age of self-improvement, we talk a lot about discipline. We obsess over Atomic Habits, cold plunges, and the 5 AM club. But there is one ancient, hyper-effective motivational tool that has quietly disappeared from our lives: the spontaneous neighbor visit.

    Before the rise of endless scrolling, the neighbor visit was a daily ritual. You walked fifty feet. You knocked on a door. You talked to another human being with no agenda other than presence. For the modern “motivation buff,” reviving this lost art isn’t just about being friendly—it is a tactical strategy for breaking inertia, building accountability, and recharging your mental batteries.

    Let’s break down why neighbor visits are the ultimate motivation hack, and how to resurrect them in a world that has forgotten how to knock.

    The Psychology of Proximity and Inertia

    Motivation isn’t a lightning bolt; it is a muscle. And like any muscle, it atrophies without use. The single biggest killer of motivation is not laziness—it is isolation.

    When you live in a bubble (home office, grocery delivery, streaming services), your brain enters a low-energy default mode. You stop receiving external cues to act. A neighbor visit disrupts this entropy.

    Psychologists call this social facilitation: the tendency for people to perform better on tasks simply because other people are present. When you know the family next door is up and active, your brain subconsciously raises its own baseline. When you chat with a neighbor over the fence, your cortisol (stress hormone) drops and your oxytocin (bonding hormone) rises. That chemical shift is the biological foundation of motivation. You cannot feel motivated when your nervous system is locked in isolation-mode. A five-minute porch chat resets the system.

    Why Digital Connection Isn’t Enough

    The skeptic says: “I already talk to people online. I have a Discord server. I follow motivational influencers. Why do I need a physical neighbor?”

    Because digital interaction lacks stakes.

    You can rage-type in a comment section and walk away. You can watch a David Goggins video, feel pumped for ten minutes, and then order pizza. But when your actual neighbor—a real human who sees your car in the driveway every day—asks, “How’s that project coming along?” something shifts. Social pressure becomes positive fuel.

    The neighbor visit provides three things that no app can:

    1. Non-negotiable accountability – You can unfollow a guru. You can’t unfollow the person who lives twenty feet from your bedroom window.
    2. Spatial energy – Being in someone else’s physical space (their kitchen, their garage, their garden) exposes you to new micro-habits. You see their organized toolbox. You notice their morning stretching routine. This visual learning is far more powerful than a PDF checklist.
    3. Unscripted spontaneity – Motivation thrives on novelty. Algorithms show you what you already like. A neighbor shows you what you didn’t know you needed—a book recommendation, a tool you can borrow, a shared complaint about the street’s drainage that turns into a collaborative solution.

    The Five Types of Neighbor Visits (And Their Motivational Payoffs)

    Not all neighbor visits are equal. Here’s how to match the visit type to your motivational goal.

    1. The Tool-Borrowing Visit (For Overcoming Procrastination)

    The scenario: You need to fix a fence, but you lack a specific drill bit. Instead of ordering one online (and waiting three days, by which point your motivation has died), you walk next door.
    The payoff: Action momentum. The simple act of walking, knocking, and asking breaks the procrastination loop. By the time you return home with the tool, you are already in “doing” mode. The fence gets fixed in twenty minutes.

    2. The Coffee Porch Visit (For Mental Recovery)

    The scenario: You’ve been grinding for four hours on a work project. Your focus is shot. Instead of doomscrolling, you take a mug to the porch. Your retired neighbor two doors down is also sitting outside.
    The payoff: Cognitive reset. Low-stakes conversation (weather, birds, old stories) activates your brain’s default mode network, which is where creative problem-solving happens. You return to your work with a fresh solution that was hiding in plain sight.

    3. The “I Made Too Much” Food Drop (For Social Dopamine)

    The scenario: You baked bread or grilled extra chicken. You wrap a portion and deliver it.
    The payoff: Purpose fulfillment. Motivation is not just about productivity; it is about feeling needed. The gratitude on a neighbor’s face produces a clean, lasting dopamine hit that no notification can match. You feel like a valuable member of a tribe—which is the deepest human motivator.

    4. The Walk-and-Talk (For Accountability)

    The scenario: You and a neighbor agree to a 7 PM lap around the block every Tuesday. No phones. Just walking.
    The payoff: Consistency architecture. This is the “buddy system” applied to life. On days when your internal motivation is zero, the external commitment of “they are waiting for me” gets your shoes on. And once you’re moving, motivation often follows.

    5. The Emergency Help Visit (For Resilience Training)

    The scenario: A pipe bursts. A car won’t start. A tree falls. You knock on a neighbor’s door for help.
    The payoff: Anti-fragile confidence. Helping someone (or being helped) in a real, non-digital emergency trains your brain to handle stress. You realize: I am not alone. We solve things together. That realization is the foundation of long-term grit.

    The Generational Divide: Why Boomers Know This and Gen Z Is Rediscovering It

    Motivation buffs love studying high performers. Ask any successful person over 60 about their childhood, and they will describe a world of open doors and impromptu neighbor visits. It wasn’t “networking.” It was just life. That constant low-level social connection provided a baseline of emotional regulation and motivation that required zero apps.

    Younger generations face a paradox: they are more digitally connected than ever but more physically isolated. The result is a motivation deficit. You can watch a thousand productivity TikToks, but without a real person to reflect your energy back to you, your drive sputters.

    The good news? Gen Z and Millennials are hungry for this. Post-pandemic, there is a quiet resurgence of “porch culture,” communal gardens, and street potlucks. The motivation buffs who recognize this trend are getting ahead—not because they have better planners, but because they have better neighbors.

    How to Start (Even If You’re Introverted)

    If the idea of knocking on a stranger’s door makes your palms sweat, you are not broken. You are normal. Here is a five-step protocol for the motivation-minded introvert:

    Step 1: The Low-Friction Wave
    Start with zero verbal commitment. Wave when you see them. Make eye contact. Do this for a week. You are building neural pathways that associate “neighbor” with “safe.”

    Step 2: The Prop
    Walk outside holding something obvious—a watering can, a bag of trash, a basketball. Props give people an easy conversation opener. “Nice plant” or “Big game today?” is all it takes.

    Step 3: The Ten-Second Ask
    When you do knock, keep it absurdly short. “Hi, I’m [Name] from number 24. Could I borrow a ladder for ten minutes? I’ll return it right away.” Brevity lowers anxiety for both parties.

    Step 4: The Return Visit
    This is the secret weapon. When you return the ladder (or the measuring cup, or the screwdriver), add a tiny bonus. A cookie. A compliment. “Thanks again. Hey, I noticed your car—if you ever need a jump start, I’m home most evenings.” You have now established a reciprocal relationship.

    Step 5: The Scheduled Spontaneity
    Ironically, you may need to schedule neighbor time at first. Put “porch check-in” on your calendar for Saturday at 10 AM. Walk outside. If no one is there, enjoy five minutes of sunlight. If someone is there, great. Over time, the schedule becomes habit, and habit becomes natural flow.

    Real-World Results: What the Data Says

    Sociological research backs this up. A long-term Harvard study on happiness (the Grant Study) found that the single strongest predictor of a flourishing life at age 80 was not cholesterol levels or wealth—it was warm relationships. And the most accessible form of those relationships? Neighbors.

    Furthermore, a 2022 study in the Journal of Positive Psychology found that people who reported at least one “casual friendly interaction” with a neighbor per week had 18% higher self-reported motivation scores than those who did not. They exercised more, completed more personal projects, and reported fewer “do-nothing” days.

    Why? Because a neighbor visit is a commitment device. Once you’ve told someone you’re training for a 5K, you feel a gentle pressure to actually run. Once you’ve shown a neighbor your half-painted garage, you feel a quiet urge to finish it. That pressure isn’t toxic—it’s the engine of follow-through.

    A Cautionary Note (For the Motivation Purist)

    Not every neighbor will be your tribe. Some will be grumpy. Some will be overbearing. Some will want to talk for an hour when you have fifteen minutes. That’s fine.

    The goal is not to become the neighborhood social director. The goal is to add one or two low-stakes, real-world accountability partners to your motivational ecosystem. Treat neighbor visits like a supplement, not a replacement for your core habits. You still need your morning routine. You still need your workout. But the neighbor visit is the glue that prevents those habits from feeling robotic and lonely.

    The Bottom Line

    We live in an era of motivational abundance. There are more podcasts, more apps, more challenges, and more gurus than ever. And yet, we feel less motivated than ever. Why? Because we’ve forgotten that motivation is relational.

    You cannot scroll your way to discipline. You cannot optimize your way out of loneliness. But you can walk fifty feet, knock on a door, and say hello.

    That small, brave act does three things simultaneously:

    1. It breaks your current state of inertia (a physical win).
    2. It releases neurochemicals that support drive (a biological win).
    3. It builds a web of gentle accountability (a social win).

    For the motivation buff who has tried every productivity system and still feels stuck, the answer is not a new app. It is not a stricter schedule. It is an old, forgotten technology called your neighbor.

    So here is your challenge for this week: pick one neighbor you have never spoken to. Find a trivial reason to knock (borrow an egg, ask about recycling day, compliment their plant). Stay for less than two minutes. Then go back inside.

  • The Elvenar Halloween Event: A Guide to the Misty Forest and All Howl’s Eve

    The Elvenar Halloween Event: A Guide to the Misty Forest and All Howl’s Eve

    In the magical world of Elvenar, seasonal events bring unique challenges, exclusive rewards, and thematic gameplay that breaks from routine city management. The Halloween Event—alternatively known as Misty Forest, Whispers of the Soul, or All Howl’s Eve depending on the year—stands as one of the most atmospheric and strategically engaging annual celebrations. With its spooky aesthetics, evolving building rewards, and distinctive exploration mechanics, the Halloween event has become a cornerstone of the Elvenar calendar since its introduction

    .

    Event Evolution: From Whispers to All Howl’s Eve

    Elvenar’s Halloween event has undergone significant transformation over the years. The 2022 iteration, titled “Weird and Wonderful,” introduced players to Mrs. Sniffles and her headless companion Sir Necklace, tasking adventurers with helping them navigate toward the center of a mysterious forest to discover ancient rewards

    . The 2023 event, “Whispers of the Soul,” featured Professor Freakenspleen conducting experiments with spirits in the Misty Forest, where players collected magical ingredients and explored fog-shrouded terrain

    .

    The 2024 event, “All Howl’s Eve,” marked a narrative shift, bringing back the popular character Crash—the infamous monster hunter. The storyline followed lumberjacks who refused to work due to unearthly howls echoing through the forest, prompting desperate townsfolk to hire Crash out of sheer boredom. Players joined Crash in investigating the supernatural occurrences, with the full moon rising and the forest pulsing with eerie life

    .

    Core Mechanics: Light Sources and Forest Exploration

    The Halloween event employs a distinctive exploration mechanic that sets it apart from other seasonal events. Players must purchase Light Sources using event currency to lift the mist and reveal the forest floor. This exploration system creates strategic depth, as every light source placement must be calculated to maximize reward exposure while minimizing currency expenditure

    .

    The forest floor contains various elements:

    • Hedges and Rocks: Obstacles that block exploration and must be worked around
    • Friendly Spirits: Key collection items that advance Grand Prize progress (typically one spirit per 20 collected grants a Grand Prize)
    • Lost Items: Containers offering chances at daily prizes, including valuable buildings and resources
    • Additional Light Sources: Free tools occasionally found during exploration that extend your investigation capacity

    This exploration system rewards careful planning. Experienced players analyze the revealed terrain before placing light sources, attempting to expose multiple prizes with minimal investment. The fog-of-war mechanic creates tension and excitement, as each illuminated square could reveal anything from common goods to the coveted daily prize

    .

    Quest Structure: Sequential and Daily Challenges

    Like all major Elvenar events, the Halloween celebration features a dual quest system. Sequential quests form the narrative backbone, advancing the story as players complete specific tasks. These quests scale with your chapter progress—a Chapter 5 player faces different requirements than a Chapter 20 player, ensuring appropriate challenge levels across all city development stages

    .

    Daily quests unlock episodically throughout the event, providing fresh objectives every 24 hours. These quests typically involve standard Elvenar activities: producing specific goods, training military units, completing encounters, or constructing buildings. The Halloween event often introduces thematic variations, such as collecting “Magic Ingredients” or crafting spooky items in the Magic Academy

    .

    Quest rewards include event currency (Magic Ingredients or similar), which fuels your forest exploration. Milestone rewards at specific quest completion points provide bonus currency, buildings, and resources. The Royal Prize Pass—Elvenar’s premium reward track—offers additional tiers of exclusive buildings, artifacts, and instants for players willing to invest real currency

    .

    The Evolving Building: Centerpiece Rewards

    Each Halloween event introduces a signature Evolving Building that grows from Stage 1 to Stage 10 (or Stage 5 in earlier versions) through artifact collection. These buildings represent the ultimate reward for dedicated event participation, providing escalating bonuses that often remain relevant for years.

    The Soul Lab from the 2023 event offered switchable production and population benefits, while the Moonlight Party from 2024’s All Howl’s Eve provided different rewards based on evolution stage. These evolving buildings typically feature:

    • Population and Culture: Increasing housing and cultural value as they evolve
    • Switchable Production: Options to produce different resource types based on current city needs
    • Special Bonuses: Unique effects like spell fragment generation, combat boosts, or guest race goods

    The 2024 event introduced a Set Building alongside the evolving structure, requiring multiple connected pieces to achieve maximum bonuses. This architectural puzzle added city planning complexity, as players had to预留 space for optimal set arrangement

    .

    Strategic Preparation: Maximizing Event Success

    Veteran players employ several strategies to optimize Halloween event outcomes:

    Pre-Event Production: Stockpiling coins, supplies, and boosted goods before the event begins enables instant quest completion when daily quests unlock. Many players maintain “production queues”—pre-manufactured goods waiting in workshops and manufactories for immediate collection

    .

    Workshop Focus: Halloween event quests heavily favor workshop production. Maintaining 4-5 upgraded workshops with diverse production options (5-minute, 15-minute, 1-hour, 3-hour, 9-hour, and 24-hour cycles) provides flexibility for any quest requirement. Some players even build temporary “event workshops” specifically for quest-heavy periods

    .

    Military Readiness: Encounter resolution quests appear frequently. Having trained troops ready—or maintaining negotiation goods stockpiles—prevents quest stagnation. The Halloween event’s spooky theme sometimes introduces special combat scenarios or unit types

    .

    Magic Academy Preparation: Spells and crafting capabilities support event participation. Ensuring your Magic Academy is upgraded to level 5 for maximum efficiency, with catalysts and fragments available for emergency crafting, provides strategic flexibility

    .

    Community Resources and Strategy

    The Elvenar community mobilizes extensively for each Halloween event, creating comprehensive resources:

    iDavis Website: This player-maintained site offers chapter-specific quest lists, building production values, and interactive tools. For Halloween events, iDavis provides video tutorials explaining the light source mechanics and practice areas where players can test exploration strategies without spending actual event currency

    .

    Italian Event Site: Always first with complete information, this multi-page resource provides quest lists with variable requirements for different player levels, daily and grand prize displays, interactive building menus, and league reward breakdowns. The site’s translate button enables global accessibility

    .

    Beta Fellowship Platinum Leaf: This dedicated group play-tests every quest across multiple chapter levels, compiling Google Documents with verified information. Their Halloween event docs include production checklists, strategy guides for optimal light source placement, and building set arrangement recommendations

    .

    League Competition and Rewards

    Halloween events feature League systems where players compete for ranking-based rewards. Leagues (typically Wood, Bronze, Silver, Gold, and sometimes Platinum) award progressively valuable prizes based on event currency collection and quest completion speed.

    Top league rewards often include:

    • Exclusive Expiring Buildings: Limited-duration structures with powerful bonuses
    • Artifact Instants: Immediate evolution building advancement
    • Premium Currency: Diamonds for shop purchases
    • Special Decorations: Thematic aesthetic items for city beautification

    The competitive aspect encourages active participation, though the random elements of forest exploration (which prizes light sources reveal) introduce variance that can frustrate players seeking specific daily prizes

    .

    Common Challenges and Solutions

    Players frequently encounter specific Halloween event difficulties:

    Currency Scarcity: Light sources are expensive, and the 420-currency “value packs” deplete quickly. Strategic players balance single-tile illumination against the efficiency of larger light source investments, sometimes waiting for free light sources from exploration rather than purchasing immediately

    .

    Daily Prize RNG: Unlike some events with guaranteed daily prize progression, Halloween’s random reveal system means players might complete the entire event without obtaining specific desired buildings. This variance is intentional design, though community feedback consistently requests more deterministic reward systems

    .

    Evolution Completion: Reaching Stage 10 on evolving buildings requires substantial artifact investment. Players who miss daily prizes or fail to complete all quests may find themselves several artifacts short of maximum evolution. Fellowship Adventures following events sometimes provide additional artifacts, but this requires additional time investment that not all players can commit

    .

    The Future of Halloween in Elvenar

    As Elvenar continues evolving, the Halloween event adapts with new mechanics and narratives. The shift from Professor Freakenspleen’s scientific experiments to Crash’s monster hunting demonstrates InnoGames’ commitment to fresh storytelling within established frameworks. Future Halloween events may introduce:

    • New Exploration Mechanics: Variations on the light source system with different terrain types
    • Additional Evolving Buildings: More complex evolution trees with branching upgrade paths
    • Collaborative Elements: Fellowship-based Halloween challenges requiring cooperative play
    • Combat Integration: Themed military units or spooky battle scenarios

    Conclusion

    The Elvenar Halloween Event encapsulates what makes seasonal content compelling: atmospheric storytelling, unique mechanics that break routine gameplay, valuable rewards worth strategic investment, and community engagement through shared exploration challenges. Whether you’re navigating the Misty Forest’s fog, helping Crash investigate supernatural occurrences, or simply collecting artifacts to evolve your spooky centerpiece building, the Halloween event offers something for every playstyle.

    Success requires preparation—upgraded workshops, stockpiled resources, and active community engagement to stay informed about optimal strategies. But beyond efficiency, the Halloween event invites players to embrace the spooky season, decorating their cities with gothic architecture and enjoying the narrative charm that distinguishes Elvenar from more sterile city builders.

    In a game about magical kingdoms and ancient wonders, Halloween reminds us that even in Elvenar, there’s always room for a little mystery, a little darkness, and the thrill of exploring what lurks in the fog-shrouded forest.

  • Maximizing Daily Engagement: The Elvenar Login System Explained

    Maximizing Daily Engagement: The Elvenar Login System Explained


    In the magical kingdom of Elvenar, daily login rewards serve as the foundation of consistent player engagement, providing guaranteed resources simply for accessing the game. Unlike complex systems requiring active participation, these rewards acknowledge that life interrupts even the most dedicated rulers. Understanding the various login reward mechanisms—from standard daily bonuses to event-specific windfalls and seasonal progression systems—ensures you never miss valuable opportunities to accelerate your city’s development

    .

    The Standard Login Reward Architecture

    At its core, Elvenar’s login system operates on a progressive reward structure that encourages consistent daily engagement. While specific implementations have evolved over the game’s history, the fundamental principle remains: checking in daily provides escalating benefits that reward loyalty

    .

    The system typically features consecutive day bonuses where each login builds upon previous engagement. Missing a day doesn’t erase your progress entirely but may reset certain streak-based benefits. This forgiving approach accommodates real-world schedules while maintaining incentive for regular play

    .

    Mobile-exclusive bonuses add another layer to daily engagement. Players accessing Elvenar through mobile applications receive a Free Daily Gift available through the in-game Store window—a feature unavailable to browser-based players

    . This mobile incentive reflects the game’s cross-platform strategy, encouraging app installation without penalizing desktop users.

    Event Login Rewards: Guaranteed Festival Currency

    The most substantial daily login rewards emerge during seasonal events, where simply opening the game generates significant event currency income. These rewards operate independently of quest completion, outskirts collection, or active participation, making them the most efficient currency source available

    .

    Autumn Zodiac 2024 exemplified this system: players received 50 Golden Keys immediately upon event start, followed by 35 Golden Keys daily simply for logging in

    . Across a typical three-week event, this passive income totaled over 1,000 Golden Keys—representing approximately 30-40% of total free-to-play currency acquisition. No quest completion, no strategic decisions, just guaranteed rewards for maintaining login habits.

    The Autumn Zodiac 2025 iteration maintained this structure with Shellux the Dragonsnail, again providing 35 Golden Keys daily alongside the initial starting bonus

    . This consistency allows players to budget event currency knowing that login rewards provide reliable baseline income regardless of quest difficulty or time availability.

    These daily event rewards stack with all other currency sources. A player logging in collects their guaranteed keys, then completes quests, collects outskirts drops, and opens chests—creating compound benefits from single sessions. The login reward serves as the foundation upon which active participation builds

    .

    Seasons System: Daily Quest Integration

    The Seasons feature represents Elvenar’s most significant evolution of daily engagement mechanics. Introduced with the “Season of Dreams” in late 2022, this system replaced repeatable quests with structured daily and weekly objectives spanning 75-day periods

    .

    Daily Quest Structure: Each day brings 4 new Daily Quests that must be completed within 24 hours. These quests integrate naturally with normal gameplay—producing goods, training units, collecting resources—rather than demanding extraordinary efforts. Completing all 4 quests earns 4 Daily Keys that unlock the Daily Chest containing randomized rewards

    .

    The Daily Chest mechanic creates urgency: uncompleted quests expire, and their associated keys vanish. However, the system includes protective measures—if you complete quests but forget to open the chest, rewards automatically add to your inventory when daily quests refresh

    . This prevents loss due to simple oversight, though manual collection remains preferred for immediate gratification.

    Weekly Quests complement daily objectives with more challenging tasks offering greater Season Petals rewards. These weekly objectives persist across multiple days, accommodating players who cannot engage daily while still rewarding consistent participation. The combination of daily and weekly quests creates flexible engagement tiers

    .

    Reward Progression and Waypoints

    The Seasons system structures rewards along a 50-waypoint progression track. Each completed quest advances your position, unlocking increasingly valuable prizes. Waypoints feature:

    Standard Rewards: Available to all participants simply by collecting sufficient Season Petals. These include instants, resources, knowledge points, and buildings from previous events

    .

    Premium Rewards: Locked behind the Season Pass purchase. These exclusive items include unique buildings, additional artifacts, and enhanced resource packages. The pass can be purchased at any point during the season, retroactively unlocking all previously passed premium waypoints

    .

    Choice Waypoints: Certain positions offer selection between multiple reward options, allowing customization based on individual city needs. Unselected rewards at season end are chosen automatically, ensuring no player loses unlocked benefits due to indecision

    .

    Season Blessings: After completing all 50 waypoints, every 130 additional Season Petals earns a Season Blessing—essentially a bonus chest with escalating rewards. These post-completion mechanics ensure continued engagement even for players who rapidly finish the main track

    .

    Strategic Login Timing

    While login rewards seem straightforward, optimization opportunities exist:

    Event Synchronization: Logging in at consistent times ensures you never miss daily event currency windows. Since event login rewards refresh on 24-hour cycles based on server time rather than personal last-login, establishing routine check-in times maximizes collection opportunities

    .

    Quest Stacking: Completing daily quests during single sessions prevents partial progress expiration. Since uncompleted daily quests vanish at refresh, partial completion wastes potential rewards. Planning play sessions to accommodate full quest completion optimizes Season progression

    .

    Mobile Utilization: Players with both browser and mobile access should claim mobile-exclusive daily gifts even when primarily playing desktop. These additional resources compound over time, creating significant advantages for cross-platform engagement

    .

    Weekly Quest Management: Since weekly quests persist across days, players with limited time can focus weekend sessions on challenging weekly objectives while handling quick daily quests during busy weekdays. This flexibility accommodates diverse schedules without punishing irregular engagement

    .

    Historical Evolution and Community Response

    Elvenar’s login reward systems have undergone significant transformation based on community feedback:

    Repeatable Quests to Seasons: The 2022 transition from infinite repeatable quests to structured Seasons represented the most dramatic change. Developers explained this shift as providing “more interesting quest tasks, with more meaningful rewards” while eliminating the grind of repetitive objectives

    . The community generally welcomed this evolution, though some veteran players missed the unlimited earning potential of repeatable systems.

    Daily Chest Mechanics: Early Seasons implementations required manual chest opening, leading to confusion when players completed quests but missed rewards. The auto-collection feature—adding unclaimed chest contents to inventory at refresh—addressed this pain point while maintaining the visual satisfaction of chest opening

    .

    Mobile Bonus Introduction: The mobile-exclusive daily gift emerged as smartphone engagement became increasingly central to gaming revenue. This platform-specific reward acknowledges mobile’s convenience while not penalizing desktop players who prefer larger screens or specific browser features

    .

    Common Login Reward Mistakes

    New and returning players frequently undermine their reward potential:

    Inconsistent Timing: Sporadic login patterns miss consecutive day bonuses and allow daily quest expiration. Even brief 5-minute sessions suffice to collect rewards and complete simple quests, making consistency more valuable than session length.

    Platform Neglect: Desktop-only players miss mobile daily gifts; mobile-only players sacrifice browser interface advantages. Optimal engagement leverages both platforms’ strengths—mobile for quick reward collection, desktop for complex city management.

    Event Ignorance: Some players don’t realize that event login rewards exist independently of quest participation. Simply opening the game during events generates currency, making zero-effort reward collection preferable to complete absence.

    Season Pass Hesitation: Delaying Season Pass purchase until late in the season wastes potential premium reward accumulation. Since passes retroactively unlock all passed waypoints, early purchase maximizes value from every completed quest

    .

    Comparative Value Analysis

    Understanding login reward value requires contextualizing against alternative acquisition methods:

    Event Currency: Login rewards typically provide 30-40% of total free event currency. A player earning 1,000 keys from login rewards and 2,000 from quests/outskirts achieves 3,000 total—login rewards represent the single largest income source despite requiring zero active play

    .

    Season Progression: Daily quests provide approximately 60% of Season Petals, with weekly quests contributing the remainder. Missing daily quests significantly slows waypoint advancement, potentially preventing completion of the 50-waypoint track before season end

    .

    Time Investment: Login rewards offer exceptional return on time invested. Five minutes collecting daily rewards and completing simple quests often yields resources requiring hours of alternative production. This efficiency makes daily engagement the highest-priority activity for time-constrained players.

    Conclusion

    Daily login rewards in Elvenar represent more than simple engagement mechanics—they embody the game’s philosophy of respecting player time while encouraging consistent participation. From guaranteed event currency to structured seasonal progression, these systems ensure that even brief daily sessions generate meaningful advancement.

    The evolution from basic consecutive bonuses to sophisticated Seasons integration demonstrates Elvenar’s commitment to rewarding loyalty without demanding addiction. Whether you’re a casual player collecting event login rewards during busy weeks or a dedicated ruler maximizing every Season waypoint, understanding and optimizing these daily systems transforms routine engagement into strategic advantage.

    In a game measured in months and years rather than hours, daily login rewards compound into significant differences. Master these systems, establish consistent habits, and watch your magical kingdom flourish through the steady accumulation of guaranteed blessings.

  • Mastering Event Currency in Elvenar: The Key to Festival Rewards

    Mastering Event Currency in Elvenar: The Key to Festival Rewards

    In the vibrant world of Elvenar, event currency serves as the magical key that unlocks seasonal treasures, evolving buildings, and exclusive rewards during the game’s frequent festivals. Unlike standard resources that persist indefinitely, event currency represents a time-limited opportunity that demands strategic collection, efficient spending, and careful planning. Understanding the dual-currency system and optimization techniques separates casual participants from elite reward collectors .

    The Dual Currency Architecture

    Elvenar’s event economy operates through two distinct currency types, each serving different functions within the festival ecosystem

    :

    Primary Event Currency (Golden Keys, Postal Keys, Chef Hats, Dwarven Chips, Sky Essence) represents the standard resource collected through active participation. You earn this currency by completing event quests, reaching quest milestones, opening reward chests, and collecting hourly drops from your city’s outskirts. This currency fuels the immediate reward mechanisms—opening chests, spheres, or postal boxes that contain randomized prizes

    .

    Secondary Event Currency (Stardust, Winter Gifts, Triumph Gems, Amuni Knowledge) functions as the progression resource. You acquire this currency by “trading” your primary currency through event mechanics—each opened chest or sphere generates secondary currency as a guaranteed byproduct. This secondary currency advances you along Grand Prize tracks, unlocks milestone rewards, and determines your League placement among fellow participants

    .

    Both currencies expire when events conclude, typically after 3-4 weeks of active celebration. Any unspent currency vanishes, making strategic timing essential for maximizing returns

    .

    Primary Currency Collection Methods

    Maximizing event currency requires understanding and optimizing all collection channels:

    Quest Completion provides the most substantial and reliable currency income. Events feature two quest categories: a main storyline that can be completed immediately upon unlocking, and daily episodic quests that release one per calendar day. Completing all available quests typically yields thousands of primary currency units—often representing 60-70% of total free-to-play acquisition

    .

    Quest milestones add bonus currency at specific completion thresholds, rewarding sustained participation beyond individual quest rewards. These milestones often include additional secondary currency, creating compound benefits for thorough quest completion

    .

    Daily Login Rewards grant guaranteed currency simply for accessing the game during the event period. The Autumn Zodiac 2024 event, for example, provided 50 Golden Keys initially plus 35 additional keys daily—over 1,000 keys from passive login alone across a three-week event

    . These rewards require zero effort beyond opening the game, making them the most efficient currency source available.

    City Outskirts Drops spawn hourly around your city’s edges, with specific timing mechanics that reward frequent check-ins. Maximum efficiency requires collecting these drops every 4 hours, as the system allows up to 6 simultaneous spawns before pausing new generation. Players logging in four times daily can capture approximately 24 drops, while those checking once daily collect merely 6-12

    .

    The drops appear at fixed server times regardless of when you last collected, meaning consistent scheduling optimizes acquisition. Missing a collection window doesn’t delay future spawns—it merely wastes that hour’s potential currency

    .

    Chest and Sphere Rewards sometimes return primary currency as randomized prizes, creating positive feedback loops where spending currency occasionally generates more currency. While unreliable, these returns can extend your total spending power by 10-15% across an event

    .

    Secondary Currency Mechanics

    Secondary currency accumulation determines your access to the most coveted event rewards. The conversion rate from primary to secondary currency varies by event mechanics:

    Sphere/Chest Opening guarantees secondary currency with each primary currency expenditure. Different options offer varying efficiency—some chests provide more secondary currency per primary key spent, while others prioritize different reward types. Strategic players analyze these ratios to optimize Grand Prize progression

    .

    Grand Prize Tracks typically require 20 secondary currency units per major reward, with the sequence looping after initial completion. Early Grand Prizes cost 20 tokens each, while later iterations (starting around prize #21) demand 30 tokens, creating accelerating costs for deep progression

    .

    League Competition ranks players by total secondary currency collected, with tiered rewards for top performers. The Autumn Zodiac 2024 featured five leagues: Hobby (all participants), Iron (top 50%), Bronze (top 20%), Silver (top 5%), and Gold (top 1%). League thresholds recalculate hourly based on server-wide participation, creating dynamic competition where sustained effort matters more than single-day spikes

    .

    Strategic Currency Spending

    Efficient currency deployment requires balancing multiple reward priorities against limited resources:

    Grand Prize Focus suits players seeking evolving building artifacts and major set pieces. This strategy prioritizes secondary currency efficiency—selecting chests/spheres with optimal token-per-key ratios regardless of other rewards. Calculators and community spreadsheets help identify mathematically optimal choices for pure Grand Prize progression

    .

    Daily Prize Targeting appeals to collectors wanting specific building variants or portrait frames. Since daily prizes rotate every 24 hours, this strategy requires saving currency for preferred options and potentially accepting suboptimal secondary currency returns to secure desired items

    .

    Balanced Approach distributes currency across Grand Prize advancement, daily prize attempts, and incidental rewards (instants, knowledge points, rune shards). Most free-to-play players naturally adopt this hybrid strategy due to currency constraints preventing exclusive focus on any single target

    .

    Chest Selection Mathematics varies dramatically by event type. The “rotating chest” events (like Autumn Zodiac) present 9 different sphere types with varying costs, secondary currency yields, and bonus reward probabilities. Analysis reveals that optimal strategies can differ by 20-30% in expected outcomes depending on target priorities

    .

    For example, maximizing Grand Prizes requires selecting high-efficiency spheres even when they offer less exciting incidental rewards, while daily prize hunters should prioritize spheres showing their target item regardless of efficiency metrics

    .

    Collection Optimization Techniques

    Veteran event participants employ advanced strategies to maximize free currency acquisition:

    The 4-Hour Cycle: Setting phone alarms or calendar reminders for 4-hour check-ins captures maximum outskirts drops without excessive disruption. This schedule aligns with natural spawn mechanics, ensuring you never reach the 6-drop cap that pauses generation

    .

    Quest Pre-Preparation: Reviewing community quest lists (available through iDavis, Italian fan sites, and Beta Fellowship documents) before events start allows pre-production of required goods, clearing of training queues, and strategic building placement. This preparation enables instant quest completion when daily quests unlock, preventing lost days due to production delays

    .

    Phoenix and Evolution Building Synergy: The Ashen Phoenix evolving building provides 2% bonus event currency per quest completed—seemingly modest but compounding significantly across 50+ event quests. Players with max-level Ashen Phoenix can earn 100% additional currency from quest completion, effectively doubling their primary income from this source

    .

    Fellowship Coordination: Active fellowships share event strategy tips, quest solutions, and currency optimization techniques. While currency itself cannot be traded, collective knowledge dramatically improves individual efficiency. Some fellowships maintain event-specific planning documents tracking optimal chest selections based on real-time prize rotations

    .

    Economic Considerations and Trade-offs

    Event currency management involves complex resource allocation decisions:

    Time vs. Currency: The 4-hour optimal collection cycle demands significant lifestyle integration. Players unable to maintain this schedule accept 25-50% currency reduction but gain quality-of-life improvements. The game accommodates various commitment levels, though competitive League placement typically requires near-optimal collection

    .

    Diamond Acceleration: Premium currency purchases can supplement event currency through direct buying or instant quest completion. However, the diminishing returns structure—where later Grand Prizes cost 50% more tokens—makes heavy diamond investment increasingly expensive for marginal rewards. Free-to-play strategies often achieve 80-90% of paid player outcomes through disciplined optimization

    .

    Opportunity Costs: Event participation demands time and attention diverted from normal city development. During intense events, players may neglect tournament participation, fellowship contributions, or chapter advancement. Successful players balance event currency collection against these competing priorities, recognizing that events recur while some opportunities (like specific tournament weeks) may be more valuable

    .

    Event-Specific Currency Variations

    Different event types feature unique currency mechanics requiring adapted strategies:

    Chest/Shuffle Events (Autumn Zodiac, Winter Magic) offer randomized reward pools with strategic selection. Players choose from 3 visible options, with rejected alternatives rotating out. This creates meaningful decisions where saving currency for optimal chests outperforms immediate spending

    .

    Merge Events (Gateway Into the Past, The Great Excavation) involve combining lower-tier items into higher-value creations. Currency efficiency depends on merge optimization and trade acceptance with event NPCs, adding puzzle-solving elements to pure collection

    .

    Progressive Events feature linear reward tracks where currency automatically advances fixed paths. These reduce strategic choice but ensure predictable returns for consistent participation

    .

    Common Currency Management Mistakes

    New participants frequently undermine their event potential through preventable errors:

    Hoarding Without Purpose: Saving currency for “better” options that never appear wastes potential daily prize opportunities. Unless targeting specific known rotations, spending currency efficiently typically outperforms indefinite hoarding.

    Ignoring Outskirts Drops: Players focusing exclusively on quests miss 20-30% of potential currency from city drops. The minimal effort of perimeter checks yields substantial returns.

    Impulsive Early Spending: Using all currency on day-one options prevents response to better later opportunities. Maintaining currency reserves until understanding full event mechanics enables informed optimization.

    Neglecting Secondary Currency: Focusing exclusively on primary currency collection without considering Grand Prize progression efficiency leads to suboptimal reward acquisition. The best chest for primary currency generation may differ from the best chest for secondary currency advancement

    .

    Conclusion

    Event currency represents Elvenar’s most dynamic resource system, transforming routine gameplay into festive optimization puzzles. The dual-currency architecture—primary for immediate rewards, secondary for progression—creates strategic depth where collection efficiency and spending wisdom both matter.

    Success requires balancing quest completion, hourly check-ins, optimal chest selection, and long-term planning against the backdrop of limited-time availability. While premium acceleration offers shortcuts, disciplined free-to-play strategies achieve remarkable results through community knowledge, mathematical optimization, and consistent engagement.

    Master event currency management, and each festival becomes not merely a celebration but a strategic opportunity to accelerate your kingdom’s development through exclusive buildings, powerful artifacts, and invaluable resources.

  • Phoenix Artifacts in Elvenar: The Ultimate Guide to Evolving Firebird Power

    Phoenix Artifacts in Elvenar: The Ultimate Guide to Evolving Firebird Power

    Introduction to Phoenix Artifacts

    Phoenix Artifacts represent some of the most powerful and coveted items in Elvenar, serving as the essential components that unlock, evolve, and maximize the potential of the legendary Phoenix buildings—creatures of fire and rebirth that provide transformative benefits to any city fortunate enough to host them

    . These artifacts embody the pinnacle of event reward systems in InnoGames’ fantasy city-builder, representing both the culmination of dedicated event participation and the gateway to endgame capabilities that distinguish exceptional cities from merely adequate ones.

    The Phoenix system in Elvenar introduces a unique evolution mechanic where buildings progress through multiple stages of power, each requiring specific artifacts to unlock enhanced capabilities

    . Unlike standard buildings that provide fixed benefits, evolved Phoenix structures scale dramatically with investment, creating compounding returns that reward intensive artifact collection and strategic deployment. Understanding how to acquire, utilize, and optimize Phoenix Artifacts is therefore essential for any player seeking to maximize their city’s potential and compete at the highest levels of Elvenar gameplay.

    This comprehensive guide explores every aspect of Phoenix Artifacts in Elvenar, from their acquisition methods and evolution mechanics to strategic deployment and optimization approaches that extract maximum value from these rare and powerful resources. Whether you are encountering your first Phoenix event or seeking to complete your collection of evolved firebirds, this analysis provides the knowledge necessary to master one of Elvenar’s most dynamic and rewarding systems.

    The Phoenix Building System

    Types of Phoenix Buildings

    Elvenar features multiple Phoenix buildings, each with distinct aesthetic designs and functional benefits that cater to different city strategies and player preferences

    .

    Fire Phoenix: The original and most iconic Phoenix, the Fire Phoenix typically provides military benefits—boosting troop attack power, reducing training time, or enhancing combat effectiveness in various ways. This Phoenix suits military-focused cities and players prioritizing tournament performance or aggressive expansion

    .

    Storm Phoenix: The Storm Phoenix generally offers goods production benefits—boosting manufactory output, reducing production costs, or providing bonus goods generation. This Phoenix appeals to economically-focused cities and players emphasizing trade, catering strategies, or goods-intensive development

    .

    Aureate Phoenix: The Aureate Phoenix typically provides coin and supply generation bonuses, directly boosting the fundamental economic resources that fuel all city activities. This Phoenix benefits all city types but particularly supports rapid development and extensive construction or training programs.

    Other Phoenix Variants: Elvenar periodically introduces additional Phoenix variants with unique benefit profiles—perhaps culture-focused Phoenixes, population-enhancing versions, or specialized variants for specific gameplay aspects. Each new Phoenix expands the strategic options available to artifact collectors.

    Evolution Mechanics and Stages

    The Phoenix system employs a sophisticated evolution mechanic where buildings progress through multiple power tiers, with each stage requiring Phoenix Artifacts to unlock

    .

    Base Stage (Stage 1): Initial Phoenix buildings provide modest benefits appropriate to their type. Even at base stage, Phoenix buildings offer valuable advantages, but their true potential remains locked until evolution begins.

    Evolution Stages (Stages 2-10): Each evolution stage requires Phoenix Artifacts and provides substantial benefit increases. Higher stages offer dramatically enhanced capabilities—perhaps doubling or tripling the bonuses of base stages. The evolution curve is typically non-linear, with later stages providing disproportionately large gains.

    Maximum Evolution (Stage 10): Fully evolved Phoenix buildings represent peak power, providing benefits that can transform city performance in their specialized areas. Achieving maximum evolution requires extensive artifact collection across multiple events and represents a long-term achievement goal.

    Set Bonuses and Synergies: Some Phoenix systems include set bonuses where multiple evolved Phoenixes provide additional benefits beyond their individual contributions, creating incentive for collecting and evolving complete sets.

    Acquiring Phoenix Artifacts

    Event-Based Acquisition

    The primary source of Phoenix Artifacts is special events, particularly the Phoenix-themed events that recur periodically throughout the Elvenar calendar

    .

    Phoenix Event Quests: During Phoenix events, completing event quests awards Phoenix Artifacts as primary rewards. These quests typically follow progressive difficulty curves, with later quests demanding more substantial efforts but offering greater artifact rewards.

    Event Currency Exchange: Phoenix events feature special currency systems where accumulated event currency can be exchanged for Phoenix Artifacts in event shops. Strategic currency management—prioritizing artifacts over other rewards—maximizes artifact acquisition.

    Grand Prize Tracks: Phoenix event grand prizes often include substantial artifact packages, with top-tier rewards providing enough artifacts for multiple evolution stages. Pushing for grand prize completion during Phoenix events accelerates evolution progress dramatically.

    Daily Rewards and Milestones: Phoenix events typically include daily login rewards, milestone achievements, and participation bonuses that provide steady artifact accumulation throughout the event duration.

    Alternative Acquisition Methods

    Beyond primary events, Phoenix Artifacts can be acquired through various secondary methods that supplement event-based collection

    .

    Fellowship Adventure Rewards: Some Fellowship Adventures include Phoenix Artifacts in their reward structures, particularly those occurring near Phoenix event periods or featuring fire/rebirth themes.

    Tournament and Weekly Challenge Rewards: Exceptional tournament performance or weekly challenge completion occasionally offers Phoenix Artifacts as premium rewards, though these are typically rare and limited.

    In-Game Shop Purchases: Phoenix Artifacts may be available for direct purchase using premium currency (Diamonds) during events or special promotions. This provides a pay-to-accelerate option for players seeking rapid evolution.

    Special Promotions and Bundles: InnoGames occasionally offers Phoenix Artifact packages through special promotions, anniversary celebrations, or limited-time bundles that provide acquisition opportunities outside standard events.

    Artifact Rarity and Value

    Phoenix Artifacts represent high-value resources that should be managed carefully due to their scarcity and transformative potential

    .

    Limited Availability: Unlike standard resources, Phoenix Artifacts cannot be produced through normal city operations or acquired through regular gameplay. Their event-limited availability makes each artifact precious and irreplaceable.

    Evolution Investment Requirements: Evolving Phoenix buildings to maximum stages requires substantial artifact quantities—often dozens or hundreds of artifacts per Phoenix. This high investment requirement makes strategic artifact allocation crucial.

    Opportunity Cost Considerations: Every artifact spent on one Phoenix cannot be spent on another. Players must evaluate which Phoenix type provides greatest benefit for their specific city strategy and prioritize accordingly.

    Strategic Artifact Management

    Phoenix Selection and Prioritization

    With multiple Phoenix types available and limited artifact supplies, strategic selection determines optimization outcomes

    .

    City Strategy Alignment: Select Phoenix types that align with your city development focus. Military cities should prioritize Fire Phoenix evolution; economic cities should emphasize Storm or Aureate Phoenixes; balanced cities might distribute artifacts across multiple types.

    Current Development Phase: Prioritize Phoenixes that address immediate development needs. Early-game cities might benefit most from Aureate Phoenix economic boosts; late-game cities might prefer Fire Phoenix military enhancements for tournament dominance.

    Fellowship and Social Considerations: Consider fellowship needs when selecting Phoenix priorities. If your fellowship lacks military power, Fire Phoenix development provides collective benefit; if goods trading is fellowship focus, Storm Phoenixes enhance economic contribution.

    Long-Term Collection Planning: Plan artifact distribution across multiple events and years. Completing one Phoenix to maximum evolution before starting another may provide concentrated benefits, while distributed evolution across multiple Phoenixes offers flexibility.

    Evolution Timing and Sequencing

    Strategic timing of Phoenix evolution maximizes artifact value and city development impact

    .

    Immediate vs. Delayed Evolution: Some players evolve Phoenixes immediately upon acquiring artifacts, enjoying incremental benefits throughout their collection journey. Others hoard artifacts until they can complete multiple evolution stages simultaneously, maximizing visual impact and benefit thresholds.

    Event Coordination: Time major evolution stages to coincide with periods where enhanced Phoenix benefits provide maximum value—before tournaments for Fire Phoenixes, before intensive construction for Aureate Phoenixes, or before goods-intensive activities for Storm Phoenixes.

    Set Completion Timing: If pursuing Phoenix set bonuses, plan evolution timing to complete multiple Phoenixes near simultaneously, unlocking set bonuses that provide additional value beyond individual building benefits.

    Artifact Conservation and Spending

    Managing artifact scarcity requires disciplined conservation and strategic spending

    .

    Emergency Reserves: Maintain artifact reserves for unexpected opportunities—perhaps sudden Phoenix events, evolution discounts, or new Phoenix variants that match your strategy better than current options.

    Evolution Efficiency: Some events or periods may offer evolution efficiency bonuses—reduced artifact costs for evolution or bonus benefits from evolution stages. Timing major evolution investments to coincide with these efficiencies maximizes artifact value.

    Abandonment and Refund Considerations: While typically permanent, some Phoenix systems allow evolution reset or building relocation with partial refunds. Understanding these mechanics provides flexibility if strategic priorities change.

    Phoenix Deployment and City Integration

    Placement Optimization

    Phoenix building placement affects their value extraction and city aesthetics

    .

    Culture Bonus Maximization: Like all buildings, Phoenixes benefit from culture bonuses that enhance their output. Placing Phoenixes in high-culture areas maximizes their effective benefits.

    Road Connectivity: Phoenixes require road connections to function. Efficient road placement minimizes space usage while ensuring adequate culture coverage and accessibility.

    City Aesthetics and Theming: Phoenix buildings feature distinctive fiery aesthetics that can dominate city visual design. Some players design entire city themes around their Phoenixes, creating visually striking fire-themed districts.

    Space Efficiency: Evolved Phoenixes typically occupy substantial space. City planning must accommodate Phoenix placement without sacrificing essential infrastructure or creating inefficient layouts.

    Benefit Extraction and Utilization

    Maximizing Phoenix benefits requires active utilization of their enhanced capabilities

    .

    Fire Phoenix Military Optimization: Cities with evolved Fire Phoenixes should leverage enhanced military capabilities through aggressive tournament participation, province conquest, and combat-focused event engagement that extracts value from attack bonuses and training efficiencies.

    Storm Phoenix Production Scheduling: Storm Phoenix benefits should inform goods production scheduling—running intensive manufacturing cycles during peak bonus periods, optimizing trade timing around enhanced output, and coordinating with fellowship goods strategies.

    Aureate Phoenix Economic Acceleration: Aureate Phoenix coin and supply bonuses enable rapid development cycles, extensive construction programs, and accelerated training that compounds over time through faster city advancement.

    Synergy with Other Systems

    Phoenix buildings interact with various Elvenar systems, creating optimization opportunities through synergy

    .

    Ancient Wonder Combinations: Phoenix benefits often stack multiplicatively with Ancient Wonder effects. Fire Phoenix military bonuses combined with Martial Monastery health boosts create exceptionally powerful armies; Storm Phoenix production bonuses alongside goods-enhancing wonders create industrial powerhouses.

    Event Building Integration: Phoenixes integrate with event building strategies, with some event buildings providing culture, population, or other supports that enhance Phoenix placement and effectiveness.

    Fellowship Coordination: Multiple fellowship members with complementary Phoenix types can coordinate strategies—Fire Phoenix members handling military challenges while Storm Phoenix members provide goods support, creating collective capabilities exceeding individual contributions.

    Long-Term Phoenix Strategy

    Multi-Year Collection Planning

    Phoenix evolution represents a multi-year journey for most players, requiring long-term strategic planning

    .

    Annual Event Participation: Plan consistent participation in Phoenix events across years, recognizing that maximum evolution requires artifact accumulation beyond single-event availability.

    Artifact Target Setting: Establish annual artifact collection targets based on evolution goals. If evolving a Fire Phoenix to Stage 10 requires 100 artifacts and events provide 20 artifacts annually, plan five-year collection timelines with contingency for variation.

    Priority Stability vs. Adaptation: Maintain stable Phoenix priorities to ensure concentrated evolution progress, but remain adaptable if game changes, new Phoenix types, or strategy shifts warrant reallocation.

    Competitive and Ranking Considerations

    Phoenix buildings significantly impact competitive Elvenar aspects including rankings and fellowship performance

    .

    Tournament Competitiveness: Evolved Fire Phoenixes provide substantial tournament advantages through military enhancement. Competitive tournament players prioritize Fire Phoenix evolution for ranking performance.

    Fellowship Recruitment Value: Cities with advanced Phoenixes are more attractive to competitive fellowships seeking members with established capabilities. Phoenix evolution represents investment in social capital and fellowship opportunities.

    Server Standing and Prestige: Maximum-evolution Phoenixes signal dedication and capability, contributing to server standing and player reputation within the Elvenar community.

    Future-Proofing and Adaptation

    Elvenar’s ongoing development requires Phoenix strategies that adapt to game changes

    .

    New Phoenix Type Preparation: Maintain artifact reserves for new Phoenix variants that may match emerging strategies better than existing options. Game updates may introduce Phoenix types for previously unsupported gameplay aspects.

    Mechanic Change Adaptation: Phoenix evolution mechanics, benefit structures, or acquisition methods may change through game updates. Flexible artifact management allows adaptation to new systems without stranded investments.

    Meta-Game Evolution: As Elvenar’s competitive meta evolves, optimal Phoenix priorities may shift. Regular reassessment of Phoenix value against current game conditions ensures continued optimization.

    Common Phoenix Artifact Mistakes

    Impulsive Spending and Poor Prioritization

    The most common Phoenix artifact mistake involves impulsive spending without strategic consideration

    .

    Scattered Evolution: Spreading artifacts across multiple Phoenix types without completing any to high stages creates collections of weak Phoenixes rather than powerful specialized tools. Concentrated evolution typically outperforms scattered investment.

    Mismatch with Strategy: Evolving Phoenixes that don’t align with actual gameplay strategy—Fire Phoenixes for purely economic players, Storm Phoenixes for military-focused cities—wastes artifact potential on unused benefits.

    Aesthetic Over Function: Choosing Phoenixes based on visual preference rather than functional benefit may satisfy aesthetic desires but sacrifices optimization for players seeking competitive performance.

    Acquisition Failures

    Missing artifact acquisition opportunities represents permanent lost potential

    .

    Event Participation Gaps: Missing Phoenix events due to inactivity, poor planning, or real-life constraints creates artifact deficits that delay evolution progress by months or years until events recur.

    Quest Inefficiency: Incomplete event quest lines leave artifacts unclaimed. Thorough event participation maximizes artifact acquisition and evolution speed.

    Currency Misallocation: Spending event currency on inferior rewards rather than Phoenix Artifacts during Phoenix events represents opportunity cost that delays evolution progress.

    Deployment and Utilization Errors

    Even well-acquired Phoenixes underperform with poor deployment

    .

    Suboptimal Placement: Poor Phoenix placement that misses culture bonuses or creates inefficient city layouts reduces effective benefits and wastes potential.

    Underutilization: Failing to leverage Phoenix capabilities—neglecting military advantages from Fire Phoenixes, ignoring production scheduling with Storm Phoenixes—wastes artifact investment through disuse.

    Isolation from Synergies: Deploying Phoenixes without considering synergies with Ancient Wonders, event buildings, or fellowship strategies leaves compounding benefits unrealized.

    Conclusion

    Phoenix Artifacts in Elvenar represent the pinnacle of event reward systems, providing access to evolving buildings that can transform city capabilities and distinguish exceptional players from casual participants

    . The journey from acquiring first artifacts to completing maximum-evolution Phoenixes spans multiple events and years, creating long-term goals that sustain engagement and reward dedication.

    Success with Phoenix Artifacts requires strategic prioritization aligned with city development goals, patient collection across numerous events, and thoughtful deployment that maximizes synergy with other game systems . The decision of which Phoenix to evolve, when to invest artifacts, and how to integrate Phoenix benefits into broader city strategy shapes performance as fundamentally as any other Elvenar development choice.

    For new players encountering their first Phoenix event, the advice is simple: participate fully, prioritize artifact acquisition, and begin the long journey of evolution with clear strategic direction. For veterans managing established Phoenix collections, optimization focuses on completing maximum evolution, exploring set synergies, and adapting to new Phoenix variants that expand strategic possibilities.