Category: Elvenar Online

  • The Complete Elvenar Map Guide: Mastering World Exploration

    The Complete Elvenar Map Guide: Mastering World Exploration

    Understanding the World Map

    The World Map in Elvenar represents your gateway to expansion, resources, and progression. Unlike the static city grid where you build and upgrade, the World Map is a dynamic, ever-expanding territory filled with provinces waiting to be discovered, conquered, and exploited. Each province you scout and complete provides Knowledge Points, relics, essential resources, and most critically—city expansions that provide the space necessary for your growing empire

    .

    The map is organized in concentric rings around your starting city, with province difficulty and rewards increasing as you push outward. Your relationship with this map determines your economic strength, military capabilities, and ultimately your success in Elvenar. Mastering map exploration separates thriving cities from stagnant ones.

    The Scouting Mechanic: Time and Strategy

    Scouting Fundamentals

    Scouting is the process of sending your scout to investigate an adjacent province, revealing its contents, difficulty, and rewards. This process takes time—initially just minutes, but eventually stretching to days in later chapters. The scout time increases based on two factors: the distance from your city (ring number) and your current chapter

    .

    Critically, you can only scout one province at a time. This limitation creates strategic bottlenecks, particularly during events requiring multiple scouted provinces or when approaching chapter ends with province completion requirements. The community has long requested multiple scouting capability or reduced scout times, but developers have maintained this as a pacing mechanism

    .

    The Scout’s Tavern

    Available in later chapters, the Scout’s Tavern reduces scouting time by up to 65%. This building becomes essential for maintaining reasonable progression speed as scout times extend into multiple days. However, reaching the point where you can build this structure requires substantial prior scouting, creating a catch-22 that frustrates many players

    .

    Province Difficulty: The Color-Coded System

    Provinces display difficulty ratings through a color-coded system that directly impacts both fighting and negotiating costs:

    • Very Easy (Green): Minimal enemy squad size or negotiation costs
    • Easy (Light Green): Slightly elevated but manageable
    • Medium (Yellow): Noticeable difficulty increase
    • Hard (Orange): Significant resource investment required
    • Very Hard (Red): Extreme costs, often requiring specialized strategies

    Difficulty Determinants

    Province difficulty depends primarily on two factors: the number of provinces you’ve already scouted (your “scout count”) and your Squad Size Upgrades researched. The more provinces you’ve scouted, the harder new provinces become. Additionally, each Squad Size Upgrade you research increases enemy strength in all unscouted provinces

    .

    This creates a strategic tension: scouting more provinces provides expansions and rewards but makes future provinces harder. Meanwhile, Squad Size Upgrades help you complete existing provinces but increase difficulty for new ones.

    The Overscouting Debate: Community Strategies

    The Elvenar community maintains active debate about optimal scouting strategy, with two primary philosophies:

    Minimal Scouting Approach

    This conservative strategy advocates scouting only the provinces required for chapter advancement plus a small buffer for events (typically 4-6 extra provinces). Proponents argue this keeps provinces at “Very Easy” or “Easy” difficulty, minimizing resource expenditure per province and maintaining sustainable progression

    .

    The minimal approach requires disciplined patience. You must resist the temptation to scout for immediate expansion space, instead optimizing your existing city layout. This strategy works best for players who enjoy city planning efficiency and prefer manageable, predictable costs

    .

    Aggressive Scouting Approach

    The opposing philosophy encourages continuous scouting regardless of immediate needs. Advocates point to several advantages: more expansions for building space, increased trading partners, Knowledge Point generation from the Tome of Secrets Ancient Wonder (which provides supplies based on scouting activity), and preparation for future chapter requirements

    .

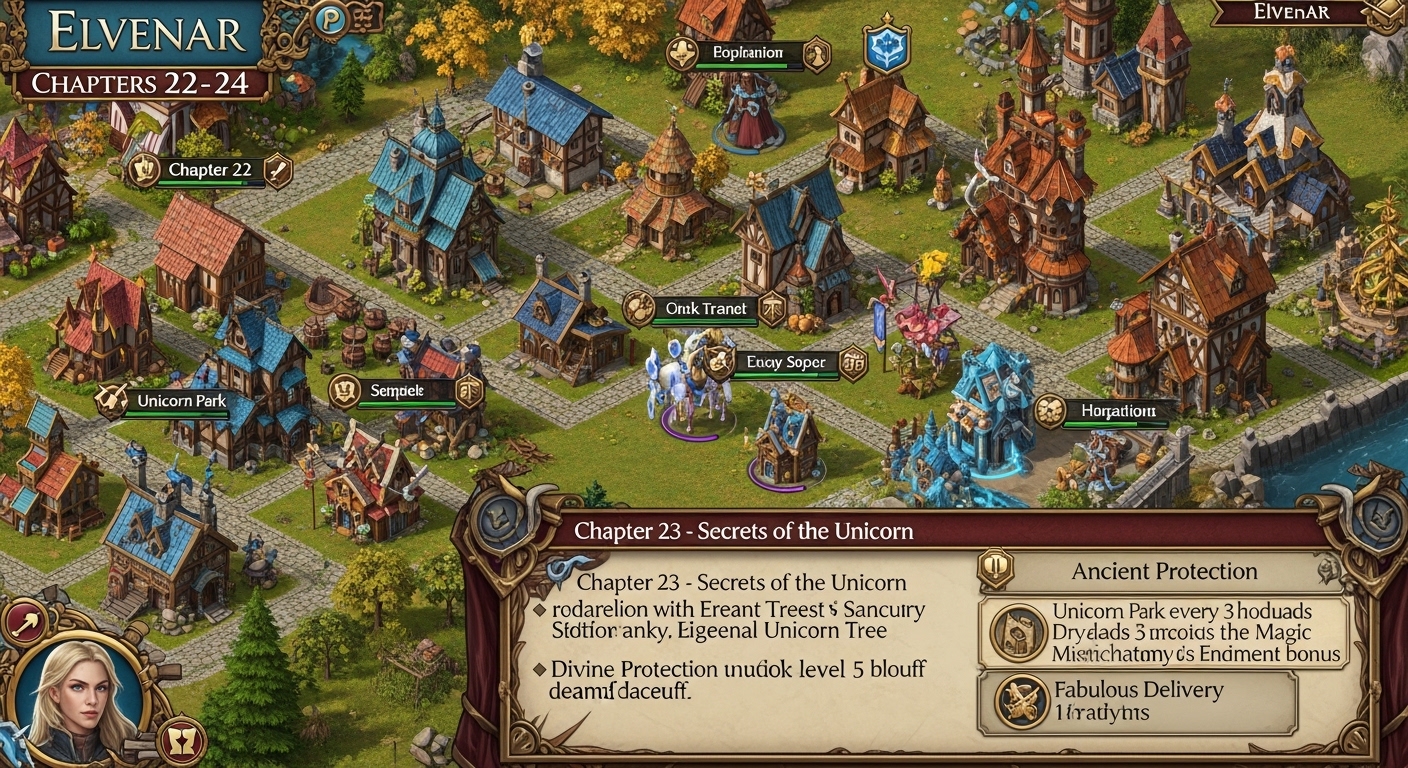
    Aggressive scouts note that later chapters require massive province counts—entering Chapter 15 requires 40 more provinces than Chapter 14. If you haven’t scouted ahead, you may wait longer for scouts than it takes to complete the chapter itself. Additionally, they argue that “Very Hard” provinces negotiate the same as “Easy” ones; the difficulty rating only affects fighting

    .

    The Consensus Balance

    Most experienced players recommend a middle path: scout ahead moderately while monitoring difficulty colors. Keep provinces at “Medium” difficulty or below through Chapter 10, then relax restrictions as your city strength grows. Maintain a buffer of 4-12 scouted-but-incomplete provinces for event quests, but avoid reaching “Very Hard” status unless prepared for the resource investment

    .

    Combat vs. Negotiation: Choosing Your Path

    Each province encounter offers two resolution methods: fighting or negotiating. Understanding when to use each approach maximizes efficiency and resource preservation.

    Fighting Advantages

    • No goods consumption—only troop losses
    • Scales with your military infrastructure
    • Tournament and Spire training translates directly to map progress
    • Ancient Wonders can significantly boost military effectiveness
    • Faster completion for active players

    Negotiation Advantages

    • No troop losses—preserves army for tournaments
    • Predictable costs visible before committing
    • Scales with your goods production, not military
    • Required for certain event quests
    • Often faster for casual players who check infrequently

    The Hybrid Approach

    Optimal play typically involves both methods. Fight provinces where you have type advantages and terrain benefits; negotiate where enemy composition would cause heavy losses or where goods are plentiful. Many players fight early provinces in a scouting push (when they’re Easy), then negotiate later ones as difficulty increases

    .

    Province Completion Strategy

    The 7-Encounter Technique

    A sophisticated strategy involves completing only 7 of 8 encounters in scouted provinces until necessary for chapter advancement. This keeps provinces “incomplete” for event quests that require completed provinces, while still allowing you to claim most rewards. When you finally need the province count for chapter progression, complete the final encounters en masse

    .

    Rune Shard Optimization

    Ancient Wonders require rune shards for construction, obtained primarily from province completion. By leaving provinces incomplete until you’ve unlocked new chapter wonders, you can direct rune shards toward wonders you actually want to build rather than random earlier options

    .

    Expansion Management

    Province expansions increase your city grid, but they also increase tournament and Spire difficulty if placed immediately. Advanced players often hold expansions unplaced until necessary, preventing difficulty spikes while maintaining the option for rapid expansion when needed

    .

    Advanced Scouting Tactics

    The Advanced Scouts Research

    Each chapter contains “Advanced Scouts” technology that reduces scouting costs, negotiation costs, and fighting difficulty for provinces within that chapter. The research description shows two numbers: provinces required and provinces recommended. Staying under the second number maintains easier difficulties

    .

    Strategic players scout only to the second number before researching Advanced Scouts, then use the cost reduction to push further. This timing maximizes the technology’s benefit

    .

    Squad Size Upgrade Timing

    Since Squad Size Upgrades increase enemy strength in unscouted provinces, optimal timing involves scouting all needed provinces before researching these upgrades. This “locks in” easier difficulties for your current chapter while still allowing military growth for completing them

    .

    Event Quest Preparation

    Many event quests require completing encounters or gaining relics from the World Map. Maintaining 4-12 scouted-but-incomplete provinces ensures you can fulfill these quests immediately without waiting for lengthy scout times. This preparation becomes essential for players pursuing event completion

    .

    Ring Strategy and Province Types

    The World Map organizes provinces into rings of increasing distance from your city. Each ring contains specific province types with distinct characteristics:

    Inner Rings (1-5): Lower costs, faster scouts, basic rewards. Essential for early expansion but quickly exhausted.

    Middle Rings (6-15): Moderate difficulty, substantial rewards, primary hunting ground for most of the game.

    Outer Rings (16+): Extended scout times, high costs, but necessary for late-game chapter requirements

    .

    Province types within rings include:

    • Standard Provinces: Basic encounters with balanced rewards
    • Ruins: Often contain Ancient Wonder runes
    • Cities: Higher difficulty but better rewards
    • Special Territories: Unique mechanics and requirements

    The Trading Network Benefit

    Scouting expands your visible trading network. Each scouted province reveals neighboring players and fellowships, expanding your potential trade partners. More trading partners means better trade rates and faster resource acquisition, particularly for goods you don’t produce efficiently

    .

    Players in isolated map regions suffer trade disadvantages, waiting longer for trades to complete or accepting worse exchange rates. Active scouting ensures robust market access.

    Common Map Mistakes

    Overscouting Without Preparation

    Reaching “Very Hard” provinces before developing adequate military or goods production creates progression bottlenecks. The resources required to complete these provinces may exceed your generation capacity, forcing extended waits

    .

    Ignoring Scout Times

    Failing to maintain continuous scouting wastes time. Your scout should always be active; idle scouts represent lost progress. Queue scouting before sleep or work to maximize efficiency

    .

    Completing Provinces Immediately

    Finishing all encounters in scouted provinces removes flexibility for event quests and rune shard targeting. The 7-encounter technique preserves options

    .

    Neglecting Expansion Placement

    Placing expansions immediately upon receipt increases tournament and Spire difficulty. Hold expansions until needed for specific building projects

    .

    Conclusion: Map Mastery as Strategy

    The World Map in Elvenar is not merely a progression gate—it’s a strategic resource to be managed with the same care as your city layout or economic production. Optimal play requires balancing immediate needs against future requirements, managing difficulty curves, and maintaining flexibility for changing circumstances.

  • Elvenar Battle Tips: Mastering Combat for Tournament and Map Success

    Elvenar Battle Tips: Mastering Combat for Tournament and Map Success

    Understanding the Combat Fundamentals

    Elvenar’s turn-based combat system operates on a hexagonal grid where strategic positioning and unit matchups determine victory or defeat. Unlike many browser strategy games that use auto-resolve mechanics, Elvenar offers both manual and auto-fight options, with manual control consistently delivering superior results when mastered

    .

    The combat system features five unit types arranged in a rock-paper-scissors dynamic known as the Combat Pentagon:

    Light Melee (LM) → Strong against Light Ranged and Mages; Weak against Heavy Melee and Heavy Ranged Light Ranged (LR) → Strong against Heavy Melee and Heavy Ranged; Weak against Light Melee and Mages
    Mages → Strong against Heavy Melee and Heavy Ranged; Weak against Light Melee and Light Ranged Heavy Melee (HM) → Strong against Light Melee and Light Ranged; Weak against Mages and Heavy Ranged Heavy Ranged (HR) → Strong against Light Melee and Heavy Melee; Weak against Light Ranged and Mages

    Understanding these relationships is fundamental, but advanced combat requires deeper knowledge of initiative, terrain, and enemy behavior patterns.

    The Initiative System: Who Moves First

    Combat turns are determined by initiative values – lower numbers move first. This system creates crucial tactical considerations:

    High Initiative Units (Move First):

    • Light Melee: Initiative 6-9
    • Light Ranged: Initiative 6-9
    • Mages: Initiative 6-9

    Low Initiative Units (Move Later):

    • Heavy Melee: Initiative 12-14
    • Heavy Ranged: Initiative 12-14

    Critical Insight: When units have the same initiative, tie-breakers go by position number (5,4,3,2,1 from top to bottom on the battlefield)

    . This means your unit placement directly affects attack order.

    Manual Fighting vs Auto-Fight

    Why Manual Fighting Dominates

    Experienced players consistently report that manual fighting yields significantly better results than auto-fight, especially in challenging encounters

    . The AI is “dumb as a box of rocks” – great when you’re fighting against it, terrible when it controls your troops

    .

    Key Advantages of Manual Control:

    • Positioning Control: You decide exactly where each unit moves
    • Target Selection: Choose which enemy to attack based on threat priority
    • Retreat Tactics: Strategic withdrawals to preserve units
    • Terrain Utilization: Use obstacles to block enemy movement
    • Bait and Switch: Lure enemies into unfavorable positions

    When to Use Auto-Fight

    Auto-fight has its place for efficiency:

    • First 10 tournament provinces where squad sizes heavily favor you
    • Very Easy (blue) world map provinces
    • When you’re heavily buffed with temporary buildings
    • Farming repeat encounters where losses don’t matter

    However, auto-fight becomes increasingly unreliable in later tournament provinces (around province 20+) where enemy squad sizes double yours

    .

    Advanced Manual Fighting Tactics

    The Scouting Technique

    Before committing your full army, send a single high-initiative unit (like a Ranger or Light Melee) to scout the battlefield. This allows you to:

    • Examine terrain obstacles
    • Identify enemy unit types and positions
    • Plan your approach
    • Retreat without losses if the situation looks unfavorable

    Pro Tip: If enemy Mist Walkers are present, use an Orc Strategist for scouting since they have debuffs against Light Range and can survive the initial strike

    .

    The Three Response Framework

    When making any move, consider three immediate responses

    :

    1. Attack a vulnerable unit – Strike where you have buff advantages (e.g., Archers vs. Mages)
    2. Attack the next enemy to move – Reduce their hit strength before they act
    3. Position for future advantage – Move to block enemies or prepare for next turn

    Engagement Discipline

    Golden Rule: Move forward only enough to engage the enemy. Make the enemy expose themselves by moving into your territory rather than rushing into theirs

    .

    This conservative approach:

    • Prevents overextension
    • Allows counter-attacks
    • Maintains formation integrity
    • Reduces exposure to enemy range

    Kiting and Bait Tactics

    Advanced players use movement to manipulate enemy AI:

    The Chase Scenario: Two slow Heavy Melee units chasing a fast Light Melee (Cerberus with initiative 9) while Heavy Ranged units slowly eliminate them from safety

    .

    Implementation:

    1. Position fast unit just within enemy movement range
    2. Enemy wastes turn moving toward you
    3. Retreat to safe distance
    4. Repeat while ranged units deal damage

    This works because “the enemy units never skip a turn and rarely retreat” – they will chase indefinitely while your ranged units destroy them

    .

    Unit-Specific Strategies

    Light Melee: Cannon Fodder or Precision Tool?

    Light Melee units (Sword Dancers/Axe Barbarians/Cerberus) are controversial. While they have advantages against Mages and Light Ranged, they’re often considered weak due to:

    • Slow movement allowing enemies free hits
    • Vulnerability to Heavy units
    • Difficulty reaching backline Mages

    Expert Verdict: “I don’t train any Sword Dancers. They are free from Bulwark. I might use her to clear map provinces since they are all Very Easy”

    Exception: Cerberus become viable with promotions and are particularly effective against Abbots (Mage units)

    .

    Mages: The Critical Unit

    Mages (Sorceress/Priest/Blossom Mage) are essential for defeating Heavy Melee and Heavy Ranged units.

    Race Difference: Human Priests are significantly superior to Elven Sorceresses. “Priest is the best mage unit in the game” while Sorceress is “the weak point of the entire elven military”

    . Elves must wait until Chapter 7 (Fairies) to get the Blossom Mage for a truly competitive Mage unit.

    Tactics:

    • Protect Mages from Light Ranged (especially Mist Walkers)
    • Use Heavy Melee as meatshields
    • Prioritize eliminating enemy units that can reach your Mages

    Heavy Melee: The Reliable Tank

    Heavy Melee (Treants/Paladins) excel at absorbing damage and protecting vulnerable units.

    Key Difference: Human Paladins have range 2 vs. Elven Treants’ range 1, making Paladins more reliable for auto-fight and better at reaching enemy ranged units

    .

    Best Use: Position between your ranged units and enemy melee to absorb attacks while your damage dealers eliminate threats.

    Heavy Ranged: Damage Dealers

    Heavy Ranged (Golems/Mortars/Orc Strategists) provide devastating damage from safety.

    Critical Insight: “Golems are WAY++ better than Mortars”

    . Mortars are considered “the most useless unit in the game” until the Frog Prince unlocks in late chapters.

    Orc Strategist Exception: These Training Ground units are excellent against Light Range and serve as viable alternatives when Golems aren’t available

    .

    Province-Specific Strategies

    Marble Provinces

    Enemies: Heavy Melee, Heavy Range, Light Range (Orc General, Knight, Cannoneer, Mist Walker)

    Strategy:

    • Early Game: Light Range (Archers/Crossbow) as key units, despite vulnerability to Cannoneers. Use Light Melee support .
    • Mid/Late Game: Mages (Sorceress/Priest/Blossom Mage) as primary damage dealers. Protect them from Mist Walkers .

    Support Options: Light Range work well against Heavy Melee but avoid Cannoneers. Heavy Range (Orc Strategist) excel against Mist Walkers

    .

    Steel Provinces

    Enemies: Heavy Melee, Light Melee, Mage (Swamp Monster, Orc Warrior, Thornrose Mage, Thief)

    Strategy: Light Range (Archer/Crossbow/Ranger/Dryad) are key units with bonuses against Heavy Melee and Mages. Eliminate Thieves first as they have strong attack bonuses despite no defense

    .

    Planks Provinces

    Enemies: Heavy Melee, Light Melee, Light Range (Orc General, Ancient Orc, Bandit, Dryad)

    Strategy: Heavy Range (Golem/Mortar/Orc Strategist) as key units. Focus on eliminating Ancient Orcs first since Heavy Range have minimal defense against them

    .

    Tournament-Specific Tactics

    The Scaling Challenge

    Tournament difficulty scales with province number and round:

    • Provinces 1-10: Extremely easy, “people tried losing and couldn’t”
    • Provinces 15-20: Moderate difficulty, requires attention
    • Province 20+: Enemy squad sizes double yours, designed to be unwinnable without buffs

    Composition Adjustments

    As you progress deeper into tournaments, fights take longer and often devolve into “melee brawls” where ranged units become vulnerable

    .

    Adaptation: “You need to adjust for possibly needing to sprinkle more melee units into the mix the further/deeper you go into Tourney”

    A fight composition that works in Province 4 may fail in Province 24 with identical enemy types – adjust for duration and chaos.

    Common Mistakes to Avoid

    1. The All-Same Brute Force Method

    Using five identical units is simple but suboptimal. “If you understand starting position, you can ween off the ‘brute force’ method of one unit type for all 5 slots”

    .

    2. Ignoring Terrain

    Obstacles on the battlefield can block movement and create bottlenecks. Always scout to identify terrain issues before committing troops

    .

    3. Poor Unit Positioning

    Unit placement affects attack order. Remember: “In a fight of all same units, your units will fight in the order of 5,4,3,2,1” from top to bottom

    .

    4. Attacking Without Planning

    Don’t just click the nearest enemy. Consider:

    • Who moves next?
    • Can you eliminate a threat before it acts?
    • Are you exposing vulnerable units?

    5. Neglecting Squad Size

    Your squad size relative to the enemy determines fight difficulty. Research squad size technologies and adjust your world map scouting strategy to maintain favorable ratios

    .

    Mobile vs Desktop Combat

    Critical Limitation: The mobile app only offers auto-fight, removing the manual control advantage

    . Mobile players should:

    • Focus on troop composition over tactics
    • Accept higher losses
    • Consider using desktop for important fights
    • Complain to InnoGames about the disparity

    Final Thoughts: The Path to Mastery

    Mastering Elvenar combat requires patience and practice. Start with these principles:

    1. Learn the Combat Pentagon – Know your unit matchups
    2. Scout Before Fighting – Never commit blindly
    3. Control the Engagement – Let enemies come to you
    4. Protect Your Damage Dealers – Use tanks to screen ranged units
    5. Adapt to Scaling – Adjust compositions for fight duration
    6. Practice Manual Control – It’s superior to auto-fight when learned

  • The Complete Elvenar Building Guide: From Foundation to Mastery

    The Complete Elvenar Building Guide: From Foundation to Mastery

    Understanding Elvenar’s Building Ecosystem

    Elvenar’s building system forms the backbone of your entire gameplay experience. Every structure you place—from humble residences to magnificent Ancient Wonders—contributes to a complex economic and strategic web that determines your success. Unlike simple city builders where aesthetics dominate, Elvenar demands that every building serve a functional purpose, optimized for space efficiency and resource generation

    .

    The game presents you with two distinct architectural paths: Elves with their organic, nature-inspired circular buildings, and Humans with their rectangular, medieval industrial structures. While both races share identical underlying mechanics, their building shapes fundamentally impact your city layout strategies. Elven buildings typically occupy smaller footprints but have awkward dimensions, while Human buildings offer more predictable rectangular shapes that can be easier to organize in grids

    .

    Core Building Categories: The Four Pillars

    Residential Buildings: Your Population Engine

    Residences represent the most fundamental building type in Elvenar. They provide three critical resources: population (which enables all other construction), coins (the primary currency for basic transactions), and culture (which boosts production efficiency). The key to residence management lies in balancing quantity with upgrade levels.

    New players often make the mistake of building too many low-level residences rather than upgrading existing ones. A level 15 residence generates exponentially more population and coins than three level 5 residences, while occupying significantly less space when considering road requirements and culture needs. Prioritize upgrading all residences to maximum available level before expanding your residential district

    .

    Strategic placement matters enormously. Residences should cluster together near your Main Hall to minimize road connections, and they benefit enormously from adjacent culture buildings. The “Enthusiastic” culture level (130% of required culture) provides substantial production bonuses, making culture investment adjacent to residences highly profitable

    .

    Workshops: The Supply Lifeline

    Workshops produce Supplies—the second primary resource alongside Coins. Supplies fuel building upgrades, unit training, research, and virtually every advanced game action. Like residences, workshops reward concentration over dispersion. A common early-game target is approximately 10 workshops, though this number decreases dramatically as you acquire Ancient Wonders and Magic Buildings

    .

    Workshop production runs on variable timers: 5-minute emergency production, 1-hour active play sessions, 3-hour medium duration, and 9-hour overnight production. Match these timers to your real-life schedule. There’s no benefit to setting 9-hour productions if you log in every hour; conversely, 1-hour productions waste potential while you sleep

    .

    Manufactories: Goods Production Hierarchy

    Manufactories produce the nine goods types essential for trading, research, and tournament participation. These divide into three tiers: Tier 1 (Marble, Steel, Planks), Tier 2 (Scrolls, Crystal, Silk), and Tier 3 (Elixir, Magic Dust, Gems). Crucially, each player receives three “boosted” goods—one per tier—indicated by relics surrounding their city. These boosted goods produce at 400% efficiency, making specialization essential

    .

    Building ratios depend heavily on your playstyle, but general guidelines suggest approximately 5 Tier 1, 3 Tier 2, and 3 Tier 3 manufactories for balanced play. However, if you join an active fellowship with robust trading, you can focus exclusively on your three boosted goods and trade for everything else, reducing manufactory count by half

    .

    Manufactories expand significantly as they upgrade. A Human level 19 Marble manufactory occupies 5×3 squares, while an Elven level 19 Planks manufactory occupies 5×2. These dimensional differences impact your layout planning substantially

    .

    Culture Buildings: The Invisible Multiplier

    Culture buildings provide no direct resources but boost the production of everything else. Maintaining “Enthusiastic” culture (130% of required) increases Coin and Supply production by 20%, making culture investment incredibly profitable. However, culture buildings occupy precious space, creating a constant optimization puzzle

    .

    The efficiency metric is culture per square. Early culture buildings like Temples of Holy Fire provide 96 culture per square (2400 culture from 5×5), while later options like Garden of Harmony provide only 70 per square. Regularly replace obsolete culture buildings with newer models—this “culture creep” frees substantial space over time

    .

    Space Optimization: The Ten Golden Rules

    Veteran players have codified essential principles for maximizing limited space:

    1. Corner your Main Hall: Place it in a corner with no more than two connecting roads. Its awkward bulk dictates your entire layout if centered .
    2. Edge culture placement: Position culture buildings and your Builder’s Hut along outside edges—they don’t require road access .
    3. Upgrade roads immediately: Higher-tier roads provide culture bonuses, effectively creating “free” culture without space cost .
    4. Dual-purpose roads: Every road segment should touch at least two buildings. Single-building roads waste space .
    5. Avoid edge roads: Roads touching only one building at your city’s perimeter represent wasted potential .
    6. Exploit road ends: Place small culture ornaments at road terminations—these “wasted” spaces become productive .
    7. Maintain square shape: Oblong cities or irregular shapes create inefficient perimeter-to-area ratios .
    8. Short-side road contact: Orient rectangular buildings so their shorter dimension touches roads, minimizing required road tiles .
    9. Group by function: Cluster similar buildings for easier management and collection .
    10. Plan for growth: Buildings expand at levels 5-6 and beyond—leave expansion room .

    Following these rules can free 15-20% more space for production buildings, directly accelerating your progression.

    Ancient Wonders: Permanent Powerhouses

    Ancient Wonders unlock in Chapter 4 and represent permanent, upgradeable bonuses that never become obsolete. Unlike regular buildings, their footprint remains constant as they level, making them incredibly space-efficient at high levels

    .

    Essential Early Wonders:

    • Golden Abyss: Provides population and coins. Despite appearing inefficient early (underperforming standard residences until Chapter 5), at maximum level it provides an 18% population discount across your entire city. This is universally recommended as your first wonder .
    • Mountain Halls: Another 18% population discount plus goods production bonuses. Pairs perfectly with Golden Abyss to create economic dominance .
    • Sanctuary (Elves) / Martial Monastery (Humans): The most powerful combat wonder, providing health bonuses to all units. Expensive to upgrade but essential for fighters .
    • Needles of the Tempest: Accelerates barracks training and boosts Light Ranged units—critical for tournament performance .

    Upgrade Strategy: Concentrate all Knowledge Points on one wonder until it reaches maximum level (31), then move to the next. A level 31 wonder provides exponentially more value than multiple low-level wonders. Never spread resources thin

    .

    Magic Buildings: Premium Efficiency

    Magic Residences and Magic Workshops represent the pinnacle of building efficiency, won primarily through Spire of Eternity participation. A Magic Workshop produces as many supplies as 9 standard workshops while requiring only 2 residences worth of population. This space efficiency transforms late-game city planning

    .

    Top players often run cities with only 2-4 Magic Workshops rather than 10+ standard ones, freeing enormous space for other buildings. Similarly, Magic Residences allow drastic reduction in residential footprint. The Spire’s Laboratory (first boss) drops Magic Residences; the High Halls (second boss) drops Magic Workshops—making Spire participation essential for advanced city building

    .

    Guest Race Settlements: Temporary Expansion

    From Chapter 6 onward, guest races (Dwarves, Fairies, Orcs, etc.) occupy your city temporarily. These settlements require massive space—often 20-30% of your grid—and feature unique mechanics

    .

    Settlement Strategy:

    • Clear substantial space before unlocking the portal
    • Place portals centrally to minimize road connections to settlement buildings
    • Portal tracks connect settlement buildings to the portal (not to your main road system)
    • Upgrade portal first, then production buildings, to maximize output

    Production timers vary by building level—higher levels offer longer production windows (better for sleep schedules) and increased output. Balance upgrade timing with your chapter progression needs

    .

    Evolving Buildings: Event Rewards

    Events provide evolving buildings that improve through artifact collection. These permanent structures offer unique bonuses—some provide combat advantages, others economic boosts, and many provide hybrid benefits. The Fire Phoenix and Brown Bear stand as the most powerful fighting buildings, while the Polar Bear reduces tournament cooldowns

    .

    Collection Strategy: Craft base plates from the Magic Academy when offered, but don’t place them until you have sufficient artifacts for meaningful evolution. A single fully-evolved building outperforms multiple level-1 buildings occupying the same space. Concentrated power on minimal footprint should guide your decisions

    .

    Building Upgrades: Timing and Priorities

    The upgrade sequence significantly impacts your progression speed:

    1. Residences and Workshops first: These economic foundations enable everything else
    2. Boosted manufactories next: Maximize your 400% production advantage
    3. Main Hall when storage-limited: Upgrade when you consistently hit capacity caps
    4. Barracks and Armories as needed: Match military infrastructure to your fighting frequency
    5. Ancient Wonders continuously: Never stop investing Knowledge Points

    Avoid the trap of “saving” upgrades for later chapters. Buildings upgraded earlier provide compounding benefits over longer periods. A manufactory upgraded in Chapter 6 generates more total goods by Chapter 10 than one upgraded at Chapter 9, even if both reach the same level

    .

    Common Building Mistakes

    Overbuilding Armories: These population-heavy structures drain your workforce. Use Shrines/Bulwarks Ancient Wonders for training queue capacity instead

    .

    Neglecting Culture: Low culture reduces all production by 20% or more—far more expensive than the culture buildings required to fix it

    .

    Premature Expansion: Unlocking map expansions before optimizing existing space spreads your city thin and increases collection time

    .

    Cross-Tier Manufacturing: Building non-boosted goods manufactories wastes space. Trade for these instead, unless your fellowship completely lacks traders

    .

    Static Layouts: Failing to rearrange as building sizes change creates road inefficiencies. Rebuild your city layout every few chapters

    .

    Conclusion: Building for the Long Term

    Elvenar city building rewards patience and planning over quick fixes. Every building decision compounds over months and years of gameplay. The most successful players approach their cities as evolving puzzles—constantly optimizing, upgrading, and adapting to new chapters and mechanics.

    Master the fundamentals: maximize space efficiency through smart layout, prioritize economic buildings, invest heavily in Ancient Wonders, and specialize in boosted goods. As you advance, incorporate Magic Buildings and evolving buildings to achieve incredible density and power. Your city is your legacy in Elvenar—build it wisely.

  • Mastering Elvenar: Essential Strategy Tips for Building Your Fantasy Empire

    Mastering Elvenar: Essential Strategy Tips for Building Your Fantasy Empire

    Introduction: Laying the Foundation for Success

    Elvenar is a game of patience, strategic planning, and efficient resource management. Whether you’ve just begun your journey as an Elf or Human ruler, or you’re looking to optimize an established city, understanding core strategic principles will transform your gameplay experience. This comprehensive guide covers essential tips from early-game fundamentals to advanced optimization techniques, helping you build a thriving metropolis that stands the test of time

    .

    Early Game Strategy: Your First Steps

    Choose Your Race Wisely

    Your journey begins with a crucial decision: Elves or Humans. While both races share identical core mechanics ensuring balanced gameplay, their distinct aesthetics and unit compositions create different experiences. Elves embody magical sophistication with nature-connected architecture, while Humans represent industrial medieval determination with sturdy, practical designs

    . If you’re uncertain, consider creating accounts on different servers to experience both races—there’s no penalty for exploring both options

    .

    Follow the Storyline Quests

    New players often overlook the importance of storyline quests, but these serve as your tutorial and early-game accelerator. These guided missions introduce core mechanics gradually while providing valuable rewards including Coins, Supplies, and even premium Diamonds. Beyond resources, quests unlock new buildings, technologies, and game features that expand your capabilities. Never ignore these narrative-driven objectives—they’re designed to prevent overwhelming new players while ensuring steady progression

    .

    The Eight Residence Rule

    Establish your population foundation early by building at least eight residences. These structures provide both housing and Coin income through taxation. Position them strategically near cultural buildings to maximize productivity bonuses. Simultaneously, construct workshops to begin Supply production—essential for construction, upgrades, and military training

    . This dual-focus on population and production creates the economic engine that powers all future expansion.

    Resource Management Mastery

    The Knowledge Point Strategy

    Knowledge Points (KP) are your progression currency, regenerating at one per hour (maximum 10 stored). Never let your KP bar fill completely—wasted regeneration stalls your advancement. However, there’s a powerful trick: scout nearby provinces on the world map and solve encounters. Each completed encounter awards 1 KP instantly plus valuable relics, bypassing the hourly limit entirely when you’re eager to progress

    . This technique transforms the world map from passive scenery into an active KP farm.

    Production Optimization

    Workshops offer multiple production cycles—from 5 minutes to 1 day. Match your selection to your play schedule: 5-15 minute cycles for active play sessions, 1-hour cycles for regular check-ins, and 9-hour cycles for overnight

    . Shorter orders always yield better efficiency than longer ones; two 3-hour orders outproduce one 9-hour order in the same timeframe. For endgame efficiency, maintain minimum 8 workshops set to 1-hour cycles for quest completion

    .

    The Boosted Goods Focus

    Check your Main Hall to identify your production-boosted goods—these receive significant bonuses from collected relics. Focus your manufacturing on these boosted types and trade for others rather than building diverse factories. This specialization creates massive efficiency advantages, particularly as you advance to Crafted Goods (Scrolls, Crystal, Silk) and Magical Goods (Elixir, Magic Dust, Gems)

    . One boosted manufactory often outproduces three unboosted alternatives.

    City Layout and Space Optimization

    The Road Efficiency Principle

    Roads are necessary evils—they consume space while providing only culture bonuses. Minimize them ruthlessly by following golden rules: never place roads at city edges (they only serve one building), position narrow building edges toward roads (a 3×2 building should show its 2-square side to the road, saving 20+ road blocks), and ensure roads serve at least two buildings

    . The difference between efficient and inefficient road networks can free space for an entire additional building.

    The Corner Main Hall Strategy

    Place your Main Hall in a corner with no more than 2 roads leading from it. This bulky, awkwardly-sized structure dictates your entire layout if centered—corners minimize road waste and free prime space for productive buildings. Veteran players recommend the top corner, building streets downward and sideways. There will come a day when you desperately need to move it; establish this efficient foundation early when fewer buildings require relocation

    .

    Culture Building Placement

    Counter-intuitively, place culture buildings in the CENTER of your city, not the edges. This allows maximum-length straight roads at the perimeter where they’re most efficient. Since culture buildings don’t need road access, central placement optimizes space usage perfectly while freeing edge space for road-dependent structures

    . Group all culture buildings together in rows, with your Builder’s Hut alongside them—neither requires roads, so keep paths far away

    .

    The Double Spiral Design

    For maximum efficiency, implement advanced layout principles: zero crossroads (keep roads straight until hitting corners), place biggest buildings at road ends (only need 1 road square), group same-sized buildings together for easy reorganization, and expand in perfect squares (5×5, 6×6, 7×7) to maintain optimal ratios

    . When restructuring, use spare expansions as staging areas—move buildings to temporary spaces while reorganizing, then return them to optimized positions

    .

    Military and Combat Strategy

    Understanding Unit Classes

    Elvenar features five unit classes with distinct roles: Light Melee (balanced frontline), Heavy Melee (tank units), Light Ranged (high-damage shooters), Heavy Ranged (armored shooters), and Mages (support units)

    . Each race trains five unique units in their Barracks, plus ten shared units in the Training Grounds and Mercenary Camp. While stats are balanced between races, tactical styles differ—Human Light Melee hits harder but defends weaker, while Elven versions are more balanced

    .

    Combat Formation Tactics

    The order you place troops matches the opposing lineup order. Default strategy: place Archers/Rangers opposite Mages and Heavy Melee, Banshees opposite Heavy Ranged, Orc Strategists opposite Light Ranged, and Golems opposite Light Melee

    . However, adapt based on battlefield terrain—use obstacles to create bottlenecks protecting fragile ranged units while melee forces engage.

    For manual fighting, deploy fast Light Melee first to scout terrain, then position your army based on enemy formation. Retreat Light Ranged into back corners when facing Mages to avoid first-round shredding, bringing them out after melee troops have engaged

    . This “snatch victory from defeat” technique often turns losing auto-fights into wins through strategic positioning.

    The Niche Unit Advantage

    When standard lineups fail, deploy “ignored” units with highest stats: Drone Riders, Sinister Cerberus, Vallorian Veterans, and Gruff Orcs. Substitute Dogs opposite Mages, Drones opposite Light Ranged, Veterans opposite Heavy Ranged, and Gruff Orcs opposite Light Melee. You’ll lose troops but secure victory against seemingly impossible encounters

    . These units require manual control but excel in specific matchups where conventional strategies fail.

    Advanced Progression Strategies

    Ancient Wonder Prioritization

    Ancient Wonders provide powerful passive bonuses but require significant investment. Priority for new players: Golden Abyss (population boost) and Mountain Halls (population concentration). At maximum level, each provides 18% population discount—combined they save over 700,000 population in late-game, freeing massive space for other buildings

    . These general-use wonders benefit any playstyle, whether fighting or catering-focused.

    Timewarp becomes essential for active players, reducing tournament cooldowns from 16 hours to near-instant with high levels and fed Polar Bear—transforming tournament participation from spread-out obligation to single-session completion

    .

    The “Max Before Adding” Rule

    Focus on maximizing 1-2 Ancient Wonders before adding new ones. This creates hugely beneficial buildings with highly efficient benefits per square. Wonder costs increased significantly in recent updates, making concentrated investment more important than scattered low-level wonders

    . A level 30 wonder provides exponentially better returns than ten level 3 wonders occupying the same space.

    Short-Term vs. Long-Term Balance

    Decide your progression philosophy early. Short-term strategy prioritizes rapid technology advancement through the research tree—fast progress but minimal wonders until “end-game.” Long-term strategy invests heavily in wonders early, accepting slower chapter progression for powerful permanent benefits

    . Most successful players find balance: allocate daily KP between technologies and wonders, adjusting based on current needs. Approaching guest races or competitive tournaments may demand temporary focus shifts.

    Community and Trading Optimization

    The 3-Star Trading Trick

    Make trades irresistible by offering 2 units less than the default amount. This creates a “3-star offer” appearing at the top of other players’ trade lists, accepted within minutes even in saturated markets

    . The rapid turnover means faster resource acquisition than full-price trades sitting for days. Since InnoGames changed cross-tier balance ratios from 1:4 to 1:1.5, cross-tier trading stigma has reduced significantly

    .

    Fellowship Selection and Participation

    Join an active Fellowship early. These 25-player groups enable resource trading, mutual aid, and coordinated chat. Helping Fellowship members generates bonus rewards when they return the favor. Check city names when visiting—many players indicate preferences like “Culture please!” or specific building help requests

    . Motivate their strongest culture buildings for maximum mutual benefit.

    Quality of Life Enhancements

    Swipe-to-Collect Efficiency

    Click and hold on one ready building, then swipe across all other ready buildings to collect resources instantly. This cuts collection time by 90% compared to individual tapping

    . Combine with fully zoomed-out view to spot all harvestable buildings across your expanding kingdom.

    Batch Production Setup

    Click the circle icon when selecting production to apply the same item to all identical buildings simultaneously. For Workshops, this works across all buildings. For Manufactories, it batches identical types at the same upgrade level—upgrade in pairs for maximum efficiency

    .

    Keyboard Shortcuts

    When resetting production, press number keys 1-6 to select options quickly: 1=5min, 2=15min, 3=1hr, 4=3hr, 5=9hr, 6=1 day for Workshops; 1=3hr, 2=9hr, 3=1 day, 4=2 days for Manufactories . Use arrow keys to navigate the world map without mouse clicking.

    Conclusion: Patience and Persistence

    Elvenar rewards strategic thinking over rushed expansion. The most successful cities result from patient optimization—efficient road networks, focused production, balanced wonder investment, and active community participation. Whether you prefer peaceful trading or military conquest, these strategies provide the foundation for building not just a city, but a lasting legacy in the magical realm of Elvenar.

  • Mastering Elvenar: Advanced Tricks and Pro Strategies for Dominating Your Fantasy Realm

    Mastering Elvenar: Advanced Tricks and Pro Strategies for Dominating Your Fantasy Realm

    Introduction: Beyond the Basics

    Elvenar is a game of patience, strategy, and efficient resource management. While beginners focus on simply keeping their city running, advanced players understand that success lies in optimizing every grid square, every production cycle, and every interaction. This comprehensive guide reveals the sophisticated tricks and professional strategies that separate thriving metropolises from struggling settlements, helping you maximize efficiency and accelerate your progression through the chapters

    .


    Resource Generation Secrets

    The Instant Knowledge Point Hack

    Waiting 10 hours for your Knowledge Point (KP) bar to refill is a beginner’s mistake. Professional players scout nearby provinces on the world map and solve encounters—each completed encounter awards 1 KP instantly plus valuable relics

    . This technique bypasses the hourly regeneration limit entirely, allowing rapid research progression when you’re eager to unlock new technologies. Scout continuously as long as you have sufficient Coins and Supplies, turning the world map into your personal KP farm rather than a passive waiting game

    .

    Coin Generation Beyond Taxation

    Running low on Coins? Don’t just wait for residence collections. Visit other players’ cities and “help” them with their current quests. This generates bonus Coins without spending resources, and Fellowship members can help each other for mutual Coin rewards

    . Additionally, completing encounter negotiations on the world map provides substantial Coin rewards, creating a virtuous cycle where exploration fuels both research and economy

    .

    The 3-Star Trading Advantage

    Make your trades irresistible by offering 2 units less than the default amount. This creates a “3-star offer” that appears at the top of other players’ trade lists and gets accepted within minutes, even when the market is saturated

    . While the discount seems minor, the rapid turnover means you acquire needed resources faster than competitors posting full-price trades that sit for days. This trick is especially powerful for cross-tier trading, where the stigma has reduced since InnoGames changed the balance ratio from 1:4 to 1:1.5

    .


    City Layout Optimization: The Science of Space

    The Corner Main Hall Strategy

    Place your Main Hall in a corner with no more than 2 roads leading from it. This bulky, awkwardly-sized building dictates your entire layout if centered—corners minimize road waste and free up prime space for productive buildings

    . Veteran players recommend the top corner, building streets downward and sideways from there. There will come a day when you desperately need to move it; better to establish this efficient foundation early when fewer buildings require relocation

    .

    Road Efficiency Mathematics

    Roads are space parasites—minimize them ruthlessly. Follow these golden rules:

    • Never place roads at city edges—they only touch one building, wasting space
    • Put narrow building edges toward roads: A 3×2 residence should have its 2-square side touching the road, not the 3-square side. This simple rotation can save 20+ road blocks—enough for an extra building
    • Roads should serve two buildings minimum—avoid dead-end roads entirely
    • Overwrite roads when upgrading: Drag new road types directly over old ones—no deletion required

    The Counter-Intuitive Culture Placement

    Place culture buildings in the CENTER of your city, not the edges. This allows maximum-length straight roads at the perimeter where they’re most efficient. Since culture buildings don’t need road access, central placement optimizes space usage perfectly while freeing edge space for road-dependent structures

    . Group all culture buildings together in rows, with your Builder’s Hut alongside them—neither requires roads, so keep paths far away

    .

    The Double Spiral Design

    For maximum efficiency enthusiasts, implement these advanced principles:

    • Zero crossroads—keep roads straight until hitting corners
    • Place biggest buildings at road ends (only need 1 road square)
    • Group same-sized buildings together for easy reorganization
    • Expand in perfect squares (5×5, 6×6, 7×7) to maintain optimal ratios

    When restructuring, use spare expansions as staging areas. Move buildings to temporary 5×5 spaces while reorganizing, then return them to optimized positions. Don’t fear demolition—rebuilding from scratch often yields better results than incremental adjustments

    .


    Production Mastery

    The Swipe-to-Collect Technique

    Click and hold on one ready building, then swipe across all other ready buildings to collect resources instantly. This cuts collection time by 90% compared to tapping individually

    . Combine this with fully zoomed-out view to spot all “harvest-ables” easily across your expanding kingdom

    .

    Batch Production Setup

    Click the circle icon when selecting production to apply the same item to all identical buildings simultaneously. For Workshops, this works across all buildings. For Manufactories, it only batches identical types at the same upgrade level—so upgrade in pairs for maximum efficiency

    . This trick transforms tedious individual clicking into streamlined mass production.

    The 9-Hour vs. 1-Day Calculation

    Shorter orders always beat longer ones in efficiency. Two 3-hour orders outproduce one 9-hour order in the same timeframe, and the difference increases with shorter cycles. For Workshops, 5-minute orders provide maximum yield if you can maintain active play

    .

    However, match production to your schedule: 9-hour orders for overnight, 1-day orders only if you’ll be offline 24+ hours. Setting 1-day orders when you check in twice daily actually loses resources compared to shorter cycles

    .

    Workshop Optimization for Endgame

    Endgame players need minimum 8 Workshops set to 1-hour cycles for quest efficiency. Remove excess manufactories (down to 2 per tier) to free massive population for upgrades

    . With a maxed Prosperity Towers Ancient Wonder and Power of Provision spells, 2 Magical Workshops can replace 9 normal ones, saving enormous space while maintaining production

    .


    Combat and World Map Tactics

    Selective Scouting Strategy

    Don’t “joy-scout” randomly. Prioritize provinces based on your needs:

    • Need trading power? Target provinces with relics matching your boosted goods
    • Need land expansions? Check Province Overview and target “easy” difficulty provinces

    Remember: each consecutive expansion requires completing one more province than the last. First expansion needs 1 province, second needs 2, third needs 3, and so on

    .

    Combat Damage Mechanics

    Units deal identical damage regardless of stack size—32 Berserkers hit as hard as 1 Berserker until they die. Always finish off enemy stacks completely rather than spreading damage, and prioritize eliminating threats over damaging multiple units

    . Use terrain obstacles to create bottlenecks, protecting fragile ranged units while melee forces engage

    .

    Army Composition Math

    Building more Armories isn’t always better. 2 Armories suffice for active players checking twice daily; 4 Armories for players checking less frequently. Balance based on your login schedule, not maximum capacity—excess armories waste population and space that could support production buildings

    .


    Ancient Wonder Strategies

    The “Max Before Adding” Rule

    Focus on maximizing 1-2 Ancient Wonders before adding new ones. This creates “hugely beneficial buildings with highly efficient benefits per square,” saving space for other content. Wonder costs increased significantly in recent updates, making this strategy essential

    .

    Priority Wonders for New Players

    1. Golden Abyss (population boost)
    2. Mountain Halls (population concentration)
    3. Timewarp (tournament cooldown reduction—game-changing for active players)

    These provide general benefits that remain useful throughout all game stages. At maximum level, Golden Abyss and Mountain Halls each provide 18% population discount, totaling over 700,000 population savings in late-game

    .

    Spell Fragment Farming

    During events, target large daily reward buildings (16+ squares) specifically for disenchanting. These provide massive Spell Fragment returns perfect for “Crab Hotels” (high-turnover crafting). Also stockpile Portal Profits from Trading Stations for emergency fragment needs

    . Artifacts disenchant for 2000 fragments each—if you have duplicates or decide against certain evolving buildings, these become valuable resources

    .


    Advanced Fellowship and Trading

    The Neighborly Help Optimization

    When visiting cities, check their town name—many players change it to indicate preferences like “Culture please!” or “Polish please!”

    . Motivate their strongest culture buildings for maximum mutual benefit. This reciprocal system generates extra rewards when they return the favor

    .

    Cross-Tier Trading Mastery

    Since InnoGames changed the balance ratio from 1:4 to 1:1.5, cross-tier trading stigma has reduced significantly

    . However, ensure your Fellowship has diverse boosted goods producers—if everyone trades down, nobody supplies the lower tiers. Specialize in your boosted goods, trade for everything else, and maintain production diversity within your group

    .


    Diamond and Premium Efficiency

    Smart Diamond Spending

    If purchasing Diamonds, prioritize:

    • Premium cultural buildings (permanent benefits)
    • City expansions (permanent space)
    • Builder’s Huts (permanent construction slots)

    Avoid spending on instant completions or temporary conveniences—these provide poor long-term value. Patience is cheaper than diamonds

    .


    Quick Reference: Essential Shortcuts

    Table

    ActionTrick
    Collect resourcesClick-hold and swipe across buildings 
    Upgrade roadsDrag new type directly over old 
    Batch productionClick circle icon to apply to all 
    Instant KPScout provinces, solve encounters 
    Fast tradesOffer 2 units less for 3-star priority 
    Space savingNarrow building edge to road 
    Culture placementCenter city, not edges 
    Road efficiencyZero crossroads, straight lines 

  • Elvenar: A Deep Dive into InnoGames’ Enchanting Fantasy City-Builder

    Elvenar: A Deep Dive into InnoGames’ Enchanting Fantasy City-Builder

    Introduction to a Magical World

    In the crowded landscape of online strategy games, Elvenar stands out as a distinctive fantasy city-building experience that has captivated players since its launch in April 2015. Developed by the German studio InnoGames—known for hits like Forge of Empires and Grepolis—Elvenar transports players to an ancient, untouched world where they must choose between two distinct civilizations: the mystical Elves or the industrious Humans. This browser-based MMO combines traditional city-building mechanics with turn-based combat, resource management, and a unique culture system that sets it apart from typical entries in the genre

    .

    What makes Elvenar particularly appealing is its accessibility. The game runs smoothly on virtually any modern web browser and requires minimal hardware specifications—just 512 MB of RAM and any graphics card, including integrated ones

    . This low barrier to entry has helped the game maintain a high playerbase nearly a decade after its initial release, contributing to InnoGames reaching 100 million Euros in revenue in 2015 alone

    .

    Choosing Your Path: Elves vs. Humans

    The first and most significant decision players face in Elvenar is their choice of race. This isn’t merely a cosmetic difference; it fundamentally shapes the gameplay experience, aesthetic direction, and strategic approach throughout the entire game

    .

    The Elven Kingdom embodies sophistication and harmony with nature. Their architecture features sleek, organic designs intertwined with flowers, plants, and magical elements. Elven buildings curve and flow like living things, creating cities that appear grown rather than constructed. Their units and abilities lean toward magical prowess, making them ideal for players who appreciate ethereal beauty and mystical themes

    .

    The Human Empire, by contrast, represents ambition and industrial might. Their cities feature sturdy medieval architecture with practical, angular designs. Smokestacks, forges, and stone fortifications dominate the landscape, reflecting humanity’s engineering capabilities and martial traditions. Players who prefer a more grounded, historical-fantasy aesthetic will find the Human option more appealing

    .

    While both races share identical core mechanics—the same resource types, building functions, and research trees—their visual presentations and thematic flavors create genuinely different gaming experiences. This dual-path system effectively doubles the game’s replay value, encouraging players to eventually try both options

    .

    Core Gameplay Mechanics

    City Building and Resource Management

    At its heart, Elvenar is a city-builder where efficient space management proves crucial. Players begin with a small starter area containing their Main Hall and must carefully plan their expansion. Every building requires road connections to function, and the limited grid space forces meaningful decisions about placement and prioritization

    .

    The resource system operates on multiple tiers. Coins, generated primarily from Residences through taxation, serve as the basic currency for construction and upgrades. Supplies, produced in Workshops, fuel production activities, building improvements, and military training. As players advance, they unlock Manufactories that produce nine distinct types of goods across three classes: Basic (Marble, Steel, Planks), Refined (Crystal, Scrolls, Silk), and Precious (Elixir, Magic Dust, Gems)

    .

    A unique element is the Culture System. Unlike many city-builders where decorations serve purely cosmetic purposes, in Elvenar, cultural buildings directly impact productivity. Placing sanctuaries, sculptures, trees, and other ornaments increases citizen happiness, which in turn boosts resource generation rates. This creates a delicate balancing act between functional buildings and aesthetic elements, preventing players from simply min-maxing their layouts

    .

    The Technology Tree and Progression

    Elvenar features an extensive research system with over 200 different improvements to discover

    . Players earn Knowledge Points (KP) hourly (up to a default cap of 10 for free players) and through exploring the world map, completing quests, and participating in events. These points unlock new buildings, units, production capabilities, and game features

    .

    The progression is deliberately paced. Unlike mobile games that encourage or enable rapid advancement through grinding, Elvenar embraces a slower, more methodical rhythm. Research becomes increasingly expensive and demanding as players advance through the game’s 22 chapters, with later chapters potentially taking months—or even a full year for Chapter 22—to complete

    . This design philosophy targets mature players who appreciate long-term planning over instant gratification

    .

    Exploration, Combat, and Diplomacy

    The World Map

    Beyond city management, Elvenar offers a vast World Map for exploration. Players can scout neighboring provinces, revealing territories controlled by NPC enemies or other players. Each province offers opportunities to acquire Relics—powerful artifacts that boost specific production types when collected

    .

    Conquering provinces serves dual purposes: it expands the player’s sphere of influence and unlocks the ability to scout further territories. However, claiming these lands requires either military force or diplomatic negotiation

    .

    Turn-Based Tactical Combat

    Elvenar distinguishes itself from many browser strategy games through its hands-on combat system. Rather than sending units into auto-battle, players directly control their forces in turn-based tactical encounters on hexagonal grids

    .

    The combat system features a rock-paper-scissors dynamic among five unit types: Light Melee, Light Ranged, Mages, Heavy Melee, and Heavy Ranged. Each type has specific strengths against two others and weaknesses against two more. For example, Light Melee units excel against Light Ranged and Mages but struggle against Heavy Melee and Heavy Ranged opponents

    . This creates strategic depth where scouting enemy compositions and counter-picking units becomes essential for victory.

    Players can field up to five squads per battle, and the system allows for meaningful tactical decisions about positioning, engagement order, and ability usage. For those less interested in micromanagement, an auto-battle option exists, though manual control generally yields better results

    .

    Negotiation as Alternative

    Not every conflict requires bloodshed. Players can choose to negotiate with province owners, offering goods in exchange for peaceful passage. This approach appeals to traders and builders who prefer economic development over military conquest. The choice between fighting and negotiating adds meaningful role-playing elements to the game, allowing players to define their kingdom’s character through actions rather than just dialogue choices

    .

    Community and Social Features

    Fellowships and Cooperation

    Elvenar emphasizes community interaction through its Fellowship system—essentially guilds that players can join after unlocking the appropriate technology in the second age. Fellowships provide group chat functionality, easier trading among members, and participation in Tournaments where collective effort earns rewards for all participants

    .

    The Neighborly Help mechanic encourages positive social interaction. Players can visit neighboring kingdoms daily to provide assistance, with the most valuable help being cultural boosts that double a building’s culture output for a limited time. This creates reciprocal relationships where active, helpful players tend to receive help in return

    .

    Trading Economy

    The Trader feature forms the economic backbone of Elvenar’s multiplayer experience. Since each kingdom can only have three “boosted” goods types (one per class), players must trade to acquire non-boosted resources efficiently. The trading interface allows players to create offers exchanging their abundant goods for needed materials, with the system rating deals from one to three stars based on fairness

    .

    This interdependence creates a living economy where active trading proves essential for progression. Veteran players consistently advise focusing production on boosted goods and trading for everything else, as producing non-boosted items is notoriously inefficient

    .

    The Free-to-Play Experience and Controversies

    Elvenar operates on a free-to-play model with optional in-game purchases using Diamonds—the premium currency. The game is genuinely playable without spending money, but the experience differs significantly between free and paying players

    .

    Patient players can progress through all content given sufficient time. As one dedicated free player noted after two years: “It’s all about strategy, patience, and of course, time involved. Don’t expect to come once a week and be at TOP… You can play it casual, or competitive, its pretty fun”

    . However, the pace slows considerably in later chapters, and city expansions become increasingly difficult without premium purchases.

    Critics argue that the game has become more aggressive in its monetization over time. Some players report hitting “paywalls” where progress effectively stalls without purchasing city expansions or premium cultural buildings

    . Recent updates have introduced additional rare resources required for upgrading Ancient Wonders, which some community members view as deliberate monetization tactics

    .

    The developer, InnoGames, continues to update Elvenar regularly, adding new chapters, events, and features. However, these updates sometimes include controversial “balancing” changes that reduce existing player advantages, creating friction with the community

    .

    Events and Seasonal Content

    Elvenar maintains player engagement through regular seasonal events like the Winter Magic, Autumn Zodiac, and various festival celebrations. These limited-time activities offer unique buildings that provide multiple benefits—combining population, culture, and goods production in single structures. Veteran players consistently recommend prioritizing these events, as the rewards often prove superior to standard buildings available through regular progression

    .

    The Magic Academy introduces spell-casting mechanics, allowing players to bless buildings with temporary boosts like increased production or extended Knowledge Point caps. Spells such as “Power of Provision” for Workshops and “Magical Manufacturing” for Manufactories reward active play and strategic timing, adding another layer of optimization for dedicated players

    .

    Conclusion

    Elvenar represents a mature, thoughtfully designed city-building experience that respects players’ time while offering genuine strategic depth. Its dual-race system, culture mechanics, and turn-based combat create a unique identity in the browser strategy genre. The game’s emphasis on patience, planning, and community interaction appeals to players seeking a long-term hobby rather than a quick diversion.

    However, potential players should approach with realistic expectations about the free-to-play model. While entirely possible to enjoy without spending money, Elvenar rewards those who either invest financially or commit significant time. The slow pacing that defines the game’s charm can become frustrating for those accustomed to faster progression systems.

    For fans of fantasy settings, city-building, and strategic combat who appreciate a methodical pace, Elvenar offers hundreds of hours of engaging gameplay. Its nearly decade-long lifespan and continued development demonstrate InnoGames’ commitment to the title, ensuring that the world of Elvenar will continue evolving for years to come.

  • Elvenar: A Decade of Fantasy City-Building Excellence

    Elvenar: A Decade of Fantasy City-Building Excellence

    Introduction to a Living Fantasy World

    In the ever-evolving landscape of online strategy games, few titles have demonstrated the longevity and consistent innovation that Elvenar has achieved. Developed by InnoGames GmbH and released in April 2015, this free-to-play city-building MMO has captivated millions of players worldwide with its unique blend of resource management, strategic combat, and immersive fantasy storytelling

    . As the game approaches its tenth anniversary in 2025, it continues to expand with new content, proving that thoughtful game design and community engagement can sustain a title well beyond the typical lifecycle of browser-based games.

    Core Gameplay: Building Your Dream City

    At its heart, Elvenar is a city-building strategy game where players must construct and manage a thriving metropolis in a magical realm. The experience begins with a crucial choice: Elves or Humans. This decision fundamentally shapes the player’s journey, as each race offers distinct architectural styles, technological paths, and cultural aesthetics

    .

    Elves embody sophistication and harmony with nature. Their cities feature elegant structures intertwined with living plants, flowers, and organic designs that seem to grow from the landscape itself. Humans, conversely, represent industrial ambition and medieval engineering, with sturdy stone buildings and practical, robust architecture that emphasizes functionality over natural beauty

    . Despite these visual differences, both races share identical core mechanics, ensuring balanced gameplay regardless of choice.

    The foundation of city management rests on several interconnected systems. Residences house your population and generate Coins through taxation, which serve as the primary currency for construction and research. Workshops produce Supplies—essential materials for building upgrades, troop training, and various production activities. The Main Hall acts as your central storage facility, determining maximum capacity for both Coins and Supplies

    .

    What distinguishes Elvenar from simpler city builders is its road connection system. Every building must be connected to the Main Hall via roads, creating interesting spatial puzzles as cities expand. Players must balance efficiency with aesthetics, often redesigning their layouts multiple times as new technologies unlock larger or differently-shaped structures.

    The Research Tree and Technological Progression

    Progression in Elvenar follows a chapter-based research system that has grown substantially over the years. As of 2025, the game features 24 chapters, with Chapter 23 “Secrets of the Unicorn” released in May 2025 and Chapter 24 following in November 2025

    . Each chapter introduces new buildings, resources, story quests, and Ancient Wonders—massive structures that provide powerful passive bonuses to your city.

    The narrative of Chapter 23 exemplifies Elvenar’s commitment to storytelling. Players face mounting evidence that Vallorion, a malevolent deity, has been resurrected and is causing natural disasters. To combat this threat, players must seek an audience with Enar, the god of the forest, by building a replica of the Treants’ sacred sanctuary and planting the legendary Unicorn Tree. This chapter introduces Heritage Huts for existing guest races and a powerful new combat ability called Divine Protection, which allows level 5 units to block debuffs from enemy types they’re strong against

    .

    Two new Ancient Wonders debuted in Chapter 23: the Unicorn Park (3×8), which produces Dryads every three hours and increases Magic Academy disenchantment bonuses, and the Fabulous Delivery Service (5×3), which boosts standard good production and reduces canned goods decay

    .

    Strategic Combat and World Map Exploration

    Beyond city management, Elvenar features a turn-based tactical combat system that pits players against various monsters and enemy forces. Battles occur on diverse battlegrounds with up to 20 different unit types available, creating tactically deep encounters that require careful consideration of unit strengths, weaknesses, and positioning

    .

    The world map serves as Elvenar’s multiplayer backbone. Here, players scout neighboring provinces, unlock powerful Relics through negotiation or combat, and interact with fellow rulers. Relics enhance workshop efficiency, providing significant production boosts that accelerate city development

    . This system encourages both peaceful cooperation and strategic conquest, allowing players to choose their preferred approach to expansion.

    Community and Social Features

    Elvenar emphasizes community through its Fellowship system (formerly Bands of Fellows), which allows up to 25 players to form persistent groups for trading, visiting, and coordinated chat

    . Fellowships provide crucial support networks where members exchange goods, share strategies, and participate in collective events.

    The development team maintains active communication with players through official forums, where they share development roadmaps, gather feedback, and announce upcoming features. In January 2025, the team revealed plans for two new chapters annually, a new community building (with both survey options being developed due to an unprecedented 50/50 vote split), and a revised update cycle moving from bi-weekly to tri-weekly releases to improve quality control

    .

    Events and Seasonal Content

    A vibrant calendar of seasonal events keeps the game fresh throughout the year. Recent events include the Living Chorus (March 2026), Cosmic Phoenix Rite (March 2026), Summit Trials (February 2026), and Winter Magic (November 2025)

    . These limited-time activities introduce exclusive buildings, special quests, and unique rewards that encourage regular engagement.

    The Seasons system represents another layer of progression, offering Blessings for Seasons that provide ongoing benefits to active players. Combined with the Magic Academy—where players disenchant items for valuable resources—and various crafting systems, Elvenar offers remarkable depth for those seeking long-term investment.

    Monetization and Player Experience

    As a free-to-play title, Elvenar utilizes a premium currency system centered on Diamonds. These can be purchased with real money or earned slowly through gameplay, and provide conveniences such as instant building completion, premium cultural buildings, and city expansions. Player opinions on monetization vary considerably: some praise the game as genuinely free-to-play with patience and strategy, while others argue that later chapters require significant investment to progress at reasonable speeds

    .

    Trustpilot reviews present a mixed but generally positive picture, with many long-term players (2+ years) emphasizing that success comes from strategic thinking rather than spending

    . However, some criticism exists regarding recent changes to Ancient Wonder upgrade requirements and account recovery issues. The development team has addressed some concerns through improvements to upgrade systems, with players noting that recent changes made it easier to upgrade previously stagnant Ancient Wonders

    .

    Technical Evolution and Platform Accessibility

    Elvenar began as a browser-based game but has expanded to include dedicated Android and iOS applications, with cross-platform progression ensuring players can manage their cities anywhere. The development team continues refining the technical foundation, with Version 1.225 released in September 2025 bringing various optimizations

    .

    Third-party tools like iDavis-Elvenar have emerged to support the community, offering city planners, building databases, event calculators, and quest lists. These resources demonstrate the dedication of Elvenar’s player base and the complexity that dedicated players navigate

    .

    The Future: Looking Ahead to 2026 and Beyond

    As Elvenar celebrates its tenth anniversary in 2025, the future appears bright. The commitment to two chapters per year ensures steady content flow, while the tri-weekly update cycle promises more polished feature releases

    . The development team has teased Spire improvements and continues refining existing systems based on community feedback

    .

    The game’s longevity speaks to its fundamental quality: a relaxing yet strategically engaging experience that respects player time while offering depth for those who seek it. Whether you’re drawn to the aesthetic pleasure of designing beautiful cities, the tactical challenge of turn-based combat, or the social aspects of Fellowship cooperation, Elvenar provides a fantasy sandbox that has matured gracefully over its decade of operation.

    Conclusion

    Elvenar stands as a testament to what persistent world games can achieve when developers prioritize consistent content updates and community dialogue. From its 2015 launch through its ambitious 2025 content roadmap, the game has evolved from a promising city-builder into a comprehensive fantasy MMO with remarkable breadth. As Chapter 24 unfolds and the tenth anniversary celebrations begin, both new players and veteran rulers have much to look forward to in this enchanting realm where magic and strategy intertwine.

    For those seeking a city-building experience that rewards patience, creativity, and strategic thinking, Elvenar remains one of the most compelling options in the free-to-play space—a fantasy kingdom that continues to grow more magnificent with each passing year.

  • Ascended Goods in Elvenar: The Complete Guide to Chapter 18 and Beyond

    Ascended Goods in Elvenar: The Complete Guide to Chapter 18 and Beyond

    Introduction: The Next Tier of Resources

    In the ever-expanding world of Elvenar, resource management is the cornerstone of successful city-building. Just when you think you have mastered the basics of Standard Goods and adapted to the complexities of Sentient Goods, the game introduces yet another layer: Ascended Goods . Introduced with Chapter 18, “Team Spirit,” these resources represent the third major tier of manufactory-produced goods and open up entirely new gameplay mechanics . This comprehensive guide will explain everything you need to know about Ascended Goods, from unlocking them to mastering the unique trading system they bring with them.

    What Are Ascended Goods?

    Ascended Goods are a new category of resources that become available when you reach Chapter 18. Like Sentient Goods before them, Ascended Goods represent a higher tier of production that builds upon your existing manufactory infrastructure. However, they come with their own unique characteristics, requirements, and trading mechanics that set them apart from anything that came before .

    These goods are essential for progressing through Chapter 18 and remain relevant in subsequent chapters, including Chapters 19 and 20 . While you might question their purpose initially—as some players have discovered they are not strictly required for every technology in Chapter 18—they become increasingly important as you advance further .

    How to Unlock Ascended Goods

    Manufactory Level Requirement

    To begin producing Ascended Goods, you must upgrade your Basic Manufactories (Marble, Steel, or Planks) to at least level 32 . This significant investment ensures that only established cities with developed production infrastructure can access this new tier.

    Once your manufactories reach this threshold, two new production options become available: 3-hour and 9-hour productions specifically for Ascended Goods . Your existing production options for Standard and Sentient Goods remain unchanged, meaning your level 32+ manufactories can produce all three tiers of goods depending on your needs.

    Research Requirements

    Before you can do anything with Ascended Goods, you must research the appropriate technologies in Chapter 18’s Research Tree. The first Ascended Good you can research is the Basic Ascended Goods technology early in the chapter . Additionally, to trade Ascended Goods with other players, you must research the Superior Trader in Chapter 18 .

    Determining Your Boosted Ascended Good

    One of the most important concepts to understand is how your boosted Ascended Good is determined. The game uses a simple but crucial formula: Your boosted Ascended Good will be your current boosted Regular Good +2 .

    Here is how this works in practice:

    • If your boosted Basic Good is Marble, your boosted Ascended Good will be Scholarly Sprouts (which corresponds to Planks)
    • If your boosted Basic Good is Steel, your boosted Ascended Good will be Primordial Minerals (which corresponds to Marble)
    • If your boosted Basic Good is Planks, your boosted Ascended Good will be Ignited Ingots (which corresponds to Steel)

    This cycling system ensures that every player has a boosted Ascended Good that complements rather than duplicates their existing boosted goods. Just like with Standard Goods, your production boost for Ascended Goods depends on the number of relics you have stored for the respective good type .

    The Three Categories of Ascended Goods

    Following the pattern established by Standard and Sentient Goods, Ascended Goods are divided into three categories :

    • Basic Ascended Goods: The first tier, introduced in Chapter 18
    • Refined Ascended Goods: Become available in later chapters
    • Precious Ascended Goods: The highest tier, required for advanced progression

    Each category builds upon the previous one, creating a layered production chain that rewards strategic planning and efficient resource management.

    Production Requirements: Unurium and Standard Goods

    Producing Ascended Goods is not simply a matter of clicking a button. Each production requires two key inputs :

    1. Unurium: A resource introduced in Chapter 17 that continues to be essential. Unurium decays like Mana and Divine Seeds but has far fewer sources of production, making it a limiting factor 
    2. Corresponding Standard Goods: You need Standard Goods from the same manufactory to produce Ascended Goods

    This dual requirement means you cannot simply convert all your production to Ascended Goods. You must balance your Standard Goods production for other needs while allocating enough to fuel your Ascended Goods creation.

    The Merchant System: Trading Ascended Goods

    A New Way to Trade

    Ascended Goods cannot be traded through the standard Trader interface like other resources. Instead, they require a completely new mechanic: the Merchant . This system becomes available after you research the Superior Trader and upgrade your Trader to level 7 .

    How Merchants Work

    When you trade with a Merchant, you receive your requested goods immediately . This instant gratification comes with a catch: while the Merchant is traveling to fulfill your order, your goods are offered to other players through the regular trading system .

    Key features of the Merchant system include:

    • Fair offers only: Merchants will only accept balanced, two-star trades 
    • Fixed amounts: Each Merchant deal involves specific quantities based on your Main Hall level 
    • Limited slots: You can hire up to five Merchants simultaneously 
    • Temporary availability: Merchants are only available for a limited time once hired 

    Strategic Merchant Use

    Experienced players recommend always keeping your Merchants active. As one forum user noted, “Always be trading for goods. Anytime you’re in the game, check for offers and place some if a slot is available” . This constant trading helps maintain balanced stocks of all three Ascended Good types, which is essential because settlement productions frequently require different combinations.

    The cost to hire Merchants increases with each additional slot, requiring significant coins. Some players have reported needing to use Coin Rains and even bring residences out of storage to meet the coin demands .

    How Many Manufactories Do You Need?

    A common question among players entering Chapter 18 is how many manufactories to dedicate to Ascended Goods production. The answer depends on several factors.

    Some players successfully complete Chapter 18 with just one level 32+ manufactory producing their boosted Ascended Good . However, others argue that two manufactories provide a much better experience, allowing you to produce enough boosted goods to trade for the non-boosted varieties you need .

    The limiting factor is Unurium. With limited Unurium production capabilities, you may not be able to keep multiple manufactories running at full capacity. Players with access to Magical Manufacturing spells and Ancient Wonders that boost Unurium production have more flexibility .

    The Settlement Connection: Chapter 18’s Elemental Hubs

    Ascended Goods are not just another resource to stockpile—they are intimately connected to Chapter 18’s settlement mechanics. The Elemental Hubs, which are the core production buildings of this chapter, require Ascended Goods for their construction and operation .

    The settlement introduces four Element Hub variants (Earth, Wind, Fire, and Water), though experienced players have discovered that you can complete the chapter using only three of them (Earth, Wind, and Fire) . The Water Hub is only required for specific quests and can be built temporarily then teleported away .

    Within this system, you produce Elementals in the Hubs, combine them with volunteers (Humans, Elves, or Elvenar) to earn Medals, and use those Medals to qualify for Trials that reward Team Work badges—the key to unlocking technologies .

    Ascended Goods in Later Chapters

    While some players initially questioned whether Ascended Goods were truly necessary, they become increasingly important as you progress beyond Chapter 18 .

    • Chapter 18: Basic Ascended Goods are required to construct Hubs, upgrade the Gate of Dimensions, and produce Elements 
    • Chapter 19: Both Basic and Refined Ascended Goods are needed to construct Breeding Facilities, upgrade the Fortress of Revenge, and produce Black and White Magic and Matter 
    • Chapter 20: All three Ascended Good types (Basic, Refined, and Precious) are required 

    This progression confirms that investing in Ascended Goods production infrastructure is worthwhile for long-term players.

    Comparison with Sentient Goods

    Ascended Goods share many characteristics with Sentient Goods, but there are important differences. Like Sentient Goods, Ascended Goods are subject to decay—they transform back into lower-tier resources over time . However, the specific mechanics and the resources required for production differ.

    The most significant difference is the trading system. While Sentient Goods can be traded through the standard Trader interface, Ascended Goods require the Merchant system, which introduces new strategic considerations .

    Additionally, Sentient Goods require Divine Seeds for production, while Ascended Goods require Unurium . This shift reflects your city’s evolving resource priorities as you advance through the chapters.

    Strategic Tips for Ascended Goods Management

    Prepare Before Entering Chapter 18

    Before you reach Chapter 18, stockpile Unurium and ensure you have enough space for additional manufactories if needed. Level up your Main Hall to increase the quantity of goods you can trade through Merchants .

    Start with One Manufactory

    Begin Chapter 18 with a single level 32+ manufactory producing your boosted Ascended Good. Assess your Unurium income and production needs before committing to a second manufactory .

    Keep Merchants Active

    Always have your Merchant slots filled with active trades. The instant nature of Merchant trades means you never have to wait for someone to accept your offer—you get goods immediately, and other players can choose to help fulfill your order in the background .

    Maintain Balanced Stocks

    Use your Merchants to trade for non-boosted Ascended Goods regularly. Keeping roughly equal amounts of all three types ensures you can always accept whatever Merchant offers become available .

    Save Magical Manufacturing Spells

    If you have Magical Manufacturing spells stockpiled, Chapter 18 is an excellent time to use them. Boosting your Ascended Goods production can dramatically accelerate your progress through the chapter .

    Conclusion

    Ascended Goods represent the next evolution in Elvenar’s resource management systems. While they may seem complex at first, understanding their production requirements, boosted good determination, and unique Merchant trading system is essential for progressing through Chapter 18 and beyond.

    The key takeaways are simple: upgrade your manufactories to level 32, research the Superior Trader, keep your Merchants active, and maintain balanced stocks of all three Ascended Good types. With these strategies in place, you will be well-prepared to master the Team Spirit chapter and continue your city’s ascent through the ranks.

  • Manufactory Tiers in Elvenar: The Complete Production Guide

    Manufactory Tiers in Elvenar: The Complete Production Guide

    In the intricate economy of Elvenar, Manufactories serve as the industrial backbone of every thriving kingdom. These specialized buildings transform raw resources into the nine distinct goods types that fuel technological advancement, negotiation, and trade. Understanding the three-tier manufactory system—Basic, Refined, and Precious goods—along with the advanced Sentient and Ascended tiers that unlock in later chapters, is essential for efficient city development and sustainable resource management

    .

    The Three Basic Tiers: Foundation of Your Economy

    Elvenar’s goods system is organized into three fundamental tiers, each containing three distinct resource types that follow specific production and trading relationships:

    Tier 1 (Basic Goods) consists of Marble, Steel, and Planks. These foundational resources unlock earliest in your technological journey and remain relevant throughout your entire gameplay experience. Basic goods manufactories are the smallest, most space-efficient production facilities, making them ideal for early city layouts when expansion options remain limited

    .

    Tier 2 (Refined Goods) introduces Crystal, Scrolls, and Silk in the middle chapters of your progression. These goods require more complex production chains and larger manufactories, consuming more space and population while delivering higher-value outputs. The jump from Tier 1 to Tier 2 represents your city’s first significant industrial expansion

    .

    Tier 3 (Precious Goods) unlocks Elixir, Magic Dust, and Gems in later chapters. These premium resources demand the largest manufactories with substantial population requirements, but they become crucial for advanced technologies, high-level negotiations, and trading with other players. Precious goods manufactories represent significant city investments that must be carefully planned

    .

    The Boost System: Maximizing Production Efficiency

    The cornerstone of manufactory strategy revolves around boosted goods. When you establish your city, the game randomly assigns one boosted good from each tier—one Basic, one Refined, and one Precious. These boosted goods receive production bonuses based on collected relics, potentially reaching 700% increased output at maximum relic collection

    .

    This boost system fundamentally shapes your manufactory strategy. A player with boosted Planks, Crystal, and Magic Dust should focus exclusively on those three manufactories, using trading to acquire non-boosted goods. Building non-boosted manufactories wastes precious city space and population while delivering fractions of the production efficiency

    .

    The mathematics are stark: a boosted Steel manufactory might produce 3,000 units in three hours, while the same-level unboosted Planks manufactory produces merely 300 units

    . This 10:1 efficiency ratio makes specialization mandatory for competitive play.

    Manufactory Upgrades and Chapter Progression

    As you advance through Elvenar’s 22 chapters, manufactories unlock progressively higher upgrade levels. Each chapter typically introduces new upgrade technologies that improve production efficiency, though the relationship between chapter progression and manufactory efficiency is surprisingly complex

    .

    Early Chapter Efficiency (Chapters 1-5): Manufactories demonstrate consistent efficiency gains with each upgrade. A Level 6 manufactory in Chapter 2 significantly outperforms its Level 1 equivalent, justifying immediate upgrades upon technology unlock. During these formative chapters, building new manufactories and upgrading existing ones both represent sound investments

    .

    The Efficiency Plateau (Chapters 6-15): Community research reveals that manufactories experience efficiency fluctuations during middle chapters. While absolute production increases with each upgrade, the space, population, and culture requirements sometimes grow faster than output gains. Analysis suggests that manufactories occasionally reach “sweet spots” where delaying one chapter’s upgrade until supporting infrastructure (residences, culture buildings) improves can optimize overall city efficiency

    .

    Late Chapter Transformation (Chapters 16+): Advanced chapters introduce fundamental manufactory evolution. Chapter XII unlocks Sentient Goods—advanced versions of basic goods produced by manufactories upgraded to level 24 or higher. These Moonstone, Platinum, and Elven Tree Gum variants feature unique decay mechanics (10% daily conversion back to basic goods) and become essential for late-game technologies

    .

    Chapter XVIII introduces Ascended Manufactories, representing the pinnacle of goods production. These facilities produce Ascended Goods through entirely new mechanics, requiring dedicated research and substantial investment

    .

    Sentient Goods: The Tier 4 Evolution

    Starting from Chapter XII – The Elementals, your manufactories undergo their most significant transformation. Once upgraded to level 24 and beyond, manufactories gain the ability to produce Sentient Goods through modified production options

    .

    The production shift works as follows: 1-day and 2-day production options for regular goods are replaced with Sentient Goods production, while 3-hour and 9-hour options for standard goods remain available. This creates strategic flexibility—players can maintain standard goods production for trading and quests while dedicending longer cycles to Sentient accumulation

    .

    Sentient Goods follow a fixed transformation pattern based on your original boosted good:

    • MarbleMoonstone (boosted if your Basic boost is Planks)
    • SteelPlatinum (boosted if your Basic boost is Marble)
    • PlanksElven Tree Gum (boosted if your Basic boost is Steel)

    The decay mechanic adds management complexity: stored Sentient Goods lose 10% daily, converting 1:1 into their basic counterparts. This means 1,000 Moonstone becomes 900 Moonstone plus 100 Marble overnight. Unlike Mana or Seeds, Sentient Goods don’t vanish entirely, but efficient players develop consumption rhythms that minimize decay losses

    .

    Production Optimization Strategies

    Efficient manufactory management requires balancing multiple variables:

    Time Optimization: Manufactories offer four production durations—3 hours, 9 hours, 1 day, and 2 days (standard goods) or Sentient equivalents. The 3-hour option provides maximum efficiency for active players who can collect and restart frequently. Overnight or extended absences suit longer durations, though at reduced efficiency

    .

    Batch Production: The circle selection tool enables synchronized production across identical manufactories. However, manufactories only batch with others at the same upgrade level and star rating. This creates upgrade synchronization pressure—if you have six Planks manufactories at levels 4, 5, and 6, you must issue production commands separately for each pair, increasing micromanagement

    .

    Spell Enhancement: Magical Manufacturing spells boost manufactory output for 13 hours. Strategic timing maximizes returns—casting before collecting ready production applies the bonus retroactively, while casting before initiating new cycles ensures enhanced yields. Active players can achieve four 3-hour boosted cycles within a single spell duration

    .

    Space and Efficiency Mathematics

    Veteran players debate manufactory efficiency using sophisticated calculations that account for total city impact. A manufactory’s true “cost” includes not just its footprint, but supporting roads, required population (from residences), and necessary culture buildings

    .

    Analysis reveals that higher-level manufactories generally improve efficiency when supported by modern infrastructure. A Level 31 manufactory requires fewer total tiles (including supporting buildings) than multiple lower-level equivalents producing the same output. However, this efficiency assumes access to high-efficiency population sources (Magic Residences) and culture buildings (event structures)

    .

    The breakpoint varies by chapter and available support buildings. Players relying on standard residences and basic culture structures may find that manufactories from 1-2 chapters prior deliver optimal efficiency, while those with premium buildings benefit from immediate maximum upgrades

    .

    Trading and Economic Integration

    Manufactories don’t exist in isolation—they feed into Elvenar’s vibrant trading economy. The Trader building enables goods exchange with other players and the wholesaler, with upgrade levels unlocking new capabilities. Level 3 Trader unlocks Sentient Goods trading, essential for Chapter XII+ progression

    .

    Effective trading strategies leverage your boosted goods production to acquire non-boosted needs. A boosted Planks producer might trade surplus production for Marble and Steel, eliminating the need for inefficient unboosted manufactories. This specialization principle extends through all tiers—focus production on your three boosted goods, trade for everything else

    .

    Cross-tier trading follows established ratios (historically 1:4:16 for Tier 1:2:3), though these evolve with game updates. Understanding these ratios prevents unfavorable trades and maximizes the value of your boosted production

    .

    Common Manufactory Mistakes

    New players frequently undermine their economic potential through preventable errors:

    Building All Nine Manufactories: The impulse to produce every good type domestically wastes massive city space. With three boosted goods and active trading, six manufactories become unnecessary luxuries rather than necessities

    .

    Ignoring Upgrade Efficiency: Failing to research manufactory upgrades stalls production potential. Each chapter’s upgrade technology typically pays for itself through increased output, particularly when combined with improved supporting infrastructure.

    Neglecting Sentient Transition: Reaching Chapter XII without preparing level 24+ manufactories creates production bottlenecks. The shift to Sentient Goods production requires proactive upgrading well before the chapter unlock

    .

    Overlooking Decay Management: Sentient Goods’ 10% daily decay punishes hoarding. Efficient players maintain lean inventories, consuming Sentient Goods in technologies or trading them before decay accumulates

    .

    Conclusion

    Elvenar’s manufactory tier system provides a sophisticated economic progression that rewards strategic planning and specialization. From the humble Basic goods of early chapters through the transformative Sentient Goods of Elementals and the ultimate Ascended Goods of late-game chapters, your production infrastructure must evolve with your kingdom’s needs.

    The boost system creates clear optimization paths—identify your three boosted goods, maximize their production, and trade for everything else. Upgrade timing requires balancing absolute production gains against supporting infrastructure costs, with efficiency calculations guiding optimal decisions.

    Mastering manufactory tiers transforms resource scarcity into abundance, enabling rapid technological advancement, generous fellowship contributions, and tournament dominance. In Elvenar’s magical economy, efficient production isn’t just about having resources—it’s about having the right resources, at the right time, in the right quantities.

  • Phoenix Artifacts in Elvenar: The Ultimate Guide to Evolving Firebird Power

    Phoenix Artifacts in Elvenar: The Ultimate Guide to Evolving Firebird Power

    Introduction to Phoenix Artifacts

    Phoenix Artifacts represent some of the most powerful and coveted items in Elvenar, serving as the essential components that unlock, evolve, and maximize the potential of the legendary Phoenix buildings—creatures of fire and rebirth that provide transformative benefits to any city fortunate enough to host them

    . These artifacts embody the pinnacle of event reward systems in InnoGames’ fantasy city-builder, representing both the culmination of dedicated event participation and the gateway to endgame capabilities that distinguish exceptional cities from merely adequate ones.

    The Phoenix system in Elvenar introduces a unique evolution mechanic where buildings progress through multiple stages of power, each requiring specific artifacts to unlock enhanced capabilities

    . Unlike standard buildings that provide fixed benefits, evolved Phoenix structures scale dramatically with investment, creating compounding returns that reward intensive artifact collection and strategic deployment. Understanding how to acquire, utilize, and optimize Phoenix Artifacts is therefore essential for any player seeking to maximize their city’s potential and compete at the highest levels of Elvenar gameplay.

    This comprehensive guide explores every aspect of Phoenix Artifacts in Elvenar, from their acquisition methods and evolution mechanics to strategic deployment and optimization approaches that extract maximum value from these rare and powerful resources. Whether you are encountering your first Phoenix event or seeking to complete your collection of evolved firebirds, this analysis provides the knowledge necessary to master one of Elvenar’s most dynamic and rewarding systems.

    The Phoenix Building System

    Types of Phoenix Buildings

    Elvenar features multiple Phoenix buildings, each with distinct aesthetic designs and functional benefits that cater to different city strategies and player preferences

    .

    Fire Phoenix: The original and most iconic Phoenix, the Fire Phoenix typically provides military benefits—boosting troop attack power, reducing training time, or enhancing combat effectiveness in various ways. This Phoenix suits military-focused cities and players prioritizing tournament performance or aggressive expansion

    .

    Storm Phoenix: The Storm Phoenix generally offers goods production benefits—boosting manufactory output, reducing production costs, or providing bonus goods generation. This Phoenix appeals to economically-focused cities and players emphasizing trade, catering strategies, or goods-intensive development

    .

    Aureate Phoenix: The Aureate Phoenix typically provides coin and supply generation bonuses, directly boosting the fundamental economic resources that fuel all city activities. This Phoenix benefits all city types but particularly supports rapid development and extensive construction or training programs.

    Other Phoenix Variants: Elvenar periodically introduces additional Phoenix variants with unique benefit profiles—perhaps culture-focused Phoenixes, population-enhancing versions, or specialized variants for specific gameplay aspects. Each new Phoenix expands the strategic options available to artifact collectors.

    Evolution Mechanics and Stages

    The Phoenix system employs a sophisticated evolution mechanic where buildings progress through multiple power tiers, with each stage requiring Phoenix Artifacts to unlock

    .

    Base Stage (Stage 1): Initial Phoenix buildings provide modest benefits appropriate to their type. Even at base stage, Phoenix buildings offer valuable advantages, but their true potential remains locked until evolution begins.

    Evolution Stages (Stages 2-10): Each evolution stage requires Phoenix Artifacts and provides substantial benefit increases. Higher stages offer dramatically enhanced capabilities—perhaps doubling or tripling the bonuses of base stages. The evolution curve is typically non-linear, with later stages providing disproportionately large gains.

    Maximum Evolution (Stage 10): Fully evolved Phoenix buildings represent peak power, providing benefits that can transform city performance in their specialized areas. Achieving maximum evolution requires extensive artifact collection across multiple events and represents a long-term achievement goal.

    Set Bonuses and Synergies: Some Phoenix systems include set bonuses where multiple evolved Phoenixes provide additional benefits beyond their individual contributions, creating incentive for collecting and evolving complete sets.

    Acquiring Phoenix Artifacts

    Event-Based Acquisition

    The primary source of Phoenix Artifacts is special events, particularly the Phoenix-themed events that recur periodically throughout the Elvenar calendar

    .

    Phoenix Event Quests: During Phoenix events, completing event quests awards Phoenix Artifacts as primary rewards. These quests typically follow progressive difficulty curves, with later quests demanding more substantial efforts but offering greater artifact rewards.

    Event Currency Exchange: Phoenix events feature special currency systems where accumulated event currency can be exchanged for Phoenix Artifacts in event shops. Strategic currency management—prioritizing artifacts over other rewards—maximizes artifact acquisition.

    Grand Prize Tracks: Phoenix event grand prizes often include substantial artifact packages, with top-tier rewards providing enough artifacts for multiple evolution stages. Pushing for grand prize completion during Phoenix events accelerates evolution progress dramatically.

    Daily Rewards and Milestones: Phoenix events typically include daily login rewards, milestone achievements, and participation bonuses that provide steady artifact accumulation throughout the event duration.

    Alternative Acquisition Methods

    Beyond primary events, Phoenix Artifacts can be acquired through various secondary methods that supplement event-based collection

    .

    Fellowship Adventure Rewards: Some Fellowship Adventures include Phoenix Artifacts in their reward structures, particularly those occurring near Phoenix event periods or featuring fire/rebirth themes.

    Tournament and Weekly Challenge Rewards: Exceptional tournament performance or weekly challenge completion occasionally offers Phoenix Artifacts as premium rewards, though these are typically rare and limited.

    In-Game Shop Purchases: Phoenix Artifacts may be available for direct purchase using premium currency (Diamonds) during events or special promotions. This provides a pay-to-accelerate option for players seeking rapid evolution.

    Special Promotions and Bundles: InnoGames occasionally offers Phoenix Artifact packages through special promotions, anniversary celebrations, or limited-time bundles that provide acquisition opportunities outside standard events.

    Artifact Rarity and Value

    Phoenix Artifacts represent high-value resources that should be managed carefully due to their scarcity and transformative potential

    .

    Limited Availability: Unlike standard resources, Phoenix Artifacts cannot be produced through normal city operations or acquired through regular gameplay. Their event-limited availability makes each artifact precious and irreplaceable.

    Evolution Investment Requirements: Evolving Phoenix buildings to maximum stages requires substantial artifact quantities—often dozens or hundreds of artifacts per Phoenix. This high investment requirement makes strategic artifact allocation crucial.

    Opportunity Cost Considerations: Every artifact spent on one Phoenix cannot be spent on another. Players must evaluate which Phoenix type provides greatest benefit for their specific city strategy and prioritize accordingly.

    Strategic Artifact Management

    Phoenix Selection and Prioritization

    With multiple Phoenix types available and limited artifact supplies, strategic selection determines optimization outcomes

    .

    City Strategy Alignment: Select Phoenix types that align with your city development focus. Military cities should prioritize Fire Phoenix evolution; economic cities should emphasize Storm or Aureate Phoenixes; balanced cities might distribute artifacts across multiple types.

    Current Development Phase: Prioritize Phoenixes that address immediate development needs. Early-game cities might benefit most from Aureate Phoenix economic boosts; late-game cities might prefer Fire Phoenix military enhancements for tournament dominance.

    Fellowship and Social Considerations: Consider fellowship needs when selecting Phoenix priorities. If your fellowship lacks military power, Fire Phoenix development provides collective benefit; if goods trading is fellowship focus, Storm Phoenixes enhance economic contribution.

    Long-Term Collection Planning: Plan artifact distribution across multiple events and years. Completing one Phoenix to maximum evolution before starting another may provide concentrated benefits, while distributed evolution across multiple Phoenixes offers flexibility.

    Evolution Timing and Sequencing

    Strategic timing of Phoenix evolution maximizes artifact value and city development impact

    .

    Immediate vs. Delayed Evolution: Some players evolve Phoenixes immediately upon acquiring artifacts, enjoying incremental benefits throughout their collection journey. Others hoard artifacts until they can complete multiple evolution stages simultaneously, maximizing visual impact and benefit thresholds.

    Event Coordination: Time major evolution stages to coincide with periods where enhanced Phoenix benefits provide maximum value—before tournaments for Fire Phoenixes, before intensive construction for Aureate Phoenixes, or before goods-intensive activities for Storm Phoenixes.

    Set Completion Timing: If pursuing Phoenix set bonuses, plan evolution timing to complete multiple Phoenixes near simultaneously, unlocking set bonuses that provide additional value beyond individual building benefits.

    Artifact Conservation and Spending

    Managing artifact scarcity requires disciplined conservation and strategic spending

    .

    Emergency Reserves: Maintain artifact reserves for unexpected opportunities—perhaps sudden Phoenix events, evolution discounts, or new Phoenix variants that match your strategy better than current options.

    Evolution Efficiency: Some events or periods may offer evolution efficiency bonuses—reduced artifact costs for evolution or bonus benefits from evolution stages. Timing major evolution investments to coincide with these efficiencies maximizes artifact value.

    Abandonment and Refund Considerations: While typically permanent, some Phoenix systems allow evolution reset or building relocation with partial refunds. Understanding these mechanics provides flexibility if strategic priorities change.

    Phoenix Deployment and City Integration

    Placement Optimization

    Phoenix building placement affects their value extraction and city aesthetics

    .

    Culture Bonus Maximization: Like all buildings, Phoenixes benefit from culture bonuses that enhance their output. Placing Phoenixes in high-culture areas maximizes their effective benefits.

    Road Connectivity: Phoenixes require road connections to function. Efficient road placement minimizes space usage while ensuring adequate culture coverage and accessibility.

    City Aesthetics and Theming: Phoenix buildings feature distinctive fiery aesthetics that can dominate city visual design. Some players design entire city themes around their Phoenixes, creating visually striking fire-themed districts.

    Space Efficiency: Evolved Phoenixes typically occupy substantial space. City planning must accommodate Phoenix placement without sacrificing essential infrastructure or creating inefficient layouts.

    Benefit Extraction and Utilization

    Maximizing Phoenix benefits requires active utilization of their enhanced capabilities

    .

    Fire Phoenix Military Optimization: Cities with evolved Fire Phoenixes should leverage enhanced military capabilities through aggressive tournament participation, province conquest, and combat-focused event engagement that extracts value from attack bonuses and training efficiencies.

    Storm Phoenix Production Scheduling: Storm Phoenix benefits should inform goods production scheduling—running intensive manufacturing cycles during peak bonus periods, optimizing trade timing around enhanced output, and coordinating with fellowship goods strategies.

    Aureate Phoenix Economic Acceleration: Aureate Phoenix coin and supply bonuses enable rapid development cycles, extensive construction programs, and accelerated training that compounds over time through faster city advancement.

    Synergy with Other Systems

    Phoenix buildings interact with various Elvenar systems, creating optimization opportunities through synergy

    .

    Ancient Wonder Combinations: Phoenix benefits often stack multiplicatively with Ancient Wonder effects. Fire Phoenix military bonuses combined with Martial Monastery health boosts create exceptionally powerful armies; Storm Phoenix production bonuses alongside goods-enhancing wonders create industrial powerhouses.

    Event Building Integration: Phoenixes integrate with event building strategies, with some event buildings providing culture, population, or other supports that enhance Phoenix placement and effectiveness.

    Fellowship Coordination: Multiple fellowship members with complementary Phoenix types can coordinate strategies—Fire Phoenix members handling military challenges while Storm Phoenix members provide goods support, creating collective capabilities exceeding individual contributions.

    Long-Term Phoenix Strategy

    Multi-Year Collection Planning

    Phoenix evolution represents a multi-year journey for most players, requiring long-term strategic planning

    .

    Annual Event Participation: Plan consistent participation in Phoenix events across years, recognizing that maximum evolution requires artifact accumulation beyond single-event availability.

    Artifact Target Setting: Establish annual artifact collection targets based on evolution goals. If evolving a Fire Phoenix to Stage 10 requires 100 artifacts and events provide 20 artifacts annually, plan five-year collection timelines with contingency for variation.

    Priority Stability vs. Adaptation: Maintain stable Phoenix priorities to ensure concentrated evolution progress, but remain adaptable if game changes, new Phoenix types, or strategy shifts warrant reallocation.

    Competitive and Ranking Considerations

    Phoenix buildings significantly impact competitive Elvenar aspects including rankings and fellowship performance

    .

    Tournament Competitiveness: Evolved Fire Phoenixes provide substantial tournament advantages through military enhancement. Competitive tournament players prioritize Fire Phoenix evolution for ranking performance.

    Fellowship Recruitment Value: Cities with advanced Phoenixes are more attractive to competitive fellowships seeking members with established capabilities. Phoenix evolution represents investment in social capital and fellowship opportunities.

    Server Standing and Prestige: Maximum-evolution Phoenixes signal dedication and capability, contributing to server standing and player reputation within the Elvenar community.

    Future-Proofing and Adaptation

    Elvenar’s ongoing development requires Phoenix strategies that adapt to game changes

    .

    New Phoenix Type Preparation: Maintain artifact reserves for new Phoenix variants that may match emerging strategies better than existing options. Game updates may introduce Phoenix types for previously unsupported gameplay aspects.

    Mechanic Change Adaptation: Phoenix evolution mechanics, benefit structures, or acquisition methods may change through game updates. Flexible artifact management allows adaptation to new systems without stranded investments.

    Meta-Game Evolution: As Elvenar’s competitive meta evolves, optimal Phoenix priorities may shift. Regular reassessment of Phoenix value against current game conditions ensures continued optimization.

    Common Phoenix Artifact Mistakes

    Impulsive Spending and Poor Prioritization

    The most common Phoenix artifact mistake involves impulsive spending without strategic consideration

    .

    Scattered Evolution: Spreading artifacts across multiple Phoenix types without completing any to high stages creates collections of weak Phoenixes rather than powerful specialized tools. Concentrated evolution typically outperforms scattered investment.

    Mismatch with Strategy: Evolving Phoenixes that don’t align with actual gameplay strategy—Fire Phoenixes for purely economic players, Storm Phoenixes for military-focused cities—wastes artifact potential on unused benefits.

    Aesthetic Over Function: Choosing Phoenixes based on visual preference rather than functional benefit may satisfy aesthetic desires but sacrifices optimization for players seeking competitive performance.

    Acquisition Failures

    Missing artifact acquisition opportunities represents permanent lost potential

    .

    Event Participation Gaps: Missing Phoenix events due to inactivity, poor planning, or real-life constraints creates artifact deficits that delay evolution progress by months or years until events recur.

    Quest Inefficiency: Incomplete event quest lines leave artifacts unclaimed. Thorough event participation maximizes artifact acquisition and evolution speed.

    Currency Misallocation: Spending event currency on inferior rewards rather than Phoenix Artifacts during Phoenix events represents opportunity cost that delays evolution progress.

    Deployment and Utilization Errors

    Even well-acquired Phoenixes underperform with poor deployment

    .

    Suboptimal Placement: Poor Phoenix placement that misses culture bonuses or creates inefficient city layouts reduces effective benefits and wastes potential.

    Underutilization: Failing to leverage Phoenix capabilities—neglecting military advantages from Fire Phoenixes, ignoring production scheduling with Storm Phoenixes—wastes artifact investment through disuse.

    Isolation from Synergies: Deploying Phoenixes without considering synergies with Ancient Wonders, event buildings, or fellowship strategies leaves compounding benefits unrealized.

    Conclusion

    Phoenix Artifacts in Elvenar represent the pinnacle of event reward systems, providing access to evolving buildings that can transform city capabilities and distinguish exceptional players from casual participants

    . The journey from acquiring first artifacts to completing maximum-evolution Phoenixes spans multiple events and years, creating long-term goals that sustain engagement and reward dedication.

    Success with Phoenix Artifacts requires strategic prioritization aligned with city development goals, patient collection across numerous events, and thoughtful deployment that maximizes synergy with other game systems . The decision of which Phoenix to evolve, when to invest artifacts, and how to integrate Phoenix benefits into broader city strategy shapes performance as fundamentally as any other Elvenar development choice.

    For new players encountering their first Phoenix event, the advice is simple: participate fully, prioritize artifact acquisition, and begin the long journey of evolution with clear strategic direction. For veterans managing established Phoenix collections, optimization focuses on completing maximum evolution, exploring set synergies, and adapting to new Phoenix variants that expand strategic possibilities.